crystals guide chart

Crystals Guide Chart: A Comprehensive Overview (Updated April 21, 2026)

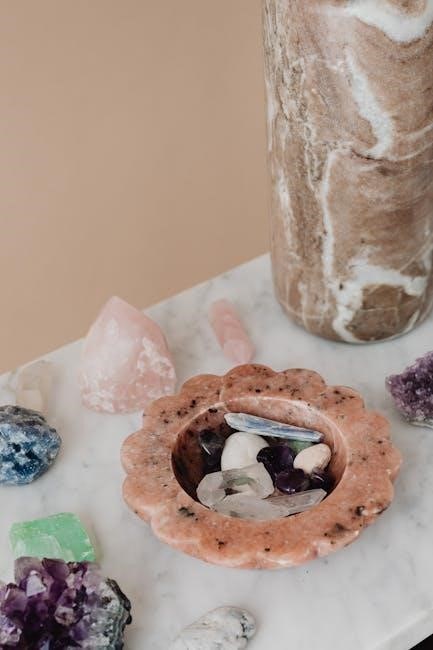
Delve into the captivating world of crystals, formed over centuries, blending spiritual significance with modern style; each gemstone possesses unique, inherent properties․

Crystal healing is an ancient practice rooted in the belief that crystals possess inherent energetic vibrations capable of positively influencing our well-being․ For millennia, cultures worldwide have utilized these beautiful stones for physical, emotional, and spiritual support․ This practice isn’t about quick fixes, but rather about facilitating a harmonious connection between your energy field and the Earth’s natural energies․

Crystals aren’t merely aesthetically pleasing; they’re thought to act as conduits for energy, amplifying intentions, clearing blockages, and promoting balance․ Each crystal boasts a unique vibrational frequency, corresponding to different healing properties․ Whether you’re seeking to alleviate stress, enhance creativity, or deepen your spiritual practice, there’s a crystal to support your journey․ This guide will explore the fascinating world of crystals, offering insights into their formation, properties, and practical applications for a more balanced and fulfilling life․

What are Crystals and How are They Formed?

Crystals are naturally occurring, solid materials whose atoms, molecules, or ions are arranged in a highly ordered, repeating pattern – extending in all three spatial dimensions․ This unique atomic structure is what gives crystals their distinct shapes and properties․ Their formation is a remarkably slow process, often taking centuries, occurring deep within the Earth’s crust under specific conditions of heat, pressure, and time․

Most crystals form from molten rock (magma or lava) as it cools and solidifies, or from solutions as minerals precipitate out․ The rate of cooling and the chemical composition of the environment significantly influence the size and quality of the crystals․ Different elements and minerals combine to create the vast array of crystal types we see today, each with its own unique chemical formula and crystalline structure․ These geological processes result in the beautiful gemstones we admire and utilize․

The Science Behind Crystal Properties

The remarkable properties of crystals aren’t solely based on metaphysical beliefs; they are deeply rooted in scientific principles․ The ordered atomic structure dictates how crystals interact with energy, including light and vibrations․ Phenomena like piezoelectricity – the ability to generate an electrical charge under mechanical stress – and pyroelectricity – generating charge with temperature changes – demonstrate these interactions․

Furthermore, the chemical composition and trace elements within a crystal influence its color, hardness, and other physical characteristics․ Crystals can also exhibit unique optical properties, such as birefringence (double refraction) and dichroism (varying color depending on viewing angle)․ While the exact mechanisms behind perceived energetic effects are still under scientific investigation, the consistent and predictable physical properties of crystals are well-established and measurable, contributing to their diverse applications․

Understanding Crystal Structures & Systems

Crystals aren’t randomly assembled; they exhibit highly ordered, repeating arrangements of atoms, ions, or molecules․ This internal order defines a crystal’s structure and belongs to one of seven crystal systems: cubic, tetragonal, orthorhombic, hexagonal, trigonal, monoclinic, and triclinic․ Each system dictates the symmetry and angles of the crystal’s axes․

These systems influence a crystal’s physical properties, like cleavage planes (how it breaks) and hardness․ Understanding these structures helps identify crystals and predict their behavior․ For example, cubic crystals, like pyrite, exhibit high symmetry and isotropic properties (same properties in all directions), while monoclinic crystals, like orthoclase, have lower symmetry and anisotropic properties․ The arrangement directly impacts how energy flows through the crystal, influencing its perceived effects․

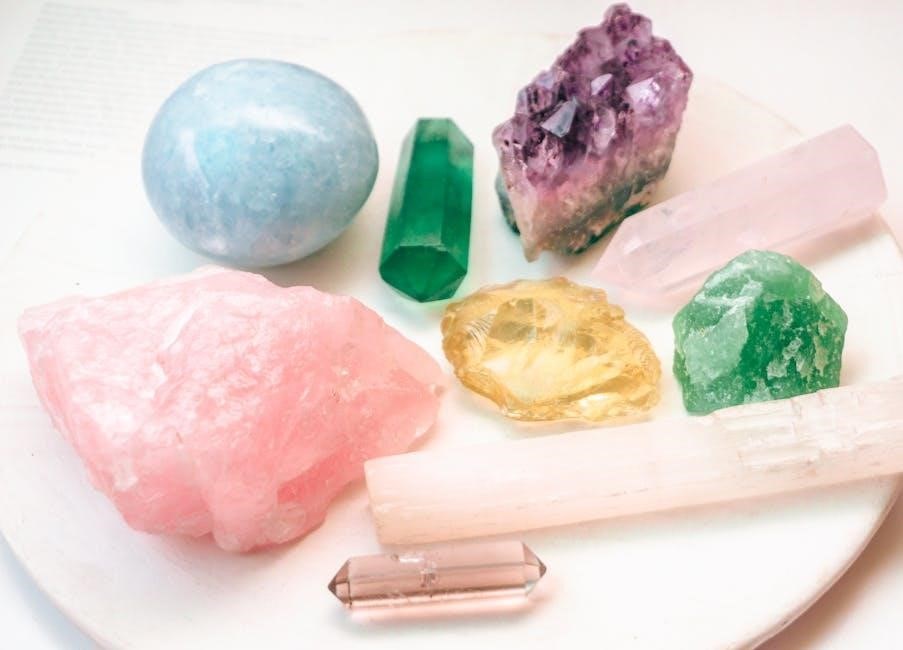
Common Crystals and Their Meanings

Explore a diverse array of popular crystals, each celebrated for its distinct energetic properties and symbolic associations, offering unique benefits to users․

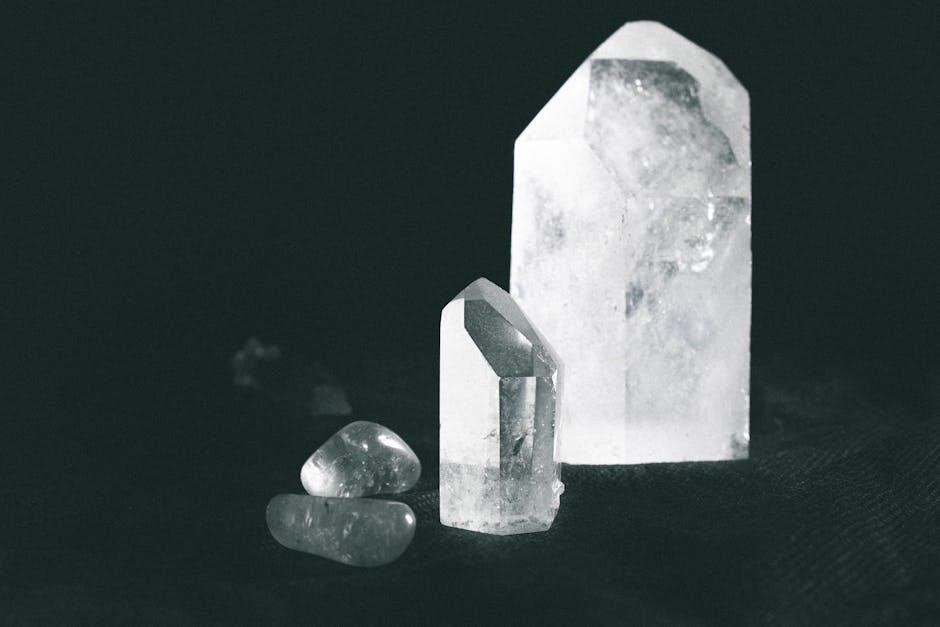
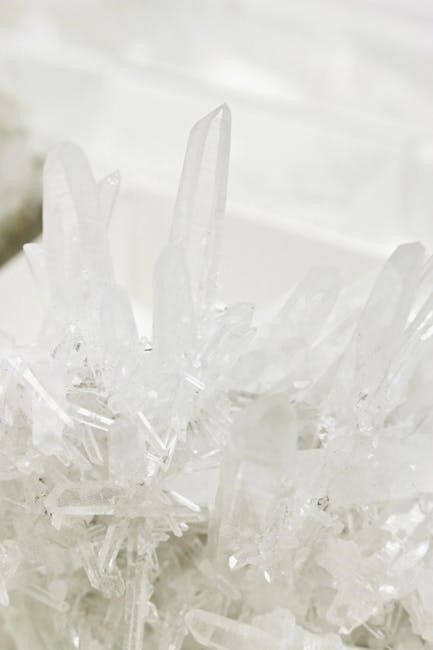
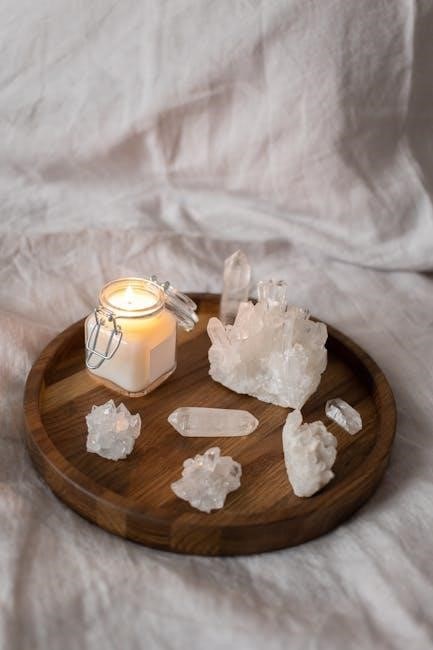
Clear Quartz: The Master Healer

Clear Quartz, often dubbed the “Master Healer,” stands as a remarkably versatile and powerful crystal within the healing realm․ Its exceptional ability to amplify energy and thought makes it a cornerstone for various spiritual practices and metaphysical applications․ This transparent stone is believed to clear negativity, enhance clarity, and promote overall well-being․

Beyond its healing properties, Clear Quartz is prized for its capacity to enhance psychic abilities and connect individuals to higher realms of consciousness․ It serves as an excellent tool for meditation, manifestation, and energy work, effectively amplifying the intentions set within its crystalline structure․ Many practitioners utilize Clear Quartz to cleanse other crystals, restoring their energetic vibrancy․

Its pure and brilliant appearance symbolizes purity and light, making it a popular choice for jewelry and decorative purposes․ Whether used for healing, spiritual growth, or aesthetic appeal, Clear Quartz remains a timeless and invaluable crystal for all seeking positive transformation․

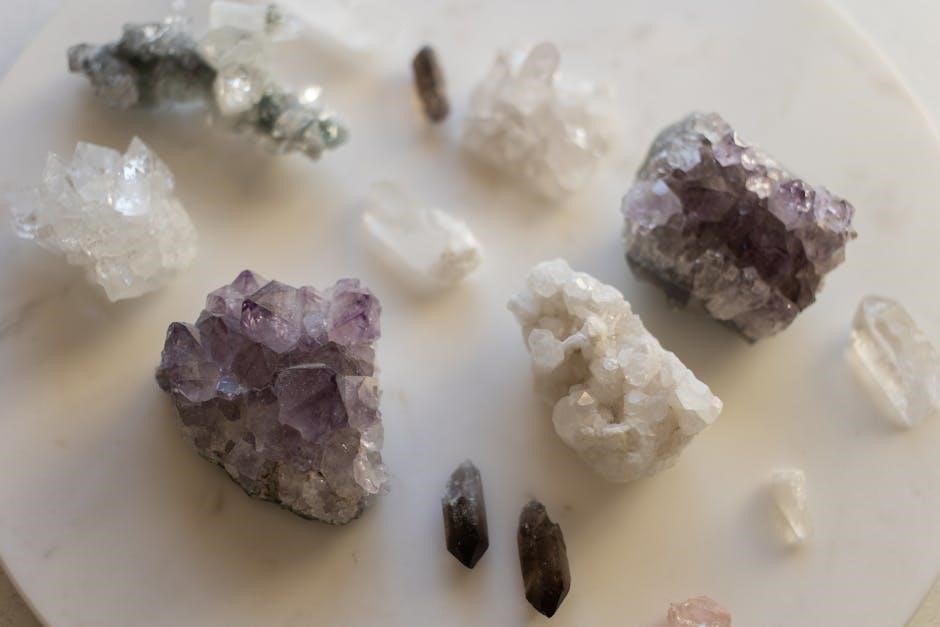
Amethyst: Spirituality and Intuition

Amethyst, with its captivating violet hues, is deeply revered for its potent spiritual properties and ability to enhance intuition․ This majestic crystal is believed to open the third eye chakra, fostering deeper self-awareness and connection to the divine․ Throughout history, Amethyst has been associated with royalty and spiritual enlightenment, symbolizing peace, tranquility, and protection․

Beyond its aesthetic beauty, Amethyst is renowned for its calming effects on the mind and emotions․ It’s often used to alleviate stress, anxiety, and insomnia, promoting restful sleep and emotional balance․ Practitioners utilize Amethyst during meditation to deepen their practice and access higher states of consciousness․

Amethyst is also thought to transmute lower vibrations into higher frequencies, creating a protective shield against negative energies․ Whether worn as jewelry or placed within a sacred space, Amethyst serves as a powerful ally on the path to spiritual growth and inner peace․

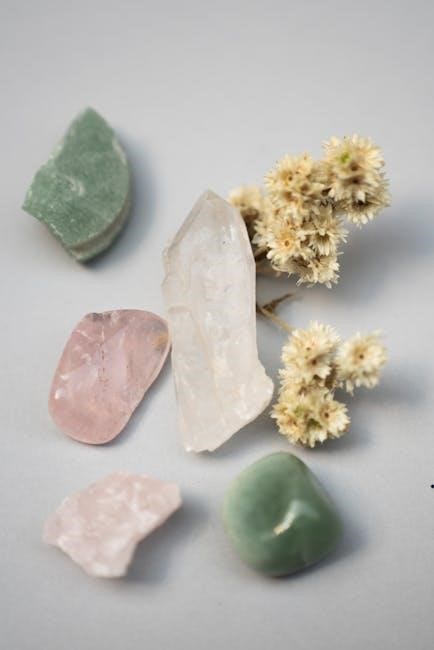
Rose Quartz: Love and Emotional Healing

Rose Quartz, radiating gentle pink energy, is universally recognized as the stone of unconditional love․ It opens the heart chakra, fostering self-love, compassion, and harmonious relationships․ This beautiful crystal encourages forgiveness, emotional healing, and a deeper connection with oneself and others․

Rose Quartz isn’t limited to romantic love; it extends to familial bonds, friendships, and self-acceptance․ It gently dissolves emotional wounds, traumas, and blockages, replacing them with feelings of peace and tranquility․ Many find comfort in holding Rose Quartz during times of grief or heartbreak, allowing its soothing energy to ease the pain․

Utilizing Rose Quartz can manifest loving energy into all aspects of life․ Placing it in your bedroom promotes peaceful sleep and loving dreams, while carrying it throughout the day attracts positive relationships and enhances emotional well-being․

Citrine: Abundance and Manifestation

Citrine, often called the “Merchant’s Stone,” is a vibrant yellow crystal renowned for attracting wealth, prosperity, and success․ It doesn’t just draw abundance; it helps you maintain it, fostering a positive mindset focused on growth and opportunity․ This joyful stone is believed to energize and uplift, dispelling negativity and promoting optimism․

Beyond financial gain, Citrine enhances creativity, confidence, and personal power․ It’s a fantastic crystal for entrepreneurs, artists, and anyone pursuing ambitious goals․ Citrine encourages taking action and stepping outside of one’s comfort zone, empowering you to manifest your desires․

Unlike many crystals, Citrine doesn’t require cleansing as often, as it doesn’t hold negative energy․ Placing it in your workspace or carrying it as a talisman can amplify your intentions and attract positive outcomes;

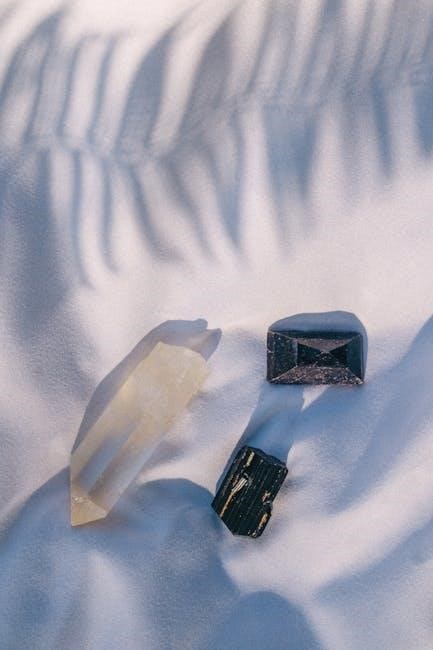
Black Tourmaline: Protection and Grounding

Black Tourmaline is a powerful grounding stone, highly valued for its protective qualities․ It acts like a shield, absorbing and transmuting negative energy, making it an excellent crystal to keep in your home or carry with you․ This stone is particularly beneficial for empaths or those sensitive to energetic influences․

Beyond protection, Black Tourmaline promotes a sense of security and stability․ It helps to dispel fear, anxiety, and self-doubt, fostering a feeling of inner strength and resilience․ This crystal is deeply connected to the Earth, grounding you and connecting you to its vital energy․

Regular cleansing of Black Tourmaline is essential, as it absorbs negativity․ Smudging with sage or placing it under running water can restore its protective properties․

Selenite: Cleansing and Purification

Selenite is renowned for its incredibly high vibrational energy and powerful cleansing properties․ Often called “liquid light,” this crystal doesn’t need cleansing itself, but actively cleanses other crystals and spaces․ Placing other stones on or near Selenite will clear their energy, removing blockages and restoring their natural vibrations․

Beyond crystal cleansing, Selenite promotes clarity of mind and spiritual connection․ It facilitates access to higher realms, aiding in meditation and angelic communication․ This gentle yet potent stone dissolves negative energy, creating a peaceful and harmonious environment․

Selenite is fragile and should be handled with care, avoiding prolonged exposure to water as it can dissolve․

Using Crystals: A Practical Guide

Unlock the potential of your crystals through mindful practices like cleansing, charging, and programming, enhancing their energy for personal well-being and intention setting․

Crystal Cleansing Methods

Maintaining the purity of your crystals is crucial for optimal energy flow and effectiveness․ Over time, crystals can absorb ambient energies, diminishing their inherent vibrations․ Several methods exist for cleansing, each suited to different crystal types and personal preferences․

Smudging with sage or palo santo is a popular technique, allowing the smoke to gently cleanse the crystal’s aura․ Alternatively, immerse your crystals in saltwater (ensure the crystal is water-safe!) for a few hours, visualizing negative energies dissolving․ Moonlight cleansing, particularly during a full moon, offers a gentle yet powerful purification․

Sound healing, using singing bowls or tuning forks, can also break up stagnant energy․ Finally, simply visualizing a bright white light surrounding and cleansing the crystal is a potent method․ Remember to research specific crystal sensitivities before employing any cleansing technique, and always handle your crystals with respect and intention․

Charging Your Crystals

After cleansing, it’s vital to recharge your crystals, replenishing their energy and amplifying their natural properties․ Think of it as revitalizing their inherent power, preparing them for focused intention work or everyday use․ Several methods effectively restore a crystal’s vibrancy․

Sunlight charging, while potent, should be approached cautiously, as prolonged exposure can fade certain crystals․ Moonlight, especially during a full moon, provides a gentler, yet equally effective charge․ Placing crystals on a selenite charging plate is another excellent option, as selenite naturally cleanses and charges other stones․

Earth burial – briefly burying crystals in soil – reconnects them with grounding energies․ Visualizing a bright, golden light infusing the crystal with energy is a powerful technique, regardless of other methods used․ Regular charging, ideally after each cleansing, ensures your crystals remain potent tools for healing and manifestation․

Programming Crystals for Intentions

Programming crystals involves imbuing them with a specific intention, directing their energy towards a desired outcome․ This process transforms a crystal from a beautiful object into a powerful tool for manifestation and personal growth․ Begin by holding the cleansed and charged crystal, closing your eyes, and focusing intently on your desired outcome․

Visualize this outcome vividly, feeling the emotions associated with its realization․ Clearly articulate your intention, speaking it aloud or silently directing it towards the crystal․ For example, “I program this rose quartz to attract loving and harmonious relationships․”

Maintain this focused energy for several minutes, allowing the crystal to absorb your intention․ Some practitioners visualize a beam of light connecting their heart to the crystal․ Trust that the crystal has received your programming, and continue to work with it regularly to reinforce the intention․

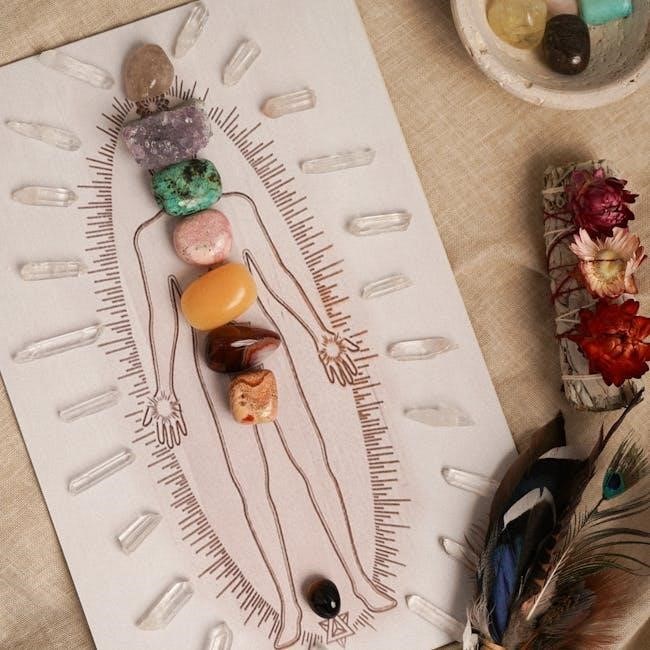
Wearing Crystals: Jewelry and Placement

Integrating crystals into your daily life is beautifully achieved through jewelry or strategic placement on the body․ Wearing crystals allows their energy to resonate with your aura throughout the day, offering continuous support for your intentions․ Pendants position crystals close to the heart chakra, promoting emotional healing and love;

Bracelets and rings maintain contact with the skin, facilitating energy flow․ Consider the crystal’s properties when choosing jewelry; amethyst for calming, citrine for abundance, or black tourmaline for protection․ Beyond jewelry, placing crystals on specific body points can amplify their effects․

For example, placing amethyst on the third eye can enhance intuition, while rose quartz on the chest opens the heart chakra․ Experiment with different placements to discover what feels most beneficial for you, trusting your intuition to guide you․

Crystals for Specific Needs

Discover targeted crystal support for various life challenges, from easing anxiety and promoting restful sleep to enhancing focus and aiding physical well-being․

Crystals for Anxiety and Stress Relief

Navigating modern life often brings feelings of anxiety and overwhelming stress; crystals can offer gentle, supportive energy during these challenging times․ Several gemstones are particularly renowned for their calming and grounding properties, assisting in restoring inner peace and emotional balance․

Amethyst, with its soothing violet hue, is a powerful stone for alleviating anxiety, promoting tranquility, and enhancing spiritual awareness․ Rose Quartz fosters self-love and compassion, dissolving emotional blockages and encouraging a sense of calm․ Lepidolite, rich in lithium, is known for its mood-stabilizing effects, reducing stress and promoting restful sleep․

Blue Lace Agate gently eases tension and encourages clear communication, while Howlite calms an overactive mind and promotes patience․ Holding these crystals during meditation, carrying them throughout the day, or placing them in your living space can create a sanctuary of serenity and support․

Crystals for Sleep and Insomnia

Restful sleep is fundamental to overall well-being, yet many struggle with insomnia or disturbed sleep patterns; crystals can be valuable allies in promoting relaxation and a peaceful night’s rest․ Certain gemstones possess energies that soothe the mind, release tension, and prepare the body for deep, restorative sleep․

Amethyst is highly regarded for its calming properties, easing anxiety and promoting tranquility, making it ideal for placing under your pillow or on your nightstand․ Lepidolite, containing lithium, gently soothes the nervous system and reduces stress, facilitating a more peaceful state․ Howlite calms an overactive mind, quieting racing thoughts that often interfere with sleep․

Selenite’s gentle energy cleanses the aura and creates a protective shield, promoting a sense of safety and serenity․ Moonstone, connected to the lunar cycle, encourages restful sleep and enhances dream recall․ Incorporating these crystals into your bedtime routine can cultivate a tranquil atmosphere conducive to deep, rejuvenating sleep․

Crystals for Focus and Concentration

In today’s fast-paced world, maintaining focus and concentration can be challenging; crystals can offer support by enhancing mental clarity, improving memory, and promoting a sense of groundedness․ Specific gemstones possess energies that stimulate cognitive function and help overcome mental distractions, allowing for increased productivity and improved learning․

Clear Quartz is known as the “master healer” and amplifies energy, enhancing focus and clarity of thought․ Carnelian boosts motivation and creativity, igniting passion and drive․ Citrine promotes optimism and self-confidence, fostering a positive mindset conducive to concentration․

Lapis Lazuli stimulates intellectual ability and enhances memory, making it a valuable tool for students and professionals․ Fluorite improves mental clarity and helps to filter out distractions․ Placing these crystals on your desk or carrying them with you can create a supportive environment for focused work and enhanced cognitive performance․

Crystals for Physical Healing (Disclaimer)

While many believe crystals possess healing properties that can support physical well-being, it’s crucial to understand that crystal healing is a complementary therapy and should never be used as a substitute for conventional medical treatment․ Crystals are not intended to diagnose, treat, cure, or prevent any disease․

The information provided regarding crystals and physical health is based on traditional beliefs and anecdotal evidence, not scientific proof․ Always consult with a qualified healthcare professional for any health concerns or before making any decisions related to your health or treatment․

Crystals can be used alongside conventional medicine to promote relaxation, reduce stress, and enhance overall well-being, but they should not replace professional medical advice or care․ Responsible use involves acknowledging their limitations and prioritizing your health above all else․

Advanced Crystal Practices

Explore deeper connections with crystal grids, elixirs, and synergistic combinations, unlocking amplified energy and refined intentions for experienced practitioners․

Crystal Grids: Amplifying Energy

Crystal grids are powerful arrangements of crystals created with specific geometric patterns to amplify energy and manifest intentions․ These sacred layouts harness the combined power of individual stones, focusing and directing their energies towards a desired outcome․ The geometry used – often based on sacred geometry like the Flower of Life – acts as a blueprint, enhancing the vibrational frequency․

Creating a grid involves selecting crystals that align with your intention, arranging them around a central focus stone, and connecting them with intention․ Consider the crystal shapes; points direct energy outward, while tumbled stones offer a more grounded influence․ Activating the grid with a wand or your finger, visualizing your intention flowing through the network, completes the process․ Grids can be used for healing, abundance, protection, or any other focused goal, offering a potent tool for energetic work․

Crystal Elixirs: Infused Water (Safety Precautions)

Crystal elixirs are water infused with the energetic properties of crystals, consumed to promote healing and well-being․ While a potent practice, safety is paramount․ Not all crystals are suitable for direct water infusion; some contain toxic elements that can leach into the water, posing a health risk․

The indirect method is highly recommended: place the crystal around the water container, rather than directly in it․ Alternatively, use a crystal wand to stir the water, imbuing it with the stone’s energy without physical contact․ Always research a crystal’s safety before use, avoiding those containing arsenic, lead, or asbestos․

Use only pure, filtered water and consume elixirs in moderation․ If you experience any adverse effects, discontinue use immediately․ Proper preparation and mindful selection are crucial for a safe and beneficial experience․

Combining Crystals for Synergistic Effects

Harnessing the power of crystal combinations can amplify their individual properties, creating synergistic effects for enhanced healing and manifestation․ This practice involves thoughtfully pairing crystals based on their complementary energies and intended purpose․

For example, combining Clear Quartz (the amplifier) with Rose Quartz (love and emotional healing) intensifies the loving energy․ Amethyst (spirituality) and Citrine (abundance) can balance spiritual growth with practical manifestation․ Black Tourmaline (protection) paired with Selenite (cleansing) provides a powerful shield against negativity while maintaining energetic purity․

Consider the crystals’ colors, associated chakras, and metaphysical properties when choosing combinations․ Intuition plays a vital role; experiment to discover pairings that resonate with your specific needs and intentions․

Resources for Further Crystal Study

Expanding your knowledge of crystals is a continuous journey, and numerous resources are available to deepen your understanding․ Several reputable books offer comprehensive guides to crystal properties, healing techniques, and historical lore․ Authors like Judy Hall and Hibiscus Moon are highly regarded in the crystal community․

Online platforms, such as websites dedicated to crystal healing and metaphysical studies, provide articles, forums, and expert insights․ Consider enrolling in workshops or courses led by certified crystal practitioners for hands-on experience and personalized guidance․

Remember to critically evaluate information and prioritize sources with established credibility․ Local metaphysical shops often host events and offer curated selections of crystals and related literature, fostering a supportive learning environment․

dance shoe size guide

Dance Shoe Size Guide: A Comprehensive Overview (Updated 03/26/2026)

Navigating dance shoe sizing requires precision! Charts vary by style – ballet, tap, jazz, Irish, Highland, Zumba, Latin, and ballroom – demanding specific measurements for optimal fit and performance.

Embarking on the journey of dance necessitates properly fitted footwear. Unlike standard street shoes, dance shoes prioritize specific needs – flexibility, support, and precise movement. A correct fit isn’t merely about comfort; it directly impacts technique, prevents injuries, and enhances performance. This guide provides a comprehensive overview of dance shoe sizing, acknowledging the diverse requirements of various dance styles.

From the delicate precision of ballet slippers to the rhythmic impact of tap shoes, each discipline demands a unique fit. We’ll explore sizing nuances for ballet, tap, jazz, Irish, Highland, Zumba, Latin, and ballroom dancing. Understanding that sizing charts differ significantly between brands and styles is crucial. This resource aims to demystify the process, ensuring dancers of all levels find their perfect fit, maximizing their potential and enjoyment.

Why Dance Shoe Sizing Differs from Street Shoe Sizing

Dance shoes aren’t designed for everyday wear; their construction prioritizes performance attributes. Street shoes focus on cushioning and general support, while dance shoes emphasize flexibility, a snug fit, and the ability to articulate the foot; This fundamental difference necessitates distinct sizing approaches.

Dance shoes often run smaller than typical street shoe sizes, accounting for the dancer’s need for a secure, precise fit. Variations also arise due to the materials used – leather, canvas, or synthetic fabrics – each impacting how the shoe conforms to the foot. Furthermore, different dance styles demand varying levels of toe room and arch support. Considering width is also vital, as dance movements require stability and control, unlike the broader fit of casual footwear.

Understanding Dance Shoe Widths

Dance shoe widths are crucial for comfort and preventing injuries. Unlike street shoes, dance shoes often come in limited width options, typically narrow (A), medium (B), or wide (D). Determining your correct width is as important as length. If you typically wear a wide width in street shoes, adding a half-size up when ordering ballet shoes is often recommended to accommodate the broader foot.

Width considerations vary by dance style. For example, tap shoes require a secure heel fit, so width impacts stability. Ballet shoes demand a snug fit to support pointe work or turns. Always consult brand-specific charts, as width sizing isn’t standardized. Ignoring width can lead to blisters, discomfort, and compromised technique.

Ballet Shoe Sizing

Ballet shoe sizing differs significantly from standard shoe sizes. Bloch Dansoft leather ballet slippers, for instance, have specific charts. For US child sizes, a size 6.5 corresponds to a shoe size of 6, while 7.5 equates to 7. Street shoe to ballet shoe conversions for men show a size 5.5 correlating to 9A, and a size 6 to 6.5.

Remember to consider width; if a dancer wears wide street shoes, adding half a size up is advisable. Charts from Inspirations Dancewear Canada detail these conversions. Accurate measurement is vital, as ballet shoes need a snug, supportive fit for proper technique and preventing injury. Always check the specific brand’s size guide.

US Child Ballet Shoe Sizes

Determining the correct US child ballet shoe size is crucial for young dancers’ comfort and technique. Bloch Dansoft ballet slippers offer a detailed sizing guide for children. A US child size of 6.5 translates to a shoe size of 6, while 7;5 corresponds to a size 7. Progressing through the sizes, 8.5 equates to 8, and 9.5 to 9.

Larger sizes continue this pattern: 10.5 becomes 10, 11.5 to 11, 12.5 to 12, and 13.5 to 13. For even larger feet, size 1 corresponds to 13.5, 1.5 to 1, and 2 to 2. Accurate measurement, referencing the brand’s chart, ensures a proper fit for growing feet.

Street Shoe to Ballet Shoe Conversion (Men)

Converting a man’s street shoe size to a ballet shoe size requires careful consideration, as ballet shoes typically run smaller. A street shoe size of 5.5 corresponds to a 9A ballet shoe, while a 6 translates to 6.5A. Moving up the scale, a 7 becomes 10A, 8 equates to 11A, and 9 to 12A.

Continuing the conversion, a street size of 9.5 becomes 11.5A, 10 to 12A, 10.5 to 12.5A, and 11 to 13A. If a dancer typically wears a wide width in street shoes, adding an additional half size when ordering ballet shoes is recommended to accommodate the broader foot shape and ensure a comfortable fit.

Bloch Dansoft Leather Ballet Shoe Size Chart

The Bloch Dansoft leather ballet shoe offers a comfortable and flexible fit, but accurate sizing is crucial. For US Child sizes, a 6.5 corresponds to a size 6, 7 to 6.5, 7.5 to 7, and 8 to 7.5. Continuing, 8.5 equates to 8, 9 to 8.5, 9.5 to 9, and 10 to 9.5.

For larger child sizes, 10.5 corresponds to 10, 11 to 10.5, 11.5 to 11, 12 to 11.5, 12.5 to 12, 13 to 12.5, 13.5 to 13, and 1 to 13.5. Size 1.5 equates to 14, 2 to 14.5, 2.5 to 15, and so on. Always consult the chart carefully, as Bloch sizing can vary slightly between styles and materials.

Tap Shoe Sizing

Tap shoe sizing requires careful consideration, differing from standard shoe sizes. Generally, tap shoes run slightly smaller, necessitating a potential half-size increase. Prioritize a snug heel fit to prevent slippage during routines, crucial for clear sound production. Width is also vital; options typically include narrow, medium, and wide.

When selecting tap shoes, consider the style of tap dance – rhythm or Broadway – as this can influence the desired fit. A more secure fit is often preferred for rhythm tap, while Broadway tap may allow for slightly more flexibility. Always check specific brand size charts as variations exist.

General Tap Shoe Sizing Considerations

Tap shoe sizing isn’t a one-size-fits-all scenario. A secure fit is paramount, preventing the shoe from shifting during complex steps and ensuring clear tap sounds. Many dancers find tap shoes run smaller than street shoes, often recommending sizing up a half size. However, this isn’t universal; always consult the brand’s specific chart.

Consider the shoe’s construction. Leather tap shoes tend to stretch slightly with wear, while synthetic materials maintain their shape. Prioritize a snug heel fit to avoid blisters and maintain control. Remember to try shoes on with tap protectors installed, as these add bulk and affect the overall fit.

Tap Shoe Width Options

Tap shoe widths are crucial for comfort and technique. While many brands offer standard widths, options like narrow (AA), medium (B), wide (D), and extra-wide (EE) cater to diverse foot shapes. If you typically wear wide widths in street shoes, adding a half size up when ordering tap shoes is often advised, ensuring ample toe room.

Pay attention to how the shoe feels across the ball of your foot. A too-narrow shoe will constrict movement and cause discomfort, while a too-wide shoe will allow excessive shifting. Proper width prevents blisters and enhances control during turns and intricate footwork. Don’t hesitate to consult brand-specific guides for accurate width selection.

Jazz Shoe Sizing

Jazz shoe sizing differs significantly from standard shoe sizes. Typically, dancers size down a half to full size, especially for split-sole jazz shoes, to achieve a snug, secure fit. This prevents the shoe from slipping during dynamic movements and allows for precise foot articulation.

Consider the material when selecting your size. Leather jazz shoes tend to stretch slightly with wear, while canvas or synthetic materials offer less give. Prioritize a close fit without being overly constricting, allowing for comfortable pointing and flexing of the foot. Always check brand-specific size charts, as variations exist.

Sizing for Split-Sole Jazz Shoes

Split-sole jazz shoes require a particularly precise fit due to their construction and the demands of jazz technique. Dancers often size down a half to a full size from their street shoe size to prevent slippage and ensure optimal control. A snug heel is crucial for stability during turns and jumps.

Pay close attention to the width of the shoe. If you typically wear a wide width in street shoes, consider ordering a wider jazz shoe or sizing up a half size. Proper fit allows for full articulation of the foot and prevents blisters or discomfort during extended rehearsals or performances. Always consult the specific brand’s sizing guide.

Irish Dance Shoe (Ghillie) Sizing

Ghillies, the soft shoes of Irish dance, require a unique fitting process. Unlike structured shoes, ghillies are designed to mold to the dancer’s foot. Accurate measurement is vital for comfort and performance. Traditionally, ghillies are sized similarly to street shoe sizes, but variations exist between manufacturers.

Measuring for ghillies involves tracing the foot and measuring the length from heel to longest toe. It’s recommended to measure both feet, as sizes can differ. Consider the thickness of socks worn during dance when measuring. A snug, but not constricting, fit is ideal, allowing for flexibility and precise footwork.

Measuring for Ghillies

Precise measurement is crucial for ghillie fit, as these shoes mold to the foot. Begin by tracing both feet on a piece of paper while standing, wearing the socks typically used for Irish dance. Measure the length from the back of the heel to the tip of the longest toe on each tracing – discrepancies are common!

Use a ruler or measuring tape to determine the longest measurement. When selecting a size, consider the shoe’s construction; ghillies stretch with wear. A snug fit initially is preferable, allowing for expansion. Remember that sizing can vary between brands, so consulting specific charts is essential for optimal comfort and performance.

Highland Dance Shoe Sizing

Highland dance shoe sizing demands careful attention, as these shoes are structured differently than other dance footwear. Measurements typically focus on the length of the foot, from heel to toe, with a slight pull indicated for accuracy. Refer to the manufacturer’s specific size chart – Tartantown Ltd. provides a detailed guide, referencing sizes 10 through 13, and corresponding foot lengths in inches and fractions.

Shoe size ranges often include 7 to 9, with fractional increments. It’s vital to measure both feet, as slight variations are common, and select the size that accommodates the larger foot. Remember that Highland shoes don’t stretch significantly, so a precise fit is paramount for comfort and technique.

Highland Dance Shoe Size Charts

Tartantown Ltd. offers a comprehensive Highland dance shoe size chart, crucial for accurate fitting. Their chart details foot length measurements corresponding to shoe sizes, ranging from 10 to 13. Specifically, a size 10 aligns with a 7-inch foot, while size 13 corresponds to a 7.8-inch foot. Incremental sizes, like 10.5, 11.5, and 12.5, feature corresponding foot length measurements as well.

The chart also includes fractional measurements, such as 7 ¼ inches for a specific size, ensuring a precise match. Always consult the latest chart from the retailer, as variations can occur. Prioritize measuring both feet and selecting the larger size for optimal comfort and performance during Highland dance routines.

Zumba Dance Shoe Sizing

When selecting ZUMBA Air Funk dance shoes, be aware that they generally run larger than standard shoe sizes. This means you might need to order a half or even a full size down from your typical athletic shoe size to achieve a comfortable and secure fit. Careful consideration of this sizing difference is essential to prevent slipping or discomfort during energetic Zumba routines.

Prioritize trying on the shoes, if possible, or thoroughly reviewing the specific brand’s size chart. Pay attention to the shoe’s construction and materials, as these can also influence the fit. A snug, yet not constricting, feel is ideal for optimal performance and injury prevention during Zumba classes.

ZUMBA Air Funk Shoe Size Considerations

The ZUMBA Air Funk shoe consistently demonstrates a tendency to run larger than conventional athletic footwear. Therefore, a proactive approach to sizing is crucial; many dancers find success by initially ordering a half size smaller than their usual shoe size. However, individual foot shapes and preferences vary, so this isn’t a universal rule.

Consider the sock thickness you’ll typically wear during Zumba classes. Thicker socks will require slightly more room within the shoe, potentially influencing your size selection. Always prioritize comfort and a secure heel fit to prevent blisters and ensure optimal performance during high-energy movements. Review recent customer feedback for additional insights.

Latin Dance Shoe Sizing

Accurate sizing is paramount for Latin dance shoes, specifically for styles like Salsa, Bachata, and Cha-Cha. These shoes typically run true to size, but subtle variations exist between brands and styles. A snug, secure fit is essential to facilitate precise footwork and prevent slippage during quick turns and intricate movements. Consider the heel height and width when selecting your size, as these factors impact overall comfort and stability.

Pay close attention to the shoe’s construction; leather shoes may stretch slightly with wear. If between sizes, it’s generally recommended to choose the smaller size for a more controlled feel. Always measure both feet and fit to the larger foot.

Sizing for Salsa, Bachata, and Cha-Cha Shoes

When selecting shoes for Salsa, Bachata, and Cha-Cha, prioritize a precise fit that complements the dynamic movements of these dances. A secure heel is crucial to prevent slipping and maintain control during turns and fast footwork. Generally, these styles run true to street shoe size, but individual brands may differ slightly. Consider the shoe’s material; leather will mold to your foot over time, while synthetic materials offer less give.

If you’re between sizes, opt for the smaller size to ensure a snug fit. Always measure both feet and fit to the larger foot. A well-fitted shoe enhances performance and minimizes the risk of blisters or discomfort during extended dance sessions.

Ballroom Dance Shoe Sizing

Ballroom shoe sizing presents a nuance: distinctions between American and International styles. American ballroom shoes often align closely with standard street shoe sizes, prioritizing comfort for a broader range of movements. International ballroom shoes, however, tend to run narrower, demanding a more precise and streamlined fit for the intricate footwork. Men’s sizing typically follows a similar pattern, with American styles being more forgiving and International styles requiring greater accuracy.

Always consult the specific brand’s size chart, as variations exist. Consider heel height and width preferences when selecting your ballroom shoes, as these impact balance and technique.

American vs. International Ballroom Shoe Sizing

The core difference lies in fit philosophy. American ballroom shoes generally mirror street shoe sizes, offering more room and comfort for expansive movements like whips and dips. This allows for greater flexibility and a less restrictive feel during social dancing and performances. International ballroom shoes, conversely, prioritize a snug, precise fit. They are typically narrower, designed to enhance the clean lines and intricate footwork characteristic of styles like Waltz and Foxtrot.

Men’s shoes follow this trend; American styles are wider, while International styles are more streamlined. Accurate measurement is crucial, especially for International styles, to avoid discomfort and compromised technique.

Sizing for Character Dance Shoes

Character dance shoes are incredibly diverse, mirroring the varied styles they represent – from Spanish flamenco boots to Polish peasant slippers. Consequently, sizing isn’t standardized like ballet or tap. Often, these shoes are based on European sizing, requiring careful conversion from US sizes. Consider the specific style; flamenco boots need a snug heel fit, while peasant slippers prioritize overall comfort and a secure fit for quick movements.

Manufacturers’ charts are essential, as sizing varies significantly between brands and styles. Always prioritize a secure fit to prevent slippage during energetic character routines. Expect some break-in time for leather options.

Tips for Accurate Measurement

Achieving a precise fit begins with accurate foot measurements! Measure both feet, as slight variations are common. Trace your foot on paper while standing, wearing socks similar to those used for dance. Measure the length from heel to longest toe, and the width at the broadest point. Measure later in the day, as feet tend to swell.

Use a Brannock device if possible, or a ruler and paper carefully. Don’t rely solely on your street shoe size – dance shoes differ! Have someone assist for greater accuracy. Record measurements in both inches and centimeters for broader chart compatibility.

Measuring Your Feet at Home

Accurate home measurement ensures a better dance shoe fit! Begin by placing a piece of paper larger than your foot flat on the floor, against a wall. Stand with your heel against the wall and trace your foot carefully, wearing dance socks. Repeat with the other foot – sizes can vary! Measure the length from the heel to the tip of your longest toe in both inches and centimeters.

Measure width at the widest point. Ensure the pencil is held vertically during tracing. Compare both foot tracings and use the larger measurement for shoe selection. Consider repeating the process later in the day, as feet swell.

When to Measure Your Feet

Timing is crucial for accurate dance shoe sizing! Avoid measuring your feet first thing in the morning, as they tend to be smaller due to overnight fluid retention. The best time is late afternoon or evening, when your feet are at their largest after a day of activity. This accounts for natural swelling that occurs throughout the day.

Measure after dance practice if possible, to simulate the conditions your feet will experience while dancing. Always measure both feet, as one may be slightly larger than the other, and use the larger measurement when selecting your shoe size. Consistent timing ensures reliable results.

Dealing with Half Sizes

Half sizes are common in dance shoe fitting, requiring careful consideration. If you typically wear a half size in street shoes, it’s often recommended to round up to the next full size when purchasing dance shoes, especially for styles like ballet or tap. This accommodates the specific fit requirements of dance footwear.

However, always consult the brand’s specific size chart, as recommendations can vary. If you’re between sizes, consider the shoe’s construction; a tighter fit is often preferred for pointe shoes, while a little more room might be better for jazz or character shoes. Prioritize comfort and secure support.

Understanding Shoe Construction and Fit

Dance shoe construction significantly impacts fit. Leather ballet slippers mold to the foot over time, requiring a snug initial fit. Tap shoes need adequate space for toe movement and secure ankle support. Jazz shoes, particularly split-sole designs, prioritize flexibility and arch support.

Consider the shoe’s material and sole type. Full-sole jazz shoes offer more support, while split-sole shoes enhance articulation. Ghillies (Irish dance shoes) require a precise fit to prevent slippage. Understanding these nuances is crucial for selecting the correct size and ensuring optimal performance and comfort during dance activities.

Common Sizing Issues and Solutions

Frequent issues include shoes running small or large. Zumba Air Funk shoes, for example, often require sizing down. Ballet slippers may initially feel tight, but should mold to the foot. Blisters and discomfort signal a poor fit. If experiencing tightness, consider shoe stretchers or thicker socks.

For width issues, Bloch recommends adding a half size for wider feet in street shoes. If heel slippage occurs, try heel grips or thicker socks. Always prioritize comfort and functionality. Don’t hesitate to exchange shoes if the initial fit isn’t perfect, utilizing return policies effectively.

Where to Find Specific Brand Size Charts

Locating accurate brand-specific charts is crucial for a precise fit. Inspirations Dancewear Canada provides a detailed sizing guide for Bloch Dansoft ballet slippers (SO205 & SO275), outlining US child sizes and corresponding choices. Tartantown Ltd. offers size charts for Highland dance shoes, detailing measurements from heel to toe.

Always check the manufacturer’s website directly for the most up-to-date information. Retailers often link to these charts as well. Remember that sizing can vary even within a brand, depending on the shoe style. Utilize online resources and customer reviews to gain further insights before purchasing.

Online Resources for Dance Shoe Sizing

Numerous online tools assist in finding the perfect dance shoe fit. ShopSavvy allows users to track products and receive alerts for price drops and stock availability, aiding informed purchasing decisions. Brand websites, like Bloch and Tartantown Ltd., are primary sources for their specific size charts.

Dance-specific retailers, such as Inspirations Dancewear Canada, often provide detailed sizing guides alongside product listings. Utilize forums and online communities dedicated to dance to gather insights from experienced dancers regarding fit and sizing nuances. Remember to cross-reference information for accuracy.

Return Policies and Exchanges

Understanding return policies is crucial when purchasing dance shoes online. Given the potential for sizing discrepancies, especially with brands like ZUMBA Air Funk which tend to run larger, a flexible return policy offers peace of mind. Carefully review the retailer’s terms regarding returns, exchanges, and potential restocking fees before completing your purchase;

Note any time limitations for returns or exchanges. Some retailers may require shoes to be unworn and in their original packaging. Keep records of your order and any communication with the retailer. A clear understanding of the policy protects your investment and ensures a satisfactory fit.

fibersim user guide chinese

FiberSim User Guide (Chinese Context) — Article Plan

This guide details navigating FiberSim within a Chinese manufacturing environment‚ addressing localization‚ terminology‚ resources‚ and the impact of the Great Firewall.

FiberSim’s adoption within China’s rapidly expanding composite materials industry is crucial‚ driven by aerospace‚ automotive‚ and infrastructure demands. This guide addresses the unique challenges and opportunities presented by utilizing FiberSim in a Chinese manufacturing setting. Understanding the software’s functionality is paramount‚ but equally important is navigating the linguistic and technological landscape.

China’s “Great Firewall” impacts access to resources‚ necessitating localized documentation and support. Furthermore‚ the prevalence of Chinese-language technical forums and the need to interpret Chinese crochet/diagramming schemes for composite layup require specific attention. Successful implementation hinges on bridging the gap between FiberSim’s capabilities and the practical realities of Chinese manufacturing processes and standards.

Understanding the Chinese Language Version of FiberSim

The Chinese localization of FiberSim presents unique considerations beyond simple translation. Character encoding and font support are critical for accurate display and data integrity‚ ensuring all symbols and characters render correctly within the software interface. Successfully addressing these technical hurdles is fundamental to user experience.

Challenges arise from the complexities of the Chinese language and the need to accurately convey technical terminology related to composite materials and manufacturing processes. Community-translated guides supplement official Siemens documentation‚ offering valuable insights and practical solutions. Users must be aware of potential discrepancies and prioritize official resources when available‚ while leveraging forums for collaborative problem-solving.

Localization Challenges and Solutions

Localizing FiberSim for Chinese users involves overcoming significant hurdles. Accurate translation of complex engineering terms is paramount‚ requiring specialized linguistic expertise in composite materials and manufacturing. Beyond terminology‚ adapting the interface to accommodate the density of Chinese characters and differing reading directions presents a design challenge.

Solutions include rigorous quality assurance testing by native speakers familiar with FiberSim’s functionalities. Utilizing Unicode (UTF-8) encoding ensures broad character support. Furthermore‚ leveraging community feedback from Chinese users‚ as seen in online forums‚ helps identify and rectify translation errors or cultural nuances missed during initial localization efforts. Addressing these challenges enhances usability and adoption.

Character Encoding and Font Support

Ensuring proper character encoding is crucial for a functional Chinese FiberSim experience. UTF-8 encoding is the recommended standard‚ supporting the vast majority of Chinese characters and preventing display errors. However‚ simply using UTF-8 isn’t enough; FiberSim must also incorporate fonts that comprehensively cover the required Chinese character sets.

Font selection impacts readability and visual fidelity. System fonts may be insufficient‚ necessitating the embedding of specific Chinese fonts within the FiberSim application. Testing across various Windows versions and user configurations is vital to confirm consistent character rendering. Addressing potential font compatibility issues guarantees accurate information display for Chinese-speaking engineers and technicians.

Accessing FiberSim Documentation in Chinese

Locating Chinese-language FiberSim documentation requires a multi-faceted approach. While official Siemens documentation may have limited direct Chinese translations‚ exploring community-driven resources is essential. Online forums and Q&A sites‚ particularly those frequented by Chinese manufacturing professionals‚ often host user-translated guides and troubleshooting tips.

Leveraging these community efforts supplements official resources. Searching for “FiberSim ” (FiberSim Chinese) can yield valuable results. Furthermore‚ investigating Chinese technical blogs and platforms may uncover helpful articles and tutorials. Remember to critically evaluate the accuracy of community-translated materials‚ cross-referencing with official English documentation whenever possible.

Official Siemens Documentation Resources (Chinese)

Currently‚ directly accessing comprehensive‚ officially translated Siemens FiberSim documentation in Chinese presents a challenge. Siemens’ primary documentation repository typically prioritizes English‚ German‚ and Japanese. However‚ it’s crucial to regularly check the official Siemens support website and partner portals for any newly released Chinese translations.

Explore regional Siemens websites specifically tailored to the Chinese market. These sites sometimes feature localized documentation or links to translated resources. Contacting Siemens support directly through their Chinese-language channels can also clarify the availability of translated materials or planned future translations. Be prepared that availability may be limited‚ necessitating reliance on community resources.

Community-Translated Guides and Forums

Given the limited official Chinese documentation‚ community-driven resources are vital for FiberSim users in China. Online forums and Q&A platforms‚ particularly those focused on composite materials and manufacturing‚ often host user-translated guides‚ tutorials‚ and troubleshooting tips. Searching using relevant Chinese keywords (see the Terminology section) is essential.

Platforms like Reddit (r/crochet‚ demonstrating pattern translation expertise) suggest a precedent for collaborative translation efforts. While not FiberSim-specific‚ this illustrates the potential for community-based knowledge sharing. Actively participate in these forums‚ contribute translations when possible‚ and verify information from unofficial sources before implementation. Be mindful of potential inaccuracies.

Navigating the FiberSim Interface (Chinese Language)

Successfully using the Chinese language version of FiberSim requires familiarity with the translated interface elements. Expect standard menu options‚ tooltips‚ and dialog boxes to be rendered in Chinese characters. Ensure your operating system and FiberSim installation support Chinese character encoding (see the Character Encoding section).

Users should proactively identify key commands and functions within the interface and correlate them with their English equivalents (refer to the Terminology Translation section). Utilizing screenshots and creating a personal glossary of translated terms can significantly improve workflow efficiency. Be prepared for potential inconsistencies in translation and rely on context to interpret ambiguous labels.

Key Terminology Translation: English to Chinese

Accurate translation of composite materials and manufacturing process terminology is crucial for effective FiberSim usage. “Composite Materials Terminology” requires understanding terms like ‘fiber‚’ ‘resin‚’ ‘layup‚’ and ‘cure’ in Chinese. Similarly‚ “Manufacturing Process Terminology” demands fluency in translations for ‘mold‚’ ‘tooling‚’ ‘plybook‚’ and ‘NC programming.’

A dedicated glossary is essential‚ as direct translations may lack nuance. Consider variations used across different regions of China. Resources like online dictionaries and collaboration with Chinese-speaking engineers are invaluable. Recognizing crochet/diagramming scheme notations (XVA) is also vital for interpreting layup data‚ as highlighted by Reddit’s r/crochet community.

Composite Materials Terminology

Translating composite material terms accurately is paramount for FiberSim users in China. Key terms like “fiber” ( – xiānwéi)‚ “resin” ( – shùzhī)‚ “matrix” ( – jītǐ)‚ and “reinforcement” ( – zēngqiáng cáiliào) require precise equivalents. Understanding distinctions between different fiber types – carbon fiber ( – tàn xiānwéi)‚ glass fiber ( – bōlí xiānwéi) – is also critical.

Nuance matters; a direct translation might not convey the intended meaning. “Layup” ( – pūcéng) and “laminate” ( – céngyābǎn) need careful consideration. Collaboration with materials scientists familiar with both English and Chinese terminology ensures clarity and avoids miscommunication during design and manufacturing processes.

Manufacturing Process Terminology

Accurate translation of manufacturing process terms is crucial for FiberSim implementation in Chinese facilities. Key terms include “molding” ( – mózhù)‚ “curing” ( – yǎnghù)‚ “machining” ( – jīxiè gōngyè)‚ and “inspection” ( – jiǎnchá). Understanding variations in terminology for automated fiber placement (AFP) and automated tape laying (ATL) is also vital.

Specific processes like “prepreg” ( – qián rèn shùzhī) and “RTM” (Resin Transfer Molding – shùzhī zhuǎnrù mózhù) require precise equivalents. Ensuring consistent terminology across design‚ simulation‚ and production phases minimizes errors. Collaboration with manufacturing engineers fluent in both languages is essential for effective communication and streamlined workflows.

Common Issues and Troubleshooting (Chinese Users)

Chinese FiberSim users frequently encounter challenges related to character encoding‚ leading to display errors or data corruption. Incorrect font settings can also distort the interface. Troubleshooting often involves verifying the system locale and FiberSim’s language settings.

Connectivity issues stemming from the Great Firewall can hinder access to Siemens’ online documentation and licensing servers. Utilizing VPNs or proxy servers may be necessary. Furthermore‚ translation discrepancies can cause confusion; referencing both English and Chinese documentation is recommended. Seeking assistance from local FiberSim communities and forums‚ as highlighted in online resources‚ proves invaluable for resolving unique issues.

Utilizing Online Resources for Chinese FiberSim Users

Chinese FiberSim users benefit from a growing network of online support. Dedicated technical forums and Q&A sites‚ prevalent within the Chinese internet landscape‚ offer solutions to common problems and facilitate knowledge sharing. Platforms like Reddit (r/crochet‚ for understanding diagramming schemes) demonstrate community-driven translation efforts.

Mandarin-language video tutorials are increasingly available‚ providing visual guidance on FiberSim functionalities. However‚ access to official Siemens documentation may be restricted by the Great Firewall‚ necessitating VPNs. Tandem‚ a language learning app‚ suggests learning basic Mandarin phrases for support interactions. Leveraging these resources ensures effective FiberSim utilization within a Chinese manufacturing context.

Chinese Technical Forums and Q&A Sites

Navigating the Chinese internet reveals numerous technical forums crucial for FiberSim users. While specific FiberSim-dedicated forums may be nascent‚ broader composite materials and manufacturing platforms host relevant discussions. These sites often feature user-generated solutions to challenges encountered during implementation and operation.

Q&A platforms allow users to pose specific questions and receive answers from experienced peers. The prevalence of these resources highlights a collaborative approach to problem-solving within the Chinese engineering community. Searching using translated keywords (see Key Terminology section) is essential for effective information retrieval. These forums are invaluable for overcoming language barriers and accessing localized expertise.

Video Tutorials in Mandarin

The availability of FiberSim video tutorials in Mandarin is currently limited but growing. While official Siemens resources may not extensively cover this‚ independent content creators and Chinese manufacturing companies are beginning to produce instructional videos.

These tutorials often focus on practical application‚ demonstrating workflows specific to Chinese manufacturing processes and standards. Platforms like Youku and Bilibili are key locations for finding such content. Searching using relevant Chinese keywords (composite materials‚ FiberSim‚ manufacturing) is crucial. These visual aids are particularly helpful for users less familiar with English-language documentation‚ offering a more accessible learning experience.

FiberSim and Chinese Composite Manufacturing Standards

Integrating FiberSim with Chinese composite manufacturing standards requires careful consideration. China has been actively developing its own standards for aerospace‚ automotive‚ and other industries utilizing composite materials. These standards often differ from international norms (like those prevalent in Siemens’ original documentation).

Users must ensure FiberSim configurations and outputs align with these specific Chinese requirements. This includes material property definitions‚ layup design rules‚ and quality control parameters. Understanding GB standards (Guobiao – National Standards of China) is vital. Adapting FiberSim workflows to accommodate these standards ensures compliance and facilitates seamless integration within Chinese manufacturing ecosystems.

Data Exchange with Chinese PLM/CAD Systems

Successful FiberSim implementation in China hinges on seamless data exchange with prevalent PLM (Product Lifecycle Management) and CAD (Computer-Aided Design) systems. Many Chinese manufacturers utilize domestically developed platforms‚ differing from commonly supported Western software like Teamcenter or NX.

Challenges arise from differing data formats and compatibility issues. Direct integration may require custom scripting or middleware solutions. Common file formats like STEP and IGES may require specific translation protocols to ensure data integrity. Thorough testing and validation are crucial to avoid errors during import/export processes. Establishing robust data exchange workflows is paramount for efficient collaboration and streamlined production.

Customization and Scripting for Chinese Language Support

FiberSim’s Python scripting capabilities offer powerful avenues for enhancing Chinese language support beyond the standard localization. Custom scripts can address specific character encoding issues or refine the display of complex composite terminology translations.

Users can develop scripts to automate tasks involving Chinese character input‚ validation‚ and reporting. This includes tailoring user interface elements‚ generating customized reports in Chinese‚ and adapting data import/export routines. Furthermore‚ scripting allows for the creation of specialized tools to interpret Chinese crochet/diagramming schemes relevant to composite layup‚ ensuring accurate data translation and implementation within FiberSim’s workflow.

FiberSim Training Resources Available in Chinese

Currently‚ officially translated FiberSim training materials in Chinese are limited. However‚ Siemens partners and local Chinese composite manufacturing companies may offer customized training programs delivered in Mandarin. Investigating these localized options is crucial for effective user adoption.

Supplementing formal training‚ online resources like Chinese technical forums and Q&A sites (see section 6) often host user-generated tutorials and knowledge-sharing initiatives in Mandarin. While not official‚ these community-driven resources can provide practical guidance. Exploring video tutorials in Mandarin‚ if available‚ can also significantly aid comprehension‚ particularly for visual learners navigating the software interface.

The Role of the Great Firewall in Accessing FiberSim Resources

The Great Firewall of China presents significant challenges for Chinese FiberSim users accessing essential resources. Official Siemens documentation‚ hosted outside of mainland China‚ may experience intermittent access disruptions or significantly reduced speeds. This impacts downloading software updates‚ accessing the knowledge base‚ and participating in international forums.

Strategies to mitigate these issues include utilizing Virtual Private Networks (VPNs)‚ though their legality and reliability can vary. Alternatively‚ exploring mirror sites or locally cached versions of documentation (where permitted) can improve accessibility. Understanding the Firewall’s impact is crucial for planning training sessions and ensuring uninterrupted workflow for Chinese-based engineering teams.

Interpreting Chinese Crochet/Diagramming Schemes (Relevant to Composite Layup)

Composite layup often utilizes diagramming schemes‚ and Chinese manufacturers frequently employ unique notations‚ similar to crochet patterns. Understanding these schemes is vital for accurate FiberSim model creation. Common elements include specific symbols representing fiber orientation‚ ply stacking sequences‚ and material types‚ differing from Western standards (XVA notation).

Resources like Reddit’s r/crochet offer introductory guides to deciphering these symbols‚ enabling users to translate physical layup plans into digital FiberSim models. Proficiency in recognizing these patterns minimizes errors during import and ensures correct manufacturing instructions. Familiarity with these schemes streamlines communication between design and production teams.

Basic Mandarin Phrases for FiberSim Support

Effective communication is crucial when providing FiberSim support to Chinese-speaking users. Knowing fundamental Mandarin phrases can bridge language gaps and improve troubleshooting efficiency. Essential phrases include “Nǐ hǎo” (Hello)‚ “Wǒ jiào…” (My name is…)‚ and “Qǐng wèn” (Excuse me/May I ask?).

For technical assistance‚ phrases like “Zhè ge wèntí shì shénme?” (What is the problem?) and “Wǒ bù míngbái” (I don’t understand) are invaluable. Resources like Tandem offer introductory language learning‚ focusing on practical phrases. Even basic attempts at Mandarin demonstrate respect and foster collaboration‚ leading to quicker resolution of FiberSim-related issues.

FiberSim Automation and Chinese Manufacturing Processes

Chinese manufacturing increasingly emphasizes automation‚ particularly within the composites industry. FiberSim’s capabilities align with this trend‚ offering tools for automated plybook creation and data transfer. Integrating FiberSim with existing Chinese PLM/CAD systems is vital for streamlined workflows.

Automation reduces manual errors and accelerates production cycles‚ crucial for meeting demanding output targets. Utilizing FiberSim’s scripting features allows customization to specific Chinese manufacturing standards and processes. This includes adapting to unique material specifications and quality control protocols. Successful implementation requires understanding the interplay between FiberSim and the broader automated factory environment.

Case Studies: FiberSim Implementation in Chinese Companies

Documenting successful FiberSim implementations within Chinese companies provides valuable insights for others. These case studies should highlight specific challenges overcome during localization and integration with existing systems. Focus areas include improvements in composite part design‚ manufacturing efficiency‚ and reduced material waste.

Analyzing these examples reveals best practices for navigating the unique aspects of the Chinese manufacturing landscape. Considerations include adapting to local standards‚ training personnel‚ and leveraging FiberSim’s automation features. Showcasing quantifiable results – such as reduced lead times or improved product quality – strengthens the value proposition for potential adopters within China’s growing composites sector.

Future Trends: FiberSim and the Chinese Composites Industry

The Chinese composites industry is rapidly evolving‚ driven by demand in aerospace‚ automotive‚ and renewable energy. FiberSim’s role will likely expand as companies seek advanced tools for design and manufacturing optimization. Increased automation‚ facilitated by FiberSim’s scripting capabilities‚ will be crucial for meeting growing production demands.

Integration with Chinese PLM/CAD systems will become increasingly important‚ alongside addressing challenges posed by the Great Firewall through optimized resource access. Expect greater demand for Chinese-language training and support. Furthermore‚ advancements in interpreting Chinese crochet/diagramming schemes within FiberSim will streamline composite layup processes‚ enhancing efficiency and accuracy within Chinese manufacturing facilities.

accu chek guide link meter

Accu-Chek Guide Link Meter: A Comprehensive Overview (Updated 01/09/2026)

The Accu-Chek Guide Link Meter offers automated data transfer, simplifying diabetes management through connectivity and precision, as demonstrated by its increasing global adoption.

The Accu-Chek Guide Link Meter represents a significant advancement in self-monitoring blood glucose systems, designed to seamlessly integrate into the modern lifestyles of individuals managing diabetes. Released with a focus on accuracy and connectivity, this meter goes beyond simple blood glucose readings, offering a comprehensive suite of features aimed at empowering users to take control of their health.

Its development reflects a growing demand for user-friendly technology in healthcare, particularly in the realm of chronic disease management. The meter’s ability to connect to smartphone applications, like the Accu-Chek Connect App, facilitates effortless data logging and sharing with healthcare professionals, fostering collaborative care. This connectivity, coupled with its precision, positions the Accu-Chek Guide Link Meter as a valuable tool for individuals striving for optimal glycemic control and improved overall well-being;

What is the Accu-Chek Guide Link Meter?

The Accu-Chek Guide Link Meter is a compact, user-friendly blood glucose monitoring system designed for individuals with diabetes. It’s more than just a meter; it’s a connected health solution. Utilizing advanced sensor technology, it delivers accurate blood glucose readings with minimal discomfort. A key feature is its Bluetooth connectivity, enabling automatic data transfer to compatible smartphones via the Accu-Chek Connect app.

This seamless data synchronization simplifies tracking trends, identifying patterns, and sharing information with healthcare providers. The meter is designed for ease of use, featuring a clear display and intuitive operation. It’s intended to support proactive diabetes management, empowering users to make informed decisions about their health. The system aims to bridge the gap between self-monitoring and professional care, promoting better outcomes.

Key Features and Benefits

The Accu-Chek Guide Link Meter boasts several key features enhancing diabetes management. Bluetooth connectivity allows for effortless data logging and sharing with healthcare professionals, facilitating informed discussions. Its spill-resistant design offers durability and peace of mind. The meter’s strip ejector minimizes contact with used test strips, promoting hygiene.

Benefits include accurate and reliable blood glucose readings, empowering users to make informed decisions. The Accu-Chek Connect app provides personalized insights and trend analysis. Automated data transfer reduces manual logging errors. The compact size makes it convenient for travel. Ultimately, the system aims to simplify diabetes self-management, improving adherence and overall health outcomes, mirroring its growing global acceptance.

Setting Up Your Accu-Chek Guide Link Meter

Initial setup involves inserting the battery and setting the date/time; then, pair the meter with the Accu-Chek Connect app via Bluetooth for seamless data transfer.

Initial Setup and Activation

Beginning with your Accu-Chek Guide Link Meter requires a few simple steps to ensure accurate readings and connectivity. First, carefully insert the battery into the designated compartment, observing the correct polarity. The meter will automatically power on and initiate a self-check. Next, you’ll be prompted to set the date and time; accurate timekeeping is crucial for proper data logging and analysis within the Accu-Chek Connect app.

Activation typically involves registering your meter online through the Accu-Chek website or directly within the app. This process links your device to your account, enabling data storage and access to personalized support resources. Ensure you have a stable internet connection during activation. Following registration, the meter is ready for use, and you can proceed to perform your first blood glucose test. Proper initial setup is fundamental for a reliable and effective monitoring experience.

Connecting to the Accu-Chek Connect App

Seamlessly linking your Accu-Chek Guide Link Meter to the Accu-Chek Connect app unlocks a wealth of data management and analysis features. Begin by downloading the app from your device’s app store (iOS or Android). Once installed, open the app and create an account or log in if you already have one. The app will guide you through the pairing process, typically involving Bluetooth activation on both your meter and smartphone.

Ensure Bluetooth is enabled on your phone and that the meter is in pairing mode (refer to the meter’s user manual for specific instructions). The app will search for available devices and display your meter. Select your meter from the list, and a pairing code may appear on both screens for verification. Once paired, your blood glucose readings will automatically sync to the app, providing a comprehensive overview of your glucose trends and patterns.

Understanding the Meter Display

The Accu-Chek Guide Link Meter’s display is designed for clarity and ease of use, presenting vital information at a glance. The primary area showcases your current blood glucose reading in a large, easily readable font. Below this, you’ll find indicators for pre- and post-meal markers, allowing for contextualized data tracking. A directional arrow indicates whether your glucose level is rising, falling, or remaining stable, providing immediate trend awareness.

The display also incorporates Bluetooth connectivity status, battery level, and strip quality indicators. Error messages, if any, will appear clearly, prompting you to address the issue. Navigating the meter’s menu is intuitive, utilizing simple button presses to access memory recall, settings adjustments, and other functionalities. Familiarizing yourself with these elements ensures efficient and informed self-monitoring.

Using the Accu-Chek Guide Link Meter for Blood Glucose Testing

Accu-Chek Guide Link facilitates precise self-monitoring; proper technique and consistent timing are crucial for reliable results and effective diabetes management.

Preparing for a Blood Glucose Test

Before initiating a blood glucose test with your Accu-Chek Guide Link Meter, meticulous preparation is paramount for accurate readings. Begin by ensuring your hands are thoroughly clean – wash them with warm water and soap, then dry completely. This removes any substances that could interfere with the test.

Gather all necessary supplies: the meter itself, a test strip, a lancing device, and lancets. Insert a fresh lancet into the lancing device, adjusting the depth setting to suit your skin type. Ensure the test strip is compatible with the meter and insert it correctly into the designated port.

Prepare a sterile lancet for the finger prick. Select a suitable finger – typically the side of the fingertip is less sensitive. Gently massage the finger to encourage blood flow. Avoid squeezing the finger excessively, as this can dilute the sample and affect accuracy. Proper preparation minimizes discomfort and maximizes the reliability of your blood glucose measurement.

Performing a Blood Glucose Test – Step-by-Step

To perform a blood glucose test using the Accu-Chek Guide Link Meter, begin by activating the meter and ensuring the correct test strip is inserted. Once ready, gently prick the side of your fingertip with the lancing device.

Apply a small drop of blood to the designated area on the test strip – the meter will typically indicate when sufficient blood has been applied. Avoid smearing the blood; allow it to be absorbed by the strip.

The meter will then automatically begin the measurement process, displaying the blood glucose result within seconds. Record the result immediately, noting the date and time. Properly dispose of the used lancet and test strip in a sharps container. Consistent adherence to these steps ensures reliable and accurate blood glucose monitoring.

Understanding Your Blood Glucose Results

Interpreting results from the Accu-Chek Guide Link Meter requires understanding target ranges, typically defined by your healthcare provider. Generally, readings before meals should fall between 80-130 mg/dL, and 1-2 hours after meals, below 180 mg/dL.

However, individual goals vary based on factors like age, health status, and medication. Consistently high readings (hyperglycemia) may indicate a need to adjust diet, exercise, or medication. Conversely, low readings (hypoglycemia), below 70 mg/dL, require immediate attention – consume fast-acting carbohydrates.

The meter’s data logging and the Accu-Chek Connect app facilitate trend analysis, helping identify patterns and optimize diabetes management. Regular review of these results with your doctor is crucial for personalized care.

Data Management and Connectivity

The Accu-Chek Guide Link Meter seamlessly integrates with the Accu-Chek Connect app, enabling effortless data logging, storage, and convenient sharing with healthcare professionals.

Data Logging and Storage Capacity

The Accu-Chek Guide Link Meter boasts substantial data storage capabilities, meticulously recording blood glucose readings, meal times, and activity levels for comprehensive diabetes management. This meter efficiently logs a significant number of test results, allowing users to track trends over extended periods without frequent data downloads.

Specifically, the device can store up to 500 test results, providing a detailed history for review and analysis. Coupled with the Accu-Chek Connect app, this data is automatically uploaded and securely stored in the cloud, ensuring accessibility across multiple devices. This cloud storage eliminates the risk of data loss and facilitates seamless sharing with healthcare providers, fostering collaborative care. The combination of onboard storage and cloud connectivity offers a robust and reliable data management solution for individuals managing their diabetes effectively;

Sharing Data with Healthcare Professionals

The Accu-Chek Guide Link Meter streamlines data sharing with healthcare professionals, enhancing collaborative diabetes care. Through the Accu-Chek Connect app, users can effortlessly generate reports summarizing their blood glucose readings, trends, and adherence to treatment plans. These reports can be directly shared with doctors, endocrinologists, or certified diabetes educators via email or secure online portals.

This feature eliminates the need for manual logbooks and facilitates more informed discussions during appointments. Healthcare providers gain valuable insights into a patient’s glucose control between visits, enabling timely adjustments to medication or lifestyle recommendations. The secure data transmission ensures patient privacy and confidentiality, complying with relevant healthcare regulations. Ultimately, this seamless data exchange empowers both patients and healthcare teams to optimize diabetes management strategies.

Troubleshooting Connectivity Issues

Connectivity problems with the Accu-Chek Guide Link Meter and the Accu-Chek Connect app can occasionally occur. First, ensure Bluetooth is enabled on your smartphone and that the meter is in pairing mode. Verify the app has the necessary permissions (Bluetooth, location) within your phone’s settings. If pairing fails, try restarting both the meter and your smartphone.

Check for app updates, as outdated versions can cause compatibility issues. Confirm a stable internet connection is available for data synchronization. If issues persist, consider temporarily disabling other Bluetooth devices that might interfere. For ongoing problems, consult the Accu-Chek support website or contact customer service for assistance. Resetting the meter to factory settings (as a last resort) may resolve complex connectivity errors.

Advanced Features and Considerations

The Accu-Chek Guide Link Meter provides customizable alerts for hypo/hyperglycemia, meal and activity logging, and detailed data analysis via the Connect app.

Hypo and Hyperglycemia Alerts

The Accu-Chek Guide Link Meter’s proactive alert system is a crucial safety feature for individuals managing diabetes. Users can personalize high and low blood glucose thresholds, triggering notifications directly on the meter and through the connected Accu-Chek Connect app. This customization allows for tailored responses based on individual needs and healthcare provider recommendations.

These alerts aren’t simply warnings; they’re designed to prompt timely intervention, helping to prevent severe hypoglycemic or hyperglycemic events. The meter’s alerts can be particularly beneficial during sleep or periods of intense activity when blood glucose levels may fluctuate unexpectedly. The app integration extends the reach of these alerts, providing a secondary layer of notification and enabling remote monitoring by caregivers, if desired. Properly configured alerts empower users to proactively manage their condition and maintain stable blood glucose control.

Meal and Activity Logging

The Accu-Chek Guide Link Meter, when paired with the Accu-Chek Connect app, facilitates comprehensive meal and activity logging. This feature allows users to record details about their food intake – including carbohydrate content – and physical activity levels directly within the app. This data is then correlated with blood glucose readings, providing valuable insights into how different meals and activities impact glycemic control.

Detailed logging helps identify patterns and trends, enabling more informed decisions about diet and exercise. Users can customize meal entries and activity types, creating a personalized record of their daily routines. The app’s interface simplifies the logging process, making it convenient to track these important lifestyle factors. This holistic approach to diabetes management, combining glucose monitoring with lifestyle data, empowers users to optimize their overall health and well-being.

Accu-Chek Connect App – Detailed Functionality

The Accu-Chek Connect app serves as the central hub for managing data from your Guide Link Meter. Beyond simple data transfer, it offers a suite of tools for analysis and personalized insights. Users can view blood glucose trends, identify patterns, and track their progress over time through interactive charts and graphs. The app facilitates data sharing with healthcare professionals, streamlining communication and collaborative care.

It also supports meal and activity logging, allowing for a comprehensive view of lifestyle factors impacting glucose levels. Customizable alerts and reminders help maintain adherence to testing schedules and medication regimens. The app’s interface is designed for intuitive navigation, making it accessible for users of all technical abilities. Regular updates ensure continued functionality and integration with the latest Accu-Chek technologies.

Maintenance and Troubleshooting

Regular cleaning with a damp cloth ensures accuracy, while addressing error messages promptly—like connectivity issues—and replacing batteries maintains optimal Accu-Chek performance.

Meter Cleaning and Care

Maintaining your Accu-Chek Guide Link Meter’s cleanliness is crucial for accurate readings and longevity. Regularly wipe the meter’s exterior with a lightly dampened cloth – avoid harsh chemicals or abrasive cleaners, as these can damage the device. Focus on areas that come into contact with skin or blood.

The test strip port should be inspected periodically for debris and gently cleaned if necessary. Never insert anything into the port that could cause damage. Ensure the meter is completely dry before inserting new test strips. Proper care extends the meter’s lifespan and ensures reliable performance. Avoid extreme temperatures and humidity during storage, and always store the meter in a clean, dry place.

Remember to also clean the lancing device regularly, following the manufacturer’s instructions for that specific component. Consistent cleaning habits contribute to accurate blood glucose monitoring and overall device health.

Common Error Messages and Solutions

The Accu-Chek Guide Link Meter may display error messages indicating issues with test strips, blood application, or meter functionality. A “Strip Error” often means the test strip is damaged, expired, or improperly inserted – try a new strip. “Insufficient Sample” requires reapplying a larger blood drop to the strip.

If you encounter a “Meter Error,” try restarting the meter or replacing the battery. Connectivity issues, indicated by app-related errors, can often be resolved by ensuring Bluetooth is enabled and the meter is within range of your smartphone. Refer to the user manual for specific error code definitions and troubleshooting steps.

If errors persist, contact Accu-Chek customer support for assistance. Documenting the error message and the steps you’ve taken can expedite the support process, ensuring a swift resolution to maintain accurate glucose monitoring.

Battery Life and Replacement

The Accu-Chek Guide Link Meter operates on standard batteries, typically AAA size. Battery life varies depending on usage frequency and features enabled, such as Bluetooth connectivity. Generally, a fresh set of batteries should provide several months of reliable operation with moderate use.

A low battery indicator will appear on the meter’s display when replacement is needed. It’s crucial to replace batteries promptly to avoid inaccurate readings or data loss. Always use high-quality alkaline batteries for optimal performance. Avoid rechargeable batteries unless specifically approved by Roche, as voltage differences can affect accuracy.

Proper battery disposal is essential; follow local regulations for recycling. Regularly checking battery levels ensures uninterrupted glucose monitoring and maintains the meter’s functionality for consistent diabetes management.

guido gardens in metter ga

Guido Gardens in Metter, GA, is a renowned destination offering serene beauty and spiritual reflection. This 20-acre botanical gem features vibrant flora, a Prayer Chapel, and peaceful waterfalls, attracting visitors who seek tranquility and inspiration.

Overview of Guido Gardens

Guido Gardens in Metter, GA, is a breathtaking 20-acre botanical garden that combines natural beauty with spiritual tranquility. Known for its vibrant flora, sparkling waterfalls, and serene brooks, the gardens offer a peaceful escape for visitors. The centerpiece, the Prayer Chapel, adds a touch of inspiration, making it a perfect spot for reflection. With its well-manicured paths and diverse plant species, the gardens cater to nature lovers, photographers, and those seeking solace. Whether strolling through the grounds or attending one of the seasonal events, Guido Gardens provides a unique and unforgettable experience. Its tranquil atmosphere and stunning landscapes make it a beloved destination for both locals and travelers alike.

Location and Directions

Guido Gardens is conveniently located at 600 N. Lewis Street, Metter, GA 30495. Situated in the heart of southern Georgia, the gardens are easily accessible for both locals and travelers. Visitors traveling on Interstate 16 can take exit 104, which places them just 2 miles from the gardens. The strategic location makes it a popular stop for those exploring the region. With clear signage and ample parking, reaching Guido Gardens is straightforward. The address ensures that GPS navigation can guide visitors directly to the entrance. Whether you’re coming from nearby cities or farther away, the gardens’ accessible location makes it a must-visit destination in southern Georgia.

History of Guido Gardens

Guido Gardens was founded by the Guido family, evolving from a small, private project into a beloved community treasure. Its transformation over the years reflects dedication to beauty and tranquility.

Founding and Evolution

Guido Gardens was established by the Guido family, beginning as a modest, private garden. Over time, it expanded into a 20-acre botanical haven, blending natural beauty with spiritual elements. The addition of the Prayer Chapel marked a significant milestone, reflecting the founders’ vision to create a space for reflection and inspiration. As the gardens grew, so did their appeal, attracting visitors from across the region. The evolution of Guido Gardens has been shaped by a commitment to preserving tranquility and fostering a connection between nature and spirituality. Today, it stands as a testament to the Guido family’s dedication to creating a sanctuary for all to enjoy.

  • The gardens began as a private project and gradually opened to the public.
  • The Prayer Chapel was added to enhance the spiritual ambiance.
  • Expansions included waterfalls, brooks, and walking paths, enriching the visitor experience.

Significance in Metter, GA

Guido Gardens holds a special place in the heart of Metter, GA, serving as a cultural and spiritual landmark. It attracts visitors from across the region, boosting local tourism and fostering community pride. The gardens’ serene atmosphere and beautiful landscapes make it a cherished destination for both locals and travelers. As a hub for events and reflection, Guido Gardens plays a vital role in the social and economic fabric of Metter, offering a peaceful escape and inspiring a sense of connection to nature and spirituality.

  • A beloved landmark that enhances Metter’s charm and identity.
  • Supports local tourism, contributing to the area’s economic growth.
  • Provides a tranquil space for community gatherings and personal reflection.

Key Features of Guido Gardens

Guido Gardens showcases a Prayer Chapel, vibrant botanical diversity, sparkling waterfalls, and serene walking paths, offering a tranquil retreat for reflection and inspiration.

  • Prayer Chapel for spiritual reflection.
  • Botanical diversity with vibrant flora.
  • Sparkling waterfalls and babbling brooks.
  • Serenity-filled walking paths.

The Prayer Chapel

The Prayer Chapel at Guido Gardens is a serene and sacred space designed for reflection and meditation. Nestled within the gardens, it offers a peaceful retreat where visitors can connect with nature and spirituality. The chapel’s tranquil atmosphere, complemented by inspiring music, creates a perfect setting for introspection. Its elegant design blends seamlessly with the surrounding botanical beauty, making it a focal point for those seeking solace or inspiration. The Prayer Chapel is not only a spiritual hub but also a symbol of the gardens’ commitment to fostering peace and harmony. Visitors often describe it as a place where they can escape the chaos of everyday life and find inner calm. Whether for personal reflection or group prayer, the chapel remains a cherished destination within Guido Gardens.

Botanical Diversity

Guido Gardens in Metter, GA, boasts an impressive array of plant species, creating a vibrant and dynamic landscape. The gardens are home to a wide variety of flowers, shrubs, and trees, carefully curated to thrive in the local climate. Visitors can explore the ever-changing beauty of the gardens, with seasonal blooms adding color and texture throughout the year. From lush greenery to vibrant floral displays, the botanical diversity ensures there is always something new to discover. The gardens also feature waterfalls and brooks, which support a range of aquatic plants and attract wildlife. This natural oasis offers a peaceful escape, showcasing the beauty of nature and the art of horticulture. The botanical diversity of Guido Gardens makes it a must-visit destination for nature lovers and gardening enthusiasts alike.

Waterfalls and Brooks

The waterfalls and brooks at Guido Gardens in Metter, GA, are among its most captivating features, creating a serene and immersive natural experience. The gentle flow of the brooks and the soothing sound of cascading waterfalls provide a tranquil backdrop for visitors to relax and unwind. These water features are thoughtfully integrated into the garden’s design, enhancing the overall sense of peace and connection to nature. The sparkling waterfalls attract visitors year-round, offering picturesque spots for reflection and photography. The brooks, with their clear waters, add a sense of movement and life to the gardens, complementing the vibrant flora and fauna. Together, the waterfalls and brooks create a meditative atmosphere, making Guido Gardens a haven for those seeking solace and inspiration in a beautiful natural setting.

Walking Paths and Serenity

The walking paths at Guido Gardens in Metter, GA, are meticulously designed to offer a serene and immersive experience. These meandering trails wind through the gardens, inviting visitors to explore the lush surroundings at a leisurely pace. The paths are well-maintained, ensuring accessibility for all, and are lined with vibrant flora, creating a picturesque backdrop for a peaceful stroll; The tranquil atmosphere is enhanced by the soothing sounds of nature, including the gentle rustle of leaves and the soft chirping of birds. Visitors often describe the experience as a perfect escape from the hustle and bustle of daily life, offering moments of reflection and relaxation. Whether walking for exercise or simply to unwind, the paths at Guido Gardens provide a sense of calm and connection to the natural world.

Events at Guido Gardens

Guido Gardens hosts various events, including the popular Night of Lights Show, seasonal activities, and weddings. These events bring the community together, fostering joy and connection in a serene setting.

The Night of Lights Show

The Night of Lights Show at Guido Gardens was a beloved annual event, transforming the gardens into a dazzling winter wonderland. Featuring thousands of twinkling lights, festive music, and intricate displays, it became a cherished holiday tradition for many. Visitors strolled through the illuminated paths, enjoying the magical ambiance and seasonal decorations. The event brought families and friends together, creating lasting memories. However, after over 30 years, the show came to an end, leaving a bittersweet sentiment in the community. Despite its conclusion, the legacy of the Night of Lights remains a testament to the gardens’ ability to inspire joy and togetherness during the holiday season.

Seasonal Activities

Guido Gardens in Metter, GA, offers a variety of seasonal activities that cater to all ages and interests. During the spring, visitors can enjoy the vibrant blooms of flowers and participate in gardening workshops. Summer brings outdoor concerts and family-friendly events, while fall features harvest-themed activities and scenic walks amid changing foliage. The gardens also host holiday events, such as festive light displays and seasonal markets, creating a magical atmosphere for visitors. These activities not only showcase the gardens’ beauty but also foster a sense of community. Whether it’s a relaxing stroll, a educational workshop, or a festive celebration, Guido Gardens provides a unique and enriching experience for every season, making it a must-visit destination throughout the year.

Weddings and Private Events

Guido Gardens in Metter, GA, is a picturesque destination for weddings and private events, offering a serene and breathtaking backdrop. The gardens’ lush landscapes, sparkling waterfalls, and the iconic Prayer Chapel create a romantic and tranquil atmosphere, perfect for exchanging vows or celebrating special occasions. Couples can choose from various scenic spots, including the chapel or beneath a canopy of vibrant flora, to host their ceremonies and receptions. The gardens also provide ample space for private events, such as anniversaries, birthdays, or corporate gatherings. With its natural beauty and inspiring ambiance, Guido Gardens has become a sought-after venue for those seeking a unique and memorable experience. The staff offers support for event planning, ensuring every detail is tailored to create unforgettable moments.

Visitor Information

Guido Gardens is located at 600 N. Lewis Street, Metter, GA. Visitors can explore the gardens during operating hours, with tickets available for admission to this serene destination.

Hours of Operation

Guido Gardens in Metter, GA, is open to visitors from 8:00 AM to 6:00 PM daily. The gardens offer a peaceful retreat, with extended hours during seasonal events like the Night of Lights Show. Visitors are encouraged to plan their visits during these times to fully experience the serene atmosphere and beautiful landscapes. The gardens are closed on select holidays, so it’s advisable to check the official schedule before planning a visit. The flexible hours cater to both early risers and those who prefer a late afternoon stroll, ensuring everyone can enjoy the tranquility of the gardens. Seasonal variations may apply, especially around holidays, so visitors should confirm hours beforehand to avoid disappointment.

Ticketing and Admission

Guido Gardens in Metter, GA, offers a straightforward ticketing process to ensure a smooth visit. General admission is priced at $12 for adults, $10 for seniors (65+), and $6 for children aged 6-12. Children under 6 enter free of charge. Special event tickets, such as the Night of Lights Show, may vary in price, typically ranging from $15 to $20 per person. Tickets can be purchased online in advance or at the gate upon arrival. Discounts are available for military personnel, students, and groups of 10 or more with prior reservations. Annual passes are also available for frequent visitors, offering unlimited access for a year. It’s recommended to buy tickets online during peak seasons to avoid wait times. The gardens strive to make their serene environment accessible to all while maintaining affordable pricing for families and individuals alike.

Plan Your Visit

Planning a visit to Guido Gardens in Metter, GA, ensures a memorable experience. Located at 600 N. Lewis Street, the gardens are easily accessible from Interstate 16, exit 104. Visitors are encouraged to arrive early to maximize their time exploring the 20-acre property. Comfortable walking shoes are recommended, as the gardens feature extensive paths winding through lush landscapes. Bring water and sunscreen for a day outdoors, and check the weather forecast to plan accordingly. Allow at least 2-3 hours to fully enjoy the Prayer Chapel, waterfalls, and botanical diversity. Peak seasons, such as spring and fall, offer stunning views, while the Night of Lights Show attracts crowds during the holiday season. Plan your visit around these events or opt for a quieter experience during weekdays. With its serene atmosphere, Guido Gardens is a perfect destination for relaxation and inspiration.

Tips for Visitors

Visiting Guido Gardens in Metter, GA, is a delightful experience, and with a few tips, you can make the most of your trip. Wear comfortable walking shoes, as the gardens span 20 acres with winding paths. Bring water and sunscreen, as you’ll likely spend time outdoors. Check the weather forecast to plan your attire. Arrive early to avoid crowds, especially during peak seasons like spring and fall. Respect the gardens by not picking flowers or littering. Be mindful of personal belongings, as occasional vandalism has been reported. Allow time to explore the Prayer Chapel and enjoy the serene waterfalls. Avoid visiting during heavy rain, as paths may become slippery. Bring a camera to capture the stunning botanical diversity. Lastly, plan for at least 2-3 hours to fully experience the gardens’ beauty and tranquility. These tips ensure a memorable and enjoyable visit to Guido Gardens.

Community Involvement

Guido Gardens in Metter, GA, is a beloved landmark that supports local initiatives and fosters community spirit through its serene environment and cultural events, enriching the local area.

Local Impact

Guido Gardens has become a cornerstone of Metter, GA, fostering community spirit and providing a peaceful retreat for residents and visitors alike. Its serene environment and cultural events have made it a hub for local gatherings, promoting unity and pride among the community. The gardens also contribute to the local economy by attracting tourists, who often support nearby businesses. Additionally, Guido Gardens has been involved in charitable initiatives, further enhancing its role as a positive force in the area. By offering a space for reflection and connection, it has become an integral part of Metter’s identity, ensuring its legacy as a place of beauty and community enrichment.

Charitable Initiatives

Guido Gardens has long been committed to giving back to the community. Through various charitable initiatives, the gardens have supported local causes, fostering a spirit of generosity and compassion. A portion of the proceeds from events like the Night of Lights Show has been donated to local charities, helping those in need. Additionally, the gardens have hosted fundraising events for community projects, such as park improvements and educational programs. The Prayer Chapel has also served as a venue for community support gatherings, offering a peaceful space for reflection and unity. By prioritizing charitable efforts, Guido Gardens has strengthened its bond with the people of Metter, GA, becoming more than just a botanical destination but a beacon of hope and kindness in the region.

Challenges and Controversies

Guido Gardens has faced challenges, including vandalism incidents and the conclusion of the Night of Lights Show, affecting its role in the Metter, GA community.

Vandalism Incidents

Guido Gardens in Metter, GA, has faced unfortunate vandalism incidents, particularly during peak visitation seasons. These acts of vandalism, including theft and property damage, have occurred despite the gardens’ peaceful ambiance. The most notable incident happened during the Christmas season, targeting the Night of Lights Show, a beloved community event. This not only caused financial loss but also disheartened visitors and staff. The vandalism highlighted the challenges of maintaining a public space and the need for increased security measures. Despite these setbacks, the gardens remain a cherished destination, showcasing resilience and community support. The incidents serve as a reminder of the importance of preserving such serene and culturally significant spaces for future generations.

End of the Night of Lights Show

The Night of Lights Show at Guido Gardens in Metter, GA, a cherished annual event, has come to an end after over 30 years. This decision, while bittersweet for the community, was made by the organizers behind the scenes. The show, known for its dazzling light displays and festive atmosphere, had become a holiday tradition for many. Its conclusion marks the end of an era, leaving visitors with fond memories. The gardens will continue to offer other attractions, but the Night of Lights will be deeply missed. This change underscores the evolving nature of community events and the challenges of sustaining long-running traditions. The legacy of the show remains a testament to its impact on the region’s cultural landscape.

Legacy of Guido Gardens

Guido Gardens stands as a cultural treasure in Metter, GA, inspiring visitors with its serene beauty and spiritual ambiance. Its enduring legacy continues to captivate hearts and minds, fostering a deep connection to nature and community, ensuring its impact for generations to come.

Cultural Significance

Guido Gardens holds a profound cultural significance in Metter, GA, serving as a symbol of tranquility and spiritual renewal. The gardens have become a cherished landmark, blending natural beauty with inspirational spaces like the Prayer Chapel. They foster a sense of community, offering a serene escape for reflection and connection. The botanical diversity and artistic design attract visitors from across the region, making it a hub for cultural enrichment. Over the years, the gardens have inspired countless individuals, creating lasting memories and a shared appreciation for nature’s beauty. This cultural treasure continues to be a source of pride and inspiration, embodying the values of harmony and spirituality that resonate deeply with the local community and beyond.

Future Prospects

Guido Gardens in Metter, GA, is poised for a bright future, with plans to expand its offerings while preserving its serene charm. The gardens aim to enhance visitor experiences through new attractions and improved facilities. Sustainability initiatives are being explored to maintain the ecological balance of the botanical haven. Community engagement will remain a priority, with plans for educational programs and cultural events. The gardens also hope to introduce new themed sections and interactive exhibits to attract a wider audience. Despite the conclusion of the Night of Lights Show, the venue is committed to innovating and adapting to ensure its legacy endures. By blending tradition with modern ideas, Guido Gardens continues to be a beacon of beauty and inspiration for future generations, solidifying its role as a cultural and spiritual hub in the region.

Guido Gardens stands as a timeless haven, blending natural beauty with spiritual solace, leaving a lasting impression on all who visit this cherished destination in Metter, GA.

Final Thoughts

Guido Gardens in Metter, GA, is a place where nature and spirituality converge, offering visitors a serene escape from the world. Its 20-acre landscape, adorned with vibrant flora, sparkling waterfalls, and a peaceful Prayer Chapel, creates an atmosphere of tranquility and reflection. While challenges like vandalism and the end of the Night of Lights Show have impacted the gardens, their beauty and significance remain undiminished. The gardens continue to be a cherished destination, attracting those seeking solace, inspiration, and connection with nature. As a cultural and spiritual landmark, Guido Gardens leaves a lasting impression on all who visit, ensuring its legacy as a haven of peace and beauty for generations to come.

Call to Action

Discover the serene beauty of Guido Gardens in Metter, GA, and experience a haven of peace and inspiration. Plan your visit today and explore the stunning botanical diversity, tranquil waterfalls, and the iconic Prayer Chapel. Whether you’re seeking solace, nature, or a unique event venue, the gardens offer something for everyone. Don’t forget your camera to capture the breathtaking views! Consider supporting this beloved landmark by attending events like the Night of Lights Show or participating in seasonal activities. Bring your family and friends to enjoy the walking paths and serene atmosphere. Help preserve this gem for future generations by respecting the grounds and supporting its charitable initiatives. Visit Guido Gardens and let its beauty inspire you. Plan your trip now and create lasting memories in this peaceful retreat!

hvac study guide

HVAC stands for Heating, Ventilation, and Air Conditioning, essential for maintaining indoor air quality and thermal comfort․ This guide provides a comprehensive overview of HVAC fundamentals, preparing you for certification exams and practical applications in the field․ Understanding HVAC systems is crucial for technicians, as they play a vital role in modern buildings․ Start your journey with this detailed study guide to master the basics and advanced concepts of HVAC technology․

1․1 What is HVAC?

HVAC stands for Heating, Ventilation, and Air Conditioning․ It refers to systems designed to regulate indoor air quality, temperature, and humidity for comfort and health․ These systems are essential in residential, commercial, and industrial settings․ HVAC technology integrates mechanical engineering, thermodynamics, and electronics to provide controlled environments․ Understanding HVAC basics is crucial for technicians, as it forms the foundation for installation, maintenance, and repair․ This section provides a clear overview of HVAC fundamentals, preparing you for advanced topics in the study guide․

1․2 Importance of HVAC in Modern Buildings

HVAC systems are vital in modern buildings for maintaining indoor air quality, thermal comfort, and energy efficiency․ They ensure a healthy environment by controlling humidity, temperature, and air circulation․ In commercial spaces, HVAC systems enhance productivity and employee well-being․ Residential buildings rely on HVAC for comfort and safety․ Additionally, HVAC plays a key role in energy conservation, helping buildings meet sustainability standards․ This section highlights the significance of HVAC in creating livable and efficient spaces, essential for both functionality and occupant satisfaction․

1․3 Brief History of HVAC Technology

The history of HVAC technology dates back to the early 20th century, with the invention of the first mechanical air conditioning system by Willis Carrier in 1902․ This innovation revolutionized industries by controlling humidity and temperature․ Over the years, advancements in thermodynamics, materials, and electronics led to more efficient systems․ Modern HVAC systems now integrate smart technologies, energy-efficient designs, and sustainable practices, making them indispensable in both residential and commercial settings․ This evolution underscores HVAC’s critical role in improving comfort and productivity․

Key Components of HVAC Systems

HVAC systems consist of heating, cooling, and ventilation components․ Key elements include furnaces, boilers, heat pumps, air conditioners, ducts, fans, and filters, ensuring efficient temperature and air quality regulation․

2․1 Heating Systems: Furnaces, Boilers, and Heat Pumps

Furnaces, boilers, and heat pumps are core heating components in HVAC systems․ Furnaces heat air using fuel or electricity, while boilers produce hot water or steam for distribution․ Heat pumps transfer heat between indoor and outdoor spaces, offering energy efficiency․ Each system has unique applications, with furnaces common in dry climates, boilers in radiant heating, and heat pumps ideal for moderate temperatures; Understanding their operation and installation is vital for HVAC technicians to ensure reliable and efficient heating solutions․

2․2 Cooling Systems: Air Conditioners and Chillers

Cooling systems, including air conditioners and chillers, are essential for maintaining comfortable temperatures․ Air conditioners circulate refrigerant to absorb heat and moisture, cooling indoor air․ Chillers produce chilled water for large-scale cooling applications․ Both systems rely on heat transfer principles, with air conditioners using direct expansion coils and chillers employing water circulation․ Proper installation and maintenance ensure efficient operation, making them vital components in modern HVAC setups for residential and commercial spaces․

2․3 Ventilation Systems: Air Ducts, Fans, and Filters

Ventilation systems ensure proper air circulation and quality by distributing conditioned air and removing contaminants․ Air ducts act as pathways for air to flow throughout a building, while fans provide the necessary airflow․ Filters capture particulates and pollutants, improving indoor air quality․ Regular maintenance of these components is crucial to prevent issues like mold growth or reduced efficiency․ Proper installation and upkeep ensure optimal performance, making ventilation systems indispensable for maintaining a healthy and comfortable environment․

HVAC Tools and Equipment

HVAC tools include multimeters, thermometers, and duct testers․ Safety equipment like gloves and goggles is essential․ These tools ensure proper and safe system maintenance and repairs․

3․1 Essential Tools for HVAC Technicians

HVAC technicians rely on tools like multimeters, thermometers, and duct testers for precise measurements․ Manifold gauges and vacuum pumps are crucial for handling refrigerants․ Leak detectors and pressure testers ensure system integrity․ Wrenches, pliers, and screwdrivers are everyday essentials․ Safety equipment, including gloves and goggles, protects technicians during repairs․ These tools are vital for diagnosing, installing, and maintaining HVAC systems efficiently and safely, ensuring optimal performance and compliance with industry standards․

3․2 Safety Equipment and Protective Gear

Safety is paramount in HVAC work․ Technicians must wear gloves, goggles, and respirators to protect against harmful substances․ Steel-toe boots and hard hats are essential on job sites․ High-pressure systems require specialized gear to prevent injuries․ Regular inspection of equipment ensures reliability․ Proper protective gear not only prevents accidents but also ensures compliance with safety regulations․ Always prioritize safety to maintain a secure working environment and protect against potential hazards in HVAC operations․

HVAC Installation and Maintenance

HVAC installation and maintenance are critical for ensuring system efficiency and longevity․ Proper planning, design, and adherence to best practices during installation are essential․ Regular maintenance, including filter cleaning and component inspections, prevents breakdowns and optimizes performance․ Troubleshooting common issues early helps maintain indoor air quality and comfort․ Follow established guidelines to ensure safe and effective HVAC system operation․

4․1 Planning and Designing HVAC Systems

Planning and designing HVAC systems involve assessing space requirements, load calculations, and airflow needs․ Proper design ensures efficient heating, cooling, and ventilation․ Factors like insulation, window placement, and occupancy levels are considered․ Designing ductwork and selecting appropriate equipment are critical for optimal performance․ A well-planned system balances energy efficiency, cost, and comfort․ Using advanced tools and guidelines helps technicians create effective HVAC solutions tailored to specific buildings․ This step is foundational for successful installation and long-term system reliability․

4․2 Installation Best Practices

Proper installation is crucial for HVAC system efficiency and longevity․ Follow manufacturer guidelines for equipment placement and sizing․ Ensure ductwork is sealed and insulated to prevent air leaks․ Use high-quality materials and tools to avoid future issues․ Test the system post-installation to confirm airflow and performance․ Regularly inspect and adjust components for optimal operation․ Adherence to safety protocols and local codes ensures compliance and reliability․ Poor installation can lead to reduced efficiency, higher energy costs, and premature system failure, making best practices essential for success․

4․3 Regular Maintenance and Troubleshooting

Regular maintenance is vital for HVAC system performance and longevity․ Clean filters, inspect ducts, and check for leaks to ensure efficiency․ Troubleshoot common issues like uneven heating, strange noises, or poor airflow․ Use diagnostic tools to identify problems quickly; Address refrigerant leaks, electrical issues, or thermostat malfunctions promptly․ Schedule professional tune-ups annually to prevent breakdowns․ Proper maintenance reduces energy bills, extends equipment life, and ensures reliable operation․ Stay proactive to avoid costly repairs and maintain optimal indoor comfort year-round․

HVAC Diagnosis and Repair

Diagnosing HVAC issues involves identifying malfunctions, such as refrigerant leaks or electrical faults․ Repair requires precision tools and adherence to safety protocols to ensure system efficiency and longevity․

5․1 Common Issues in HVAC Systems

HVAC systems often face issues like refrigerant leaks, clogged air filters, and malfunctioning thermostats․ Duct leaks and improper insulation can reduce efficiency, while faulty compressors or coils may require replacement․ Regular maintenance helps prevent these problems, ensuring optimal performance and energy savings․ Technicians should also address condensate drain blockages and sensor malfunctions to maintain system reliability and indoor air quality․ Identifying these issues early is key to extending the lifespan of HVAC equipment and preventing costly repairs․

5․2 Diagnostic Techniques and Tools

Diagnosing HVAC issues requires a combination of advanced tools and techniques․ Essential tools include multimeters for electrical testing, thermometers for temperature measurement, and pressure gauges for refrigerant systems․ Infrared cameras detect temperature anomalies, while digital manifolds analyze refrigerant flow․ Technicians also use leak detectors to identify refrigerant leaks and vacuum pumps to ensure system integrity․ Proper use of these tools, along with a systematic approach, helps pinpoint issues efficiently․ Regular training and familiarity with diagnostic equipment are crucial for accurate troubleshooting and effective repairs․

5․3 Repair Procedures and Safety Precautions

When performing HVAC repairs, always follow established procedures to ensure safety and effectiveness․ Recover refrigerant properly using approved equipment to prevent environmental harm․ Wear protective gear, including gloves and safety goggles, to avoid injuries․ Use leak detectors to identify and seal refrigerant leaks, and ensure systems are free of air and condensables before recharging․ Always follow manufacturer guidelines and industry standards for handling refrigerants and electrical components․ Proper safety practices minimize risks and ensure reliable system operation after repairs․

EPA Section 608 Certification

The EPA Section 608 Certification is crucial for HVAC technicians handling refrigerants․ This study guide helps prepare for the exam, covering regulations and safe practices․ Stay compliant and updated with the latest requirements to ensure environmental protection and professional competence in refrigerant handling and system maintenance․

6․1 Overview of the EPA Section 608 Exam

The EPA Section 608 exam certifies technicians to handle refrigerants safely and legally․ It ensures compliance with environmental regulations under the Clean Air Act․ The exam covers four certification levels: Type I, II, III, and Universal․ Each level tests knowledge in areas like refrigerant safety, recovery, and system service․ Passing the exam demonstrates competence in minimizing refrigerant emissions and protecting the ozone layer․ This certification is mandatory for HVAC professionals working with refrigerants, emphasizing environmental responsibility and technical proficiency․

6․2 Study Materials and Resources

Effective preparation for the EPA Section 608 exam requires reliable study materials․ The International Training Institute offers a comprehensive study guide with updated information on refrigerant handling and environmental regulations․ Additionally, the EPA manual provides detailed insights into the Clean Air Act and certification requirements․ Online resources, such as practice exams and tutorials, are also available to reinforce learning․ Utilizing these materials ensures technicians are well-prepared to pass the exam and comply with industry standards․

6․3 Tips for Passing the Certification

To excel in the EPA Section 608 exam, thorough preparation is essential․ Utilize the official study guide and practice exams to familiarize yourself with the format and content․ Focus on understanding key concepts, such as refrigerant handling, recovery, and environmental regulations․ Regular review of the Clean Air Act and hands-on practice with recovery equipment will enhance your confidence․ Time management during the exam is crucial, so ensure you allocate enough time to each section․ Stay calm and methodical to achieve success;

HVAC Controls and Thermostats

HVAC controls and thermostats regulate temperature, humidity, and airflow, ensuring optimal comfort and energy efficiency․ They integrate with modern systems, offering precise control and smart home compatibility․

7․1 Types of HVAC Controls

HVAC systems utilize various control types, including manual, automatic, and smart controls․ Manual controls, like basic thermostats, allow simple temperature adjustments․ Automatic controls, such as timers and sensors, optimize performance by regulating operations based on set parameters․ Smart controls integrate advanced technologies, enabling remote monitoring and energy-efficient adjustments․ These systems enhance comfort, reduce energy consumption, and ensure precise control over heating, cooling, and ventilation․ Understanding these control types is essential for effective HVAC system management and maintenance․

7․2 Programmable and Smart Thermostats

Programmable thermostats allow users to set temperature schedules, optimizing energy use and comfort․ Smart thermostats take it further by learning preferences, adapting to routines, and integrating with smart home systems․ These advanced devices often feature remote access via apps, geofencing, and energy usage reports․ They can also adjust settings based on outdoor conditions and indoor humidity․ Smart thermostats reduce energy waste and enhance convenience, making them a popular choice for modern HVAC systems․ They are key tools for achieving energy efficiency and seamless temperature control․

7․3 Wiring and Configuration Basics

Proper wiring and configuration are critical for HVAC system functionality․ Technicians must understand wiring diagrams and connections between thermostats, sensors, and control boards․ Correct wiring ensures safe and efficient operation, preventing malfunctions․ Configuration involves setting up system parameters, such as temperature ranges and fan speeds․ Always consult the manufacturer’s manual for specific instructions․ Testing tools like multimeters can verify circuit integrity․ Common mistakes include incorrect wire connections or misconfigured settings, which can lead to system failures․ Regular inspections and updates ensure optimal performance and safety․

Energy Efficiency in HVAC Systems

Energy efficiency in HVAC systems is crucial for reducing energy consumption and costs․ Modern technologies like smart thermostats and variable-speed systems optimize performance․ Regular maintenance ensures peak efficiency, lowering environmental impact and operational expenses․ Understanding SEER, AFUE, and HSPF ratings helps in selecting energy-efficient equipment․ Best practices include proper insulation, duct sealing, and upgrading to high-efficiency units․ These strategies promote sustainability and long-term savings, making HVAC systems more eco-friendly and cost-effective․

8․1 Energy-Saving Technologies

Energy-saving technologies in HVAC systems include inverter-driven compressors, smart thermostats, and geothermal integration․ Inverter technology adjusts compressor speed, reducing energy consumption․ Smart thermostats optimize temperature control, learning usage patterns․ Geothermal systems leverage earth’s stable temperature for efficient heating and cooling․ Solar-powered HVAC systems further reduce reliance on traditional energy sources․ These technologies significantly lower energy consumption and operational costs while minimizing environmental impact․ They are essential for modern, eco-friendly HVAC solutions, ensuring high efficiency and sustainability in various applications․

8․2 SEER, AFUE, and HSPF Ratings

SEER (Seasonal Energy Efficiency Ratio), AFUE (Annual Fuel Utilization Efficiency), and HSPF (Heating Seasonal Performance Factor) are key ratings for HVAC systems․ SEER measures cooling efficiency, AFUE assesses furnace performance, and HSPF evaluates heat pump efficiency․ Higher ratings indicate better energy efficiency and lower operational costs․ These standards help consumers and technicians understand system performance, guiding decisions for energy-saving solutions․ They are crucial for optimizing HVAC systems, reducing energy consumption, and promoting sustainability in heating and cooling applications․

8․3 Best Practices for Reducing Energy Consumption

To reduce energy consumption, prioritize regular HVAC system maintenance, including filter cleaning and duct sealing․ Use programmable thermostats to optimize temperature settings․ Upgrade to energy-efficient equipment with high SEER, AFUE, or HSPF ratings․ Consider smart home integration for advanced control․ Schedule professional inspections annually and invest in system upgrades when necessary․ These practices not only lower energy bills but also extend system lifespan and promote environmental sustainability․ Consistent upkeep ensures optimal performance and energy savings․

Advanced HVAC Technologies

Explore cutting-edge HVAC innovations like inverter technology, geothermal systems, and smart home integration․ These advancements enhance energy efficiency, performance, and automation, shaping the future of climate control․

9․1 Inverter Technology in HVAC

Inverter technology in HVAC systems adjusts compressor speed to match cooling or heating demand, enhancing efficiency and reducing noise․ By modulating power usage, inverters optimize performance, lowering energy bills and emissions․ This technology integrates seamlessly with smart home systems, enabling remote monitoring and precise temperature control․ Inverters also extend equipment lifespan by reducing startup stress․ Their adaptability makes them ideal for modern, energy-conscious designs, ensuring consistent comfort while minimizing operational costs․

9․2 Geothermal and Solar HVAC Systems

Geothermal HVAC systems utilize the earth’s stable temperature for efficient heating and cooling, reducing energy consumption and environmental impact․ Solar HVAC systems harness solar energy to power heating, cooling, or ventilation, offering a sustainable alternative․ Both technologies integrate seamlessly with traditional systems, providing significant energy savings and lower operational costs․ These eco-friendly solutions are ideal for environmentally conscious designs, promoting sustainability while maintaining comfort and efficiency in modern buildings․

9․3 Smart Home Integration and IoT in HVAC

Smart home technology and IoT are revolutionizing HVAC systems by enabling seamless integration with other devices․ Smart thermostats, like programmable and Wi-Fi-enabled models, allow users to control temperatures remotely via smartphones․ IoT sensors optimize energy use by adjusting settings based on occupancy and preferences․ This integration enhances comfort, reduces energy waste, and improves system efficiency․ Advanced systems can even learn heating and cooling patterns to automate operations, ensuring optimal performance while minimizing manual intervention․

HVAC Industry Trends and Future Outlook

The HVAC industry is evolving rapidly, with a focus on smart technology, sustainability, and energy efficiency․ Emerging trends include inverter technology, geothermal systems, and IoT integration, driving innovation and eco-friendly solutions․

10․1 Emerging Trends in the HVAC Industry

The HVAC industry is embracing smart technology, inverter-driven systems, and renewable energy integration․ Geothermal and solar HVAC systems are gaining traction, while IoT-enabled devices enhance system efficiency․ These trends focus on sustainability and energy savings, aligning with global efforts to reduce carbon footprints․ Additionally, advancements in programmable and smart thermostats allow for precise temperature control, optimizing comfort and energy usage․ These innovations are reshaping the industry, offering eco-friendly solutions and improving system performance․

10․2 Impact of Sustainability on HVAC

Sustainability is transforming the HVAC industry by prioritizing energy efficiency and eco-friendly solutions․ Technologies like geothermal systems and solar integration reduce reliance on fossil fuels․ High-efficiency ratings such as SEER and AFUE are now standard, promoting lower energy consumption․ Additionally, smart thermostats optimize performance, reducing waste․ These advancements not only minimize environmental impact but also lower operational costs, making sustainable HVAC practices a win-win for both businesses and the planet․

10․3 Career Opportunities in HVAC

The HVAC industry offers diverse and rewarding career paths, from technicians and installers to engineers and system designers․ With increasing demand for energy-efficient solutions, skilled professionals are in high demand․ Job roles include HVAC technicians, installers, and service managers, with opportunities in residential, commercial, and industrial sectors․ The rise of smart technology and sustainable practices further expands career prospects․ Certification programs, like EPA Section 608, enhance employability․ Competitive salaries and steady growth make HVAC a stable and lucrative field for aspiring professionals․

Additional Resources and Study Materials

Explore free HVAC PDF books, guides, and online courses for comprehensive learning․ Utilize practice exams and assessment tools to enhance your skills and prepare for certification success․

11․1 Recommended Books and Guides

Enhance your HVAC knowledge with Basic HVAC by Aaron Lee, available for free under a CC BY 4․0 Licence․ The Section 608 Study Guide by the International Training Institute is another valuable resource, offering detailed exam preparation․ Additionally, HVAC 101 by the Mechanical Service Contractors of America provides foundational understanding․ These books and guides are essential for both beginners and experienced technicians, covering theory, practical applications, and certification prep․

11․2 Online Courses and Tutorials

Expand your HVAC expertise with online courses and tutorials designed for both beginners and professionals․ Platforms offer free HVAC practice tests with 300+ questions based on certification exams, helping you assess your knowledge․ Additionally, websites provide free HVAC PDF guides and resources for learning and projects․ These online tools are ideal for exam preparation, skill enhancement, and staying updated with industry trends․ Utilize these resources to gain hands-on experience and deepen your understanding of HVAC systems and technologies․

11․3 Practice Exams and Assessment Tools

Enhance your exam readiness with free HVAC practice tests featuring 300+ questions based on certification exams․ These tools allow you to assess your knowledge, identify weak areas, and improve understanding․ Practice exams simulate real test conditions, helping you gain confidence and familiarity with the format․ Utilize these resources to refine your skills, track progress, and ensure you’re well-prepared for certification․ Regular practice with assessment tools is key to achieving success in your HVAC studies and career advancement․

Mastering HVAC concepts requires dedication and practice․ Utilize study guides, practice exams, and resources to reinforce learning․ Stay updated with industry trends and advancements to excel in this rewarding field․

12․1 Summary of Key Concepts

This HVAC study guide covers essential topics from basic principles to advanced technologies․ Key concepts include understanding heating, cooling, and ventilation systems, energy efficiency, and safety protocols․ The importance of EPA Section 608 certification and modern tools like smart thermostats is highlighted․ Regular maintenance and troubleshooting techniques ensure system longevity․ By mastering these concepts, technicians can excel in installations, repairs, and sustainable practices․ This guide serves as a foundation for both beginners and experienced professionals, promoting continuous learning and adaptation in the evolving HVAC industry․

12․2 Final Tips for HVAC Success

To excel in HVAC, stay updated with industry trends and best practices․ Invest in quality tools and safety gear to ensure efficiency and protection․ Practice hands-on skills regularly to build expertise․ Troubleshoot systematically and document your work for clarity․ Continuous learning through courses and certifications will keep you competitive․ Network with professionals to share knowledge and opportunities․ By combining theoretical knowledge with practical experience, you’ll achieve long-term success in the HVAC field and adapt to its evolving demands․

simian spirit guide

Simian Spirit Guide is a creature card in Magic: The Gathering, known for its unique mana ability, helping players accelerate early-game strategies by generating one red, blue, or green mana when tapped. Its versatility and low mana cost make it a popular choice in various deck archetypes, particularly those seeking rapid mana development. This spirit guide has become a staple in many competitive decks, offering consistent and reliable mana acceleration, which is crucial for deploying powerful spells and creatures early in the game. Its design and functionality have made it a favorite among players aiming to dominate the board from the start.

1.1 What is a Simian Spirit Guide?

Simian Spirit Guide is a creature card in Magic: The Gathering, specifically an Ape Spirit. It is known for its unique mana ability, which allows players to tap it to generate one mana of any color except white. This ability makes it a valuable resource for accelerating early-game strategies, particularly in decks that rely on multiple colors. The card is part of the Mystery Booster 2: Convention Edition and features a simple yet effective design. Its flavor text humorously states, “It’s rarely worth questioning where the mana comes from. Just be grateful,” reflecting its role as a reliable mana source. Players often include it in decks to enable faster plays and maintain tempo advantage;

1.2 Origins and Inspiration

Simian Spirit Guide draws inspiration from mystical and shamanic traditions, where spirits are believed to guide and assist. The “Spirit Guide” concept reflects a connection to primal energies and ancient wisdom. Its design as an Ape Spirit may be influenced by mythologies where apes symbolize intelligence and adaptability. The card’s artwork and flavor text, such as “It’s rarely worth questioning where the mana comes from. Just be grateful,” suggest a harmonious yet mysterious relationship between nature and magic. This blend of spirituality and primal themes makes Simian Spirit Guide a unique and intriguing addition to Magic: The Gathering lore.

1.3 Purpose in Spirituality and Magic

In spirituality, Simian Spirit Guide is often seen as a symbol of primal wisdom and connection to nature. It embodies the idea of harnessing raw energy for guidance and growth. In the context of Magic: The Gathering, this card represents a powerful tool for mana acceleration, enabling players to cast spells earlier and control the game’s tempo. Its ability to generate red, blue, or green mana makes it versatile, supporting various strategies. The card’s purpose is not only mechanical but also thematic, tying into the broader narrative of spirits aiding mortals in achieving their goals. This duality of function and lore makes Simian Spirit Guide a compelling element in both gameplay and storytelling.

Cultural and Mythological Background

The Simian Spirit Guide draws inspiration from ancient mythologies, where apes symbolize wisdom, agility, and primal energy. These creatures often represent messengers between humans and the divine, embodying both mischief and sacred guidance in various cultural tales.

2.1 Historical Symbolism of Apes

Historically, apes have symbolized strength, agility, and wisdom in various cultures. In ancient mythologies, they often represented humanity’s primal nature and connection to the divine. Apes were revered for their intelligence and adaptability, embodying both mischief and sacred wisdom. In some traditions, they served as messengers or guides between the physical and spiritual realms. These symbolic associations have influenced the depiction of apes as powerful, enigmatic beings, reflecting both their wild essence and their capacity for guidance. This duality is central to the Simian Spirit Guide’s role, bridging the gap between primal instincts and higher consciousness.

2.2 Folklore and Myths Featuring Apes

In folklore and myths, apes are often depicted as wise, mischievous, or sacred beings. In Hindu mythology, the vanara, a humanoid ape, symbolizes loyalty and strength, as seen in the epic Ramayana. African folklore features apes as tricksters, embodying cunning and adaptability. Similarly, in Japanese myths, apes are sometimes portrayed as mischievous spirits. These stories highlight apes’ intelligence and connection to both wild and divine realms. Such mythological depictions likely influenced the Simian Spirit Guide’s role as a bridge between primal instincts and spiritual growth, reflecting the duality of apes in folklore as both troublesome and enlightening figures.

2.3 Modern Interpretations in Spirituality

In modern spirituality, the Simian Spirit Guide is often seen as a symbol of primal instincts and adaptability, serving as a bridge between humanity and nature; It embodies the wisdom of the wild, encouraging individuals to embrace their inner strength and resilience. Many practitioners view it as a guide for navigating life’s challenges with intuition and agility. Its role in modern spirituality also highlights themes of grounding and connection to the earth, offering a unique perspective on personal growth and empowerment. This interpretation aligns with contemporary interests in animal symbolism and holistic well-being, making the Simian Spirit Guide a meaningful and relatable figure in modern spiritual practices.

Role in Magic: The Gathering

The Simian Spirit Guide is a versatile, cost-effective creature card, offering a 1/1 body with power tied to the number of forests controlled, synergizing well in ramp and tribal strategies.

3.1 Card Mechanics and Abilities

The Simian Spirit Guide is a creature card with the ability that its power is equal to the number of forests you control. This static ability makes it a versatile and scalable option, as its effectiveness grows with the number of forests in play. With a mana cost of 1G, it is easily castable in early-game turns, providing a consistent presence on the battlefield. Its ability to scale with forest count makes it particularly valuable in ramp and token-based strategies, offering both offensive and defensive utility. This mechanic allows it to adapt to various stages of the game, making it a dynamic addition to many deck builds.

3.2 Deck Archetypes Featuring Simian Spirit Guide

Simian Spirit Guide is a staple in various deck archetypes, particularly those that leverage its ability to scale with the number of forests. It is commonly found in ramp decks, where its growing power supports aggressive strategies. Token-based decks also utilize it to generate an overwhelming board presence. Midrange decks appreciate its versatility, as it provides early-game aggression and late-game relevance. Additionally, it pairs well with cards like Llanowar Elves or Priest of Titania, enhancing its synergy in mana acceleration and token generation. Its adaptability makes it a popular choice across multiple competitive and casual builds, ensuring its widespread appeal in Magic: The Gathering.

3.3 Interactions with Other Key Cards

Simian Spirit Guide interacts synergistically with cards that enhance its ability to scale with forests. Pairing it with Llanowar Elves or Priest of Titania amplifies its mana acceleration potential. In token-focused decks, it complements cards like Reanimate or Patriarch’s Bidding, allowing for recursive value. Its ability to grow with forests also makes it a natural fit alongside land-fetching spells like Diwan and other ramp tools. Additionally, it pairs well with cards like Elvish Rejuvenator, enhancing its role in aggressive and midrange strategies. These interactions highlight its versatility and ability to bolster various deck archetypes, making it a valuable inclusion in many builds.

Strategic Use in Decks

Simian Spirit Guide excels as a versatile, early-game accelerator, enabling explosive starts while scaling into late-game threats, making it a cornerstone in ramp and token strategies.

4.1 Early Game Advantages

Simian Spirit Guide offers significant early-game advantages, particularly in ramp and creature-based decks. Its ability to reduce the cost of spells by one generic mana accelerates mana development, enabling players to cast more impactful spells earlier. This makes it a powerful opener in decks that rely on explosive starts or quick deployments of high-value creatures. Additionally, its 2/2 body provides a modest but relevant threat on the battlefield, allowing it to trade favorably with smaller creatures while smoothing out the mana curve. This dual utility as both a mana accelerator and a credible threat makes it a staple in many aggressive and midrange strategies.

4.2 Mid to Late Game Impact

Simian Spirit Guide’s value endures into the mid to late game, evolving from a mana accelerator to a persistent threat. Its 2/2 body remains relevant, synergizing with other creatures to create a formidable board presence. While its mana reduction ability becomes less critical, it still aids in casting complex spells or activating key abilities. Additionally, it can serve as a strategic sacrifice, maintaining flexibility in various scenarios. Its consistent presence influences opponents’ decisions, potentially diverting resources away from other threats. In specific deck archetypes, its dual role as both a mana helper and a creature ensures continued relevance, contributing effectively to the overall strategy without redundancy.

4.3 Synergies with Other Creatures

Simian Spirit Guide excels in decks with complementary creatures, enhancing overall strategy through synergy. It pairs well with high-impact creatures like Liliana, the Last Hope or Nissa, Who Shakes the World, enabling early plays. Token-generating creatures like Adorned Pouncer benefit from its mana reduction, allowing for explosive starts. In sacrifice-based strategies, it works seamlessly with cards like Carrion Feeder, providing a steady stream of value. Its ability to reduce mana costs also supports creatures with activated abilities, such as Reclamation Sage, amplifying their effectiveness. This versatility makes Simian Spirit Guide a cornerstone in creature-centric decks, maximizing the potential of its allies while maintaining board dominance throughout the game.

Rulings and Errata

Official rulings clarify Simian Spirit Guide’s interactions, ensuring proper gameplay. Errata updates align its abilities with current game mechanics, maintaining balance and fairness in strategies.

5.1 Official Rulings and Updates

The Simian Spirit Guide has seen specific rulings to clarify its interactions. Notably, its ability to reduce mana cost based on the number of forests controlled has been addressed, ensuring it stacks correctly with similar effects. Wizards of the Coast confirmed that this reduction applies as a mana ability, resolving before other cost modifications. Additionally, updates have been made to its interaction with cards that alter the number of lands or forests controlled during the game. These rulings aim to maintain balance and prevent conflicts with newer mechanics introduced in subsequent sets. Players are encouraged to refer to the latest Comprehensive Rules for any further adjustments.

5.2 Common Misconceptions

Several misconceptions surround the Simian Spirit Guide. One common belief is that its mana-generating ability only works in mono-green decks, but it functions in any deck with forests. Another misconception is that it slows early-game progression due to its 2/2 body, though its mana reduction ability often offsets this. Some players mistakenly think it doesn’t synergize with non-creature spells, but its mana discount applies universally. Additionally, its interaction with effects that destroy or remove forests can be misunderstood, leading to incorrect plays. Clarifying these misunderstandings is essential for optimal use in various strategies, ensuring players leverage its full potential effectively in their decks.

5.3 Impact of Rulings on Gameplay

Official rulings on Simian Spirit Guide have significantly influenced its gameplay dynamics. Clarifications regarding its interaction with other mana-generating creatures and artifacts have ensured consistent play patterns. For instance, rulings confirmed that its ability to reduce mana costs applies to any spell, not just creatures, broadening its versatility. Additionally, errata addressing its behavior in multiplayer formats have streamlined its use in casual and competitive settings. These rulings have made Simian Spirit Guide more predictable and reliable, enhancing its appeal in ramp and combo decks. Players now better understand its limitations and synergies, leading to more strategic deck-building and in-game decision-making, overall enriching the gameplay experience.

Popularity and Community Reception

Simian Spirit Guide is widely praised for its versatility and power, making it a staple in many decks. Players appreciate its ability to accelerate mana, enhancing early-game strategies and enabling explosive starts. However, some critics argue its high efficiency can lead to imbalanced gameplay, especially in competitive formats. Despite this, its popularity endures, with many considering it a must-include in ramp and combo decks. Community reception remains largely positive, with players valuing its reliability and synergy with other cards. Its iconic artwork and flavorful design further contribute to its beloved status among Magic enthusiasts.

6.1 Player Feedback and Reviews

Simian Spirit Guide has received overwhelmingly positive feedback from players, who praise its ability to provide early-game acceleration and flexibility. Many consider it a staple in ramp and combo decks, highlighting its consistency and reliability. Players appreciate how it enables explosive starts, allowing for quicker deployment of high-impact spells and creatures. The card’s versatility across multiple formats, including Commander and Modern, has further solidified its popularity. Some players note its synergy with other creatures and spells, enhancing overall deck performance. While a few criticize its potential to create imbalanced matchups, the majority agree that Simian Spirit Guide is a powerful and essential inclusion in many strategies.

6.2 Tournament Performance

Simian Spirit Guide has consistently demonstrated strong tournament performance across various formats, particularly in Modern and Commander. Its ability to accelerate mana early in the game has made it a staple in many top-tier decks, including ramp and combo strategies. In recent Grand Prix and Pro Tour events, the card has frequently appeared in winning deck lists, showcasing its reliability and power. Players competing at high levels praise its versatility and impact, often highlighting it as a key enabler for explosive starts. While some formats have seen restrictions due to its dominance, its presence in competitive play remains significant, solidifying its reputation as a tournament powerhouse.

6.3 Impact on Meta and Deck Building

Simian Spirit Guide has significantly influenced the meta and deck-building strategies in Magic: The Gathering. Its ability to provide early mana acceleration has popularized ramp and combo decks, encouraging players to build around its explosive potential. Many top-tier decks now incorporate Simian Spirit Guide as a core component, shifting the meta toward faster, more aggressive strategies. This has led to increased diversity in deck archetypes, as players adapt to counter its prevalence. The card’s dominance has also prompted discussions about potential bans or restrictions, highlighting its profound impact on the competitive landscape and deck design philosophy in modern Magic.

Artwork and Flavor Text

Simian Spirit Guide’s artwork features a vibrant, dynamic monkey in a mystical forest, symbolizing agility and primal energy, while its flavor text highlights cleverness and quick thinking.

7.1 Analysis of Card Art

The artwork of Simian Spirit Guide, illustrated by Chris Rahn, depicts a nimble, glowing-eyed monkey in a lush, vibrant forest; The creature exudes agility and primal energy, blending seamlessly with its mystical surroundings. The warm color palette and dynamic pose emphasize its role as a spirit guide, conveying both wisdom and adaptability. The design captures the essence of a connection to nature and primal instincts, aligning with its magical and spiritual themes. The intricate details in the forest and the monkey’s expression highlight the artist’s ability to merge realism with fantasy, creating a visually striking and meaningful piece for the card.

7;2 Flavor Text Significance

The flavor text of Simian Spirit Guide, “The guide offers wisdom, but the way is fraught with danger,” reflects its role as a spiritual and mystical companion. This text emphasizes the duality of guidance and risk, suggesting that while the spirit guide provides wisdom, it also navigates treacherous paths. The wording aligns with its function in Magic: The Gathering, where it aids players in mana acceleration but requires strategic caution. The text adds depth to the card’s lore, reinforcing its connection to primal instincts and the balance between opportunity and peril, making it more than just a mechanical tool but a narrative element in the game.

7.3 Artist Inspiration and Background

The artwork for Simian Spirit Guide was created by Filip Burburan, a Serbian artist known for his detailed creature and fantasy art. Burburan drew inspiration from primate anatomy, blending it with mystical elements to convey the guide’s spiritual essence. His work often features naturalistic designs with subtle hints of the supernatural, which aligns perfectly with the card’s theme. Burburan’s background in illustrating mythical creatures allowed him to capture the guide’s primal yet wise demeanor. The artwork enhances the card’s lore, making it visually striking and deeply immersive for players. His contribution to the card’s aesthetic has been widely praised, adding to its appeal in both gameplay and collectibility.

Collectibility and Market Value

Simian Spirit Guide’s market value fluctuates based on rarity, condition, and demand. Its popularity in competitive decks and unique artwork make it desirable for collectors and players alike.

8.1 Rarity and Editions

Simian Spirit Guide is a rare card, contributing to its collectibility. It was first introduced in the Dominaria set and has since been reprinted in Modern Masters 2017 and The List.

The card’s rarity and demand in competitive decks make it sought after. Early printings, especially in pristine condition, hold higher value due to their scarcity and age.

Reprints have made it more accessible but haven’t significantly diminished its value. Collectors often pursue foil versions for their aesthetic appeal and rarity.

Each edition offers slight variations in artwork, adding to its allure for completists and enthusiasts of the Simian Spirit Guide’s design evolution.

8.2 Price Trends

Simian Spirit Guide has experienced notable price trends over the years, influenced by its demand in competitive decks. Initially released in Dominaria, the card saw steady growth, becoming a staple in ramp strategies. Prices spiked in 2021 due to its inclusion in popular Modern and Pioneer decks. By 2022, the non-foil version reached around $15-$20, while foil copies exceeded $50. Recent data shows slight fluctuations, with the card maintaining its value due to consistent tournament performance. Reprints in Modern Masters 2017 and The List have tempered price growth but haven’t reduced its appeal. The card remains a solid investment for players and collectors alike.

8.3 Investment Potential

Simian Spirit Guide is considered a strong investment due to its versatility in competitive formats. Its consistent demand in Modern and Pioneer decks ensures long-term value retention. Foil copies, particularly from older sets like Dominaria, are highly sought after by collectors and players, driving up their premium. The card’s rarity and utility in ramp strategies make it a stable investment. While price spikes are less common, its steady growth over time makes it a safer choice for those looking to invest in Magic cards. Additionally, its inclusion in high-profile tournament decks further solidifies its appeal, making it a worthwhile addition to any investment portfolio.

Similar Cards and Comparisons

Simian Spirit Guide shares similarities with other mana-accelerating creatures like Llanowar Elves and Fyndhorn Elves, but its synergy with green strategies makes it uniquely versatile in competitive formats.

9.1 Other Spirit Guides in Magic

In Magic: The Gathering, Spirit Guides are a series of creature cards designed to provide mana acceleration. While Simian Spirit Guide is the most prominent, others like Leonin Spirit Guide and Sky Spirit Guide exist. Leonin Spirit Guide, for instance, taps to add two white mana, supporting white-based decks. Similarly, Sky Spirit Guide provides blue mana, aiding in strategies requiring early blue mana for counterspells or card draw. Each Spirit Guide serves a similar purpose—accelerating mana development—but caters to different color strategies. This allows players to choose the Spirit Guide that best fits their deck’s color composition and strategic needs.

9.2 Comparisons with Non-Spirit Guide Cards

Simian Spirit Guide differs from non-Spirit Guide cards like Llanowar Elves and Fyndhorn Elves, which are creature-based mana accelerators. While these cards provide similar benefits, they are vulnerable to removal spells and creature-based interactions. In contrast, Simian Spirit Guide, as an artifact, avoids such risks. Cards like Sol Ring and Arcane Signet offer generic mana acceleration but lack the color-specific synergy of Spirit Guides. Simian Spirit Guide’s ability to add two green mana makes it a standout choice for green-heavy decks, offering reliability and versatility that non-Spirit Guide cards often can’t match in specialized strategies.

9.3 Unique Aspects of Simian Spirit Guide

Simian Spirit Guide stands out for its unique combination of mana acceleration and versatility. As an artifact creature, it avoids the vulnerabilities of traditional creature-based mana accelerators, offering a reliable source of green mana. Its ability to add two green mana, while sacrificing only one colorless, makes it highly efficient. Unlike other Spirit Guides, its artifact status allows it to synergize with artifact-themed decks. Additionally, its low mana cost and ability to be sacrificed for mana make it a flexible option in both early and mid-game scenarios. These traits make Simian Spirit Guide a valuable asset in green-heavy strategies, setting it apart from other mana accelerators in Magic: The Gathering.

Simian Spirit Guide is a versatile and reliable artifact creature, excelling in green decks with its mana acceleration. Its unique design and efficiency make it a popular choice in Magic: The Gathering.

10.1 Summary of Key Points

The Simian Spirit Guide is a versatile and impactful card in Magic: The Gathering, known for its ability to accelerate mana and provide a creature presence. Originating from the Dominaria set, it has become a staple in green decks due to its efficiency and utility. Its cultural and mythological roots draw from the symbolism of apes as intelligent and resourceful beings. In gameplay, it shines in the early game by enabling faster plays and synergizes well with other creatures. Its popularity stems from its balance of power and affordability, making it a favorite among casual and competitive players alike. Its artwork and flavor text further enhance its appeal, embedding it deeply in Magic lore. Overall, the Simian Spirit Guide represents a harmonious blend of strategy, lore, and accessibility, solidifying its place in the game’s history.

10.2 Final Thoughts on Simian Spirit Guide

The Simian Spirit Guide stands out as a remarkably versatile and beloved card in Magic: The Gathering, offering both strategic value and emotional appeal. Its ability to accelerate mana while providing a meaningful board presence makes it a cornerstone in many green decks. Players appreciate its accessibility, as it is both powerful and affordable, catering to casual and competitive playstyles. Its synergy with other cards enhances its utility, while its artwork and lore deepen its connection with the game’s rich history. As a symbol of adaptability and strength, the Simian Spirit Guide continues to inspire players, ensuring its enduring relevance in the ever-evolving world of Magic.

10.3 Future Prospects in Magic

The Simian Spirit Guide’s future in Magic: The Gathering appears promising, with potential for continued relevance in both casual and competitive play. As new sets release, its versatility may unlock fresh synergies, especially in green-centric decks. Its affordability and power make it a staple for budget builds, ensuring accessibility for newer players. Wizards of the Coast could reprint it in future core sets or expansions, maintaining its availability. Additionally, shifts in the meta might elevate its importance, particularly if mana acceleration remains a priority. The card’s enduring popularity suggests it will remain a cherished and strategic choice, adapting to the evolving landscape of Magic.

the crucible act 3 reading guide

Act 3 of The Crucible unfolds in the Salem courtroom, where tension escalates as John Proctor confronts the court. This act is pivotal, showcasing desperation, moral dilemmas, and the community’s fear-driven hysteria. Giles Corey’s dramatic entrance and Mary Warren’s testimony add complexity, while Proctor’s struggle for justice highlights themes of integrity and sacrifice. The courtroom becomes a symbol of oppression, setting the stage for tragic consequences.

1.1. Setting of Act 3

Act 3 of The Crucible is set in the Salem courtroom on August 5, 1692. The courtroom is a tense, oppressive space dominated by the authority of Deputy Governor Danforth and Judge Hathorne. The room is filled with villagers, creating an atmosphere of fear and anticipation. Mary Warren, escorted by John Proctor, enters nervously, while Giles Corey later makes a dramatic entrance, defying the court. The setting emphasizes the legal and moral conflict, with the courtroom serving as both a physical and symbolic space of judgment and power. The date and location highlight the historical context of the Salem witch trials, grounding the act in a specific time and place of hysteria and accusation.

1.2. Summary of Key Events in Act 3

Act 3 of The Crucible opens in the Salem courtroom, where John Proctor brings Mary Warren to testify against Abigail. Giles Corey enters, defying the court, and is eventually pressed to death for refusing to name names. Mary Warren, under pressure, retracts her earlier confession, accusing Proctor of witchcraft. Proctor, desperate to save his life, confesses to adultery but refuses to sign a written confession, tearing it up. The court, unconvinced by his words, sentences him to death. These events highlight the courtroom’s oppressive atmosphere and the escalating hysteria, as justice falters and fear prevails. The act ends with Proctor’s defiant refusal to betray his integrity, even in the face of death.

Character Analysis in Act 3

Act 3 delves into the complexities of key characters, revealing their moral struggles and motivations. John Proctor’s integrity shines as he confronts the court, while Danforth’s rigid authority intensifies the tension. Mary Warren’s testimony highlights her vulnerability, and Giles Corey’s defiance underscores his courage. Abigail’s manipulation reaches its peak, showcasing her cunning. Each character’s actions in this act define their roles in the play’s tragic unfolding, emphasizing themes of justice, morality, and sacrifice. Their interactions drive the plot’s emotional depth, making Act 3 a pivotal moment in the story’s progression. The characters’ decisions here have lasting consequences, shaping the play’s outcome.

2.1. John Proctor’s Role in Act 3

John Proctor emerges as a central figure in Act 3, displaying moral courage and integrity. He confronts the court, challenging its authority and revealing the hypocrisy of the witch trials. Proctor’s refusal to falsely confess, despite the pressure, highlights his commitment to truth and justice. His internal struggle with guilt over his past affair with Abigail is evident, but he ultimately chooses to stand by his principles. By tearing up the confession document, Proctor symbolically resists the court’s oppression, showcasing his defiance and willingness to sacrifice himself for the truth. His actions not only define his character but also inspire others to question the court’s legitimacy, making him a key figure in the act’s dramatic tension and moral conflict. His leadership and sacrifice deeply impact the play’s progression.

2.2. Danforth’s Authority and Decision-Making

Deputy Governor Danforth wields significant authority in Act 3, firmly believing in the court’s divine mission to root out witchcraft. His rigid adherence to the law and refusal to question the court’s legitimacy underscore his unwavering commitment to order and religious principles. Danforth’s decision-making is marked by a lack of flexibility, as he dismisses evidence that contradicts the accusations, viewing such challenges as threats to the court’s authority. His exchanges with Proctor reveal a deep tension, as Danforth sees Proctor’s defiance as an attack on the legal process. Danforth’s actions highlight the dangers of unchecked power and the erosion of justice in a climate of fear and hysteria.

2.3. Mary Warren’s Testimony and Its Impact

Mary Warren’s testimony in Act 3 is a pivotal moment, as she reluctantly accuses John Proctor of witchcraft under intense pressure from the court. Her testimony, though unsteady and filled with contradictions, carries significant weight due to her role as a former servant in Proctor’s household. Mary’s fear of Abigail and the court’s intimidating atmosphere forces her to lie, further entangling Proctor in the witchcraft allegations. Her words, despite their lack of credibility, are used to justify Proctor’s condemnation, illustrating the court’s reliance on unreliable testimonies. Mary’s testimony highlights the destructive power of fear and the manipulation of vulnerable individuals in the chaotic Salem community.

2.4. Giles Corey’s Courage and Sacrifice

Giles Corey’s courage and sacrifice in Act 3 underscore his unwavering integrity and defiance against the corrupt court. Despite being an elderly man, Corey refuses to plead guilty to witchcraft, knowing it would falsely incriminate others. His famous last words, “More weight!” symbolize his resilience as he is pressed to death for his refusal to cooperate. Corey’s sacrifice highlights the brutality of the Salem witch trials and the lengths to which individuals would go to maintain their dignity. His death serves as a powerful critique of the court’s injustice, showcasing his moral strength in the face of overwhelming oppression and fear.

2.5. Abigail Williams’ Manipulation in Act 3

Abigail Williams’ manipulation in Act 3 reaches its peak as she continues to exploit the court’s fear and hysteria. Using her charm and false piety, she orchestrates the proceedings, ensuring her enemies are targeted. Her ability to control the other girls, making them mimic her accusations, solidifies her power. Abigail’s manipulation escalates when she falsely accuses John Proctor, leveraging her influence to turn the court against him. Even when faced with Proctor’s truths, her cunning ensures the court remains deceived. Her actions highlight her ruthlessness and the dangerous power of unchecked deception, driving the play’s tragic momentum and showcasing her mastery of manipulation.

2.6. The Role of William Hathorne in the Court

William Hathorne plays a significant role in Act 3 as a deputy governor and a judge in the Salem court. He is a strict adherent to the law and believes in the court’s authority, often displaying little empathy for the accused. Hathorne’s questioning is sharp and probing, reflecting his commitment to the legal process, though his rigid mindset makes him resistant to new evidence. His skepticism toward John Proctor’s defense and his dismissal of Giles Corey’s evidence highlight his unwavering belief in the court’s decisions. Hathorne’s actions underscore the dangerous blending of legal procedure with moral inflexibility, contributing to the play’s tragic unfolding.

Themes in Act 3

Themes in Act 3 include justice vs. injustice, integrity, guilt, hysteria, and reputation, highlighting the moral and societal tensions driving the Salem witch trials’ chaos.

3.1; Justice and Injustice in the Courtroom

In Act 3 of The Crucible, the courtroom becomes a stark example of injustice, as fear and hysteria dictate the proceedings. The trials are conducted with little regard for due process, and accusations based on “spectral evidence” are accepted as fact. Deputy Governor Danforth, representing the court’s authority, refuses to consider rational explanations, instead upholding the skewed logic of the witch hunt. John Proctor’s defiance highlights the moral corruption of the system, while the court’s refusal to acknowledge Rebecca Nurse’s good reputation underscores the chaos of the trials. This act exposes the dangers of a justice system fueled by fear and manipulated by false testimony, ultimately revealing the darkest aspects of human nature under oppressive authority.

3.2. Integrity and Morality in Proctor’s Actions

John Proctor’s actions in Act 3 exemplify his unwavering integrity and moral courage. Despite the overwhelming pressure from the court, Proctor refuses to falsely confess to witchcraft, even when faced with the certainty of death. His decision to stand by the truth, despite his past mistakes, highlights his commitment to his personal morality. Proctor’s willingness to sacrifice his life rather than betray his principles underscores his redemption arc, as he seeks to reclaim his integrity after his affair with Abigail. His defiance in the courtroom, particularly when he tears up the false confession, symbolizes his rejection of the corrupt system and his steadfast belief in justice and honesty.

3.3. Guilt and Redemption: Proctor’s Internal Struggle

Proctor’s internal struggle in Act 3 is deeply rooted in his guilt over his past affair with Abigail and his desire for redemption. His initial reluctance to expose the truth reflects his shame and fear of judgment. However, as the act progresses, Proctor confronts his flaws and seeks redemption by standing up for justice, even at great personal cost. His refusal to falsely confess, despite the threat of death, demonstrates his moral growth and commitment to clearing his name and protecting others. This struggle highlights Proctor’s transformation from a man burdened by guilt to one who finds redemption through his courage and sacrifice.

3.4. Hysteria and Fear in the Community

In Act 3, the community is consumed by hysteria and fear, driven by the relentless witch trials. The court’s acceptance of unsubstantiated accusations fuels the panic, as fear of being accused spreads rapidly. The girls’ false testimonies, supported by the court’s zeal, create an atmosphere of dread and mistrust; Neighbors turn against one another, and the fear of death intensifies the chaos. The court’s failure to seek evidence escalates the madness, making it nearly impossible for reason to prevail. This collective hysteria paralyzes the community, allowing fear to dominate and leading to devastating consequences for many innocent lives.

3.5. Reputation and Its Significance in Salem

In Act 3, reputation emerges as a central theme in Salem, where societal standing is deeply intertwined with moral integrity. John Proctor’s fear of tarnishing his name drives his initial reluctance to expose Abigail’s deceit, highlighting the power of reputation in shaping decisions. The community’s obsession with maintaining a virtuous image fuels the witch hunt, as accusations are often motivated by the desire to protect or enhance one’s social standing. The court’s willingness to accept unverified claims further underscores the fragility of reputation in a society governed by fear and suspicion. Reputation becomes both a weapon and a vulnerability, influencing the tragic unfolding of events.

Key Scenes in Act 3

Act 3 of The Crucible features pivotal moments that escalate tension and reveal character depths. Proctor confronts the court, Giles defies authority, and Mary’s testimony seals Proctor’s fate.

4.1. Proctor’s Confrontation with the Court

In Act 3, John Proctor confronts the court to save his wife, Elizabeth, by exposing Abigail’s deceit. Driven by his integrity, Proctor reveals his past affair with Abigail, hoping to discredit her. However, the court, led by Deputy Governor Danforth, views Proctor’s actions as a challenge to their authority. Mary Warren, initially supportive, falters under pressure, undermining Proctor’s case. Proctor’s frustration grows as the court dismisses his evidence, ultimately leading to his accusation of witchcraft. This confrontation highlights Proctor’s moral courage and the court’s rigid refusal to acknowledge the truth, underscoring themes of justice and integrity.

4.2. Giles Corey’s Entrance and His Defiance

Giles Corey’s entrance in Act 3 marks a turning point as he defies the court’s authority. Brought in after being pressed for names, Giles refuses to cooperate, stating, “I will not give you names!” His defiance shocks the court, as he challenges Danforth’s power. Giles’s stubbornness and integrity highlight the corruption of the legal system. Despite the risk of severe punishment, Giles stands firm, refusing to betray others. His actions embody resistance against the oppressive regime, showcasing his courage and refusal to compromise his principles. This moment underscores the themes of integrity and the dangers of unchecked authority, making Giles a symbol of moral strength in the face of tyranny.

4.3. Mary Warren’s Testimony Against Proctor

Mary Warren’s testimony against John Proctor in Act 3 is a pivotal moment, as she falsely accuses him of witchcraft. Under pressure from the court and Abigail’s manipulation, Mary claims Proctor conspired with the devil. Her testimony, though false, carries significant weight due to the court’s eagerness to believe such accusations. Mary’s actions reveal her internal conflict between truth and fear, as she succumbs to the hysteria surrounding her. Proctor’s reputation is further tarnished, and the court’s bias against him becomes more pronounced. This scene highlights the destructive power of false accusations and the manipulation of vulnerable individuals in the Salem witch trials.

4.4. Proctor’s Confession and Its Aftermath

In a desperate attempt to save his life, John Proctor falsely confesses to witchcraft, hoping to spare himself and his family. However, his confession is deemed insufficient by the court, as they demand he name others involved in witchcraft. Proctor refuses to incriminate anyone else, showcasing his moral integrity. Elizabeth, called to verify his confession, lies to protect him, stating he is a good man. The court, however, dismisses her testimony due to her husband’s admission of adultery. Proctor, realizing the futility of his confession, tears it up, choosing to die with his dignity intact rather than betray others. This moment underscores his tragic-heroic resolve and the court’s relentless pursuit of convictions.

4.5. The Climactic Ending of Act 3

The act concludes with heightened tension as Proctor, after tearing up his confession, is led away to his execution. Giles Corey, having been pressed to death for refusing to name others, dies offstage, symbolizing his defiance against the court. The courtroom erupts in chaos, reflecting the moral and emotional turmoil of the characters. Proctor’s decision to die with integrity, rather than betray others, underscores his moral strength. Meanwhile, the court’s relentless pursuit of convictions highlights the unchecked power of the witch trials. The ending sets the stage for the tragic events of Act 4, leaving the audience with a sense of impending doom and moral despair.

Symbolism and Motifs in Act 3

Act 3 is rich in symbolism, with the courtroom representing oppression, the confession document symbolizing forced lies, and light-dark contrasts signifying moral struggle and deception.

5.1. The Courtroom as a Symbol of Oppression

The courtroom in Act 3 serves as a powerful symbol of oppression, embodying the oppressive regime of the Salem witch trials. The rigid, formal setting reflects the strict societal control exerted by the court, while the judges’ bench looms as a symbol of unchecked authority. The physical layout, with the accused standing alone before the court, underscores their vulnerability and the overwhelming power of the judiciary. This oppressive atmosphere mirrors the broader societal fears and hysteria driving the trials. The courtroom becomes a space where justice is distorted, highlighting the dangers of unchecked power and false accusations. Its rigid structure reinforces the theme of a community gripped by fear and control.

5.2. The Significance of the Confession Document

The confession document in Act 3 holds profound significance as a tool of manipulation and control. It represents the court’s relentless pursuit of guilt, forcing individuals to falsely admit to witchcraft. The document symbolizes the destruction of personal integrity, as signing it means surrendering one’s truth. Proctor’s refusal to sign, despite the promise of life, highlights his commitment to honesty and moral integrity. The document also embodies the court’s hypocrisy, as it prioritizes public confession over actual justice. Its presence underscores the play’s themes of fear, manipulation, and the devastating consequences of false accusations, ultimately revealing the deeply flawed nature of the Salem justice system.

5.3. Light and Darkness as Metaphors for Good and Evil

In Act 3 of The Crucible, light and darkness serve as powerful metaphors for good and evil. The courtroom, often associated with truth and justice, is instead shrouded in moral darkness, reflecting the hysteria and fear that dominate Salem. Light, symbolizing honesty and purity, is embodied by John Proctor, who refuses to compromise his integrity even in the face of death. Conversely, darkness represents the evil of false accusations and the manipulation of the court. The contrast between light and darkness highlights the moral struggle, with Proctor’s steadfast truth standing against the oppressive shadow of the court’s corruption. This duality underscores the play’s exploration of moral decay and the fight for righteousness.

Study Guide for Act 3

This section provides a comprehensive analysis of Act 3, offering insights into key quotes, study questions, and critical moments to deepen understanding of the play’s themes and characters.

6.1. Important Quotes to Analyze

“You must understand, sir, that a person is either with this court or he must be counted against it.” ⸺ This quote by Danforth highlights the rigid, unforgiving nature of the court’s authority and its refusal to tolerate dissent.
“I do think I see some shadow of truth in you.” ⎼ Proctor’s statement underscores his internal struggle and quest for moral clarity amid chaos.
“I never saw any witches.” ⸺ Mary Warren’s testimony reveals her initial honesty but also her eventual manipulation by Abigail.
“It is mistaken law that leads you to this.” ⎼ Giles Corey’s defiance challenges the court’s flawed legal practices and showcases his courage.
“I can. And there’s your proof!” ⎼ Proctor’s refusal to confess, even in the face of death, symbolizes his redemption and commitment to truth.
These quotes encapsulate the play’s themes of justice, hysteria, and morality, offering deeper insights into the characters’ motivations and the societal tensions of Salem.

6.2. Study Questions for Critical Thinking

How does the court’s reliance on “spectral evidence” undermine the concept of fair justice in Act 3?
What motivates characters like Mary Warren and Abigail to lie under oath, and what does this reveal about their moral fiber?
Analyze Proctor’s decision to tear up his confession. What does this act symbolize about his character and the themes of integrity?
How does Danforth’s refusal to consider new evidence reflect the dangers of unchecked authority?
What role does fear play in shaping the actions of the community and the court in Act 3?
Evaluate Giles Corey’s sacrifice. What message does his death convey about courage and resistance?
How does Act 3 highlight the tension between personal reputation and moral truth in Salem?
These questions encourage a deeper exploration of the play’s themes, character dynamics, and historical context.

6.3. Analysis of Key Moments and Their Implications

Key moments in Act 3 reveal the escalating tension and moral decay in Salem. Proctor’s confrontation with the court highlights his integrity but also the court’s unwillingness to admit error. Mary Warren’s testimony against Proctor showcases her vulnerability and the court’s reliance on unreliable evidence. Giles Corey’s refusal to name others demonstrates his courage and the oppressive nature of the trials. Proctor’s decision to tear up his confession symbolizes his commitment to truth, even at the cost of his life. These moments underscore themes of justice, integrity, and the dangers of unchecked power, foreshadowing the play’s tragic conclusion.

Historical Context of Act 3

Act 3 reflects the hysteria of the Salem Witch Trials, mirroring the McCarthyism era’s fear-driven persecution. Miller draws parallels between historical witch hunts and modern witch hunts.

7.1. The Salem Witch Trials and Their Impact

The Salem Witch Trials (1692–1693) were a series of prosecutions in colonial Massachusetts, fueled by mass hysteria and fear of witchcraft. Act 3 mirrors this historical event, capturing the paranoia and irrationality of the trials. The trials led to the execution of 20 people, mostly women, and the imprisonment of many others. The community’s fear of the unknown and its rigid religious beliefs created an environment where accusations spiraled out of control. The trials ultimately exposed the dangers of unchecked power and false testimonies. Miller uses this historical context to critique the destruction caused by fear, superstition, and the breakdown of rational justice.

7.2. McCarthyism and Its Parallel to the Play

Arthur Miller wrote The Crucible during the McCarthy era, drawing parallels between the Salem Witch Trials and the Red Scare. McCarthyism, like the witch trials, was characterized by mass hysteria, fear of the unknown, and the unchecked power of authoritarian figures. Both periods saw innocent people accused and ruined due to false testimonies and fear-driven paranoia. The play critiques the destructive nature of such witch-hunts, highlighting how fear can dismantle rationality and justice. Miller uses historical events to warn against the dangers of unchecked power and the erosion of civil liberties, making The Crucible a timeless commentary on human behavior during times of fear and repression.

Dramatic Devices in Act 3

Miller uses tension, irony, and suspense to heighten drama in Act 3, emphasizing the courtroom’s oppressive atmosphere and the characters’ emotional turmoil.

8.1. Irony in the Courtroom Scenes

In Act 3, Arthur Miller employs irony to highlight the moral corruption and hypocrisy of the Salem witch trials. Verbal irony is evident when Danforth claims the court seeks justice, yet ignores credible evidence. Situational irony occurs as Proctor, an honest man, is condemned for adultery, while Abigail, the true culprit, escapes punishment. The courtroom, meant to uphold truth, becomes atool of deception. This contrast between appearance and reality underscores the play’s critique of authoritarianism and mass hysteria, emphasizing the destructive power of fear and false accusations.

8.2. Tension and Suspense in the Narrative

Act 3 of The Crucible is filled with tension and suspense, driven by the escalating conflict in the courtroom. Proctor’s emotional confrontation with the court creates a palpable sense of urgency, as his fate hangs in the balance. The crowd’s divided reactions heighten the drama, while Mary Warren’s wavering testimony builds uncertainty. Miller’s use of dialogue and pacing intensifies the suspense, particularly as Proctor’s honesty clashes with the court’s rigid authority. The tension peaks when Proctor tears up his confession, defying Danforth and sealing his fate. This dramatic buildup keeps readers engaged, emphasizing the moral stakes and the tragic inevitability of the events unfolding.

8.3. Foreshadowing of the Play’s Tragic End

Act 3 of The Crucible is rich with foreshadowing that hints at the tragic conclusion of the play. Proctor’s refusal to falsely confess and his ultimate tearing of the confession document signify his impending doom. The court’s relentless pursuit of justice, despite the lack of evidence, foreshadows the inevitability of the executions. Mary Warren’s fear and instability suggest the chaos that will escalate, while Giles Corey’s silent defiance hints at the broader resistance that will be crushed. The repetition of the phrase “God is dead” underscores the moral decay and impending catastrophe, leaving little doubt that the play will end in tragedy for Proctor and the community.

Act 3 of The Crucible masterfully intertwines themes of justice, hysteria, and sacrifice, setting the stage for the play’s devastating conclusion. Proctor’s integrity and the court’s relentless pursuit of power highlight the inevitable tragedy, leaving a profound reflection on morality and societal failure.

9.1. Summary of Themes in Act 3

Act 3 of The Crucible delves into themes of justice and injustice, integrity, guilt, and hysteria. The courtroom serves as a stark reminder of the oppressive regime, where fear and manipulation override truth. Proctor’s struggle with guilt and redemption highlights his moral integrity, while the community’s hysteria escalates, fueled by false accusations. Reputation emerges as a fragile yet powerful force, influencing decisions and lives. The act underscores the devastating consequences of unchecked power and the loss of moral compass, leaving a haunting reflection on human frailty and societal failure.

9.2. The Impact of Act 3 on the Overall Play

Act 3 serves as the emotional and dramatic peak of The Crucible, intensifying the play’s themes of hysteria, injustice, and moral integrity. Proctor’s confession and his ultimate refusal to sign the document underscore his internal struggle and redefine his character’s legacy. The courtroom’s rigid refusal to acknowledge truth highlights the dangerous escalation of fear and power. This act sets the stage for the play’s tragic conclusion, deepening the audience’s emotional investment. By accelerating the plot’s momentum, Act 3 ensures the play’s themes of integrity, sacrifice, and the consequences of unchecked power resonate powerfully, leaving a lasting impact on the narrative’s resolution.

foodsaver user guide

Welcome to the FoodSaver User Guide‚ your essential resource for mastering food preservation․ This guide provides comprehensive instructions‚ safety tips‚ and expert techniques to maximize your appliance’s potential‚ ensuring fresh and flavorful meals always․

Overview of the FoodSaver System

The FoodSaver System is a revolutionary food preservation solution designed to keep your food fresh for longer․ It uses advanced vacuum-sealing technology to remove air‚ preventing oxidation and moisture that cause spoilage․ The system includes a vacuum sealer‚ reusable bags‚ and accessories like marinator containers․ It’s user-friendly‚ with features like automatic settings and a handheld sealer for versatility․ The FoodSaver is ideal for meal prep‚ sous vide cooking‚ and storing non-food items․ Its compact design and compatibility with various containers make it a must-have for home kitchens and outdoor enthusiasts․ This system enhances food storage efficiency and reduces waste effectively․

Importance of Proper Usage

Proper usage of your FoodSaver is crucial for optimal performance‚ safety‚ and food preservation․ Following the user manual ensures efficient vacuum sealing‚ preventing damage to the device and maintaining food quality․ Incorrect usage can lead to ineffective seals‚ food spoilage‚ or even appliance malfunction․ Always adhere to guidelines for handling electrical components and food preparation to avoid hazards․ Regular maintenance and correct storage also extend the lifespan of your FoodSaver․ By using the system as intended‚ you maximize its benefits‚ keep your food fresh longer‚ and ensure a safe cooking and storage experience for you and your family․

Key Features of the FoodSaver

The FoodSaver system offers advanced vacuum sealing technology to preserve food freshness and flavor․ Key features include automatic bag detection‚ multiple sealing modes‚ and a built-in handheld sealer for versatile use․ The appliance is designed with intuitive controls and indicator lights for easy operation․ It also supports various accessories like reusable bags‚ marinator containers‚ and specialized storage solutions․ These features ensure efficient food preservation‚ reduce waste‚ and maintain nutrient quality․ Additionally‚ the system is compatible with a range of sealing modes‚ allowing customization for different food types․ Its compact design and user-friendly interface make it a practical addition to any kitchen‚ enhancing food storage and meal planning․

Safety Precautions

Always read the User Manual carefully and follow guidelines to ensure safe operation․ Avoid overheating‚ use only FoodSaver-approved bags‚ and keep children away․ Regular maintenance is crucial for optimal performance and safety․

General Safety Guidelines

Always read the User Manual carefully before using your FoodSaver appliance․ Ensure the device is placed on a stable‚ heat-resistant surface․ Avoid overheating by not sealing continuously for extended periods․ Keep children away from the appliance during operation․ Never use damaged or incompatible bags‚ as they may cause malfunctions․ Regularly clean the appliance to prevent food residue buildup‚ which can affect performance․ Store the FoodSaver in a dry‚ cool place when not in use․ Follow all electrical safety guidelines to avoid accidents․ Proper usage ensures longevity and safe operation‚ protecting both you and your appliance․

Electrical Safety Tips

Ensure your FoodSaver appliance is used with the original power cord and avoid damaged or frayed cords․ Plug the device directly into a grounded electrical outlet‚ never into an extension cord․ Keep the appliance away from water sources to prevent electrical shock․ Avoid overloading outlets with multiple high-power devices․ Do not operate the FoodSaver near flammable materials or in humid environments․ If the device malfunctions‚ unplug it immediately and contact customer support․ Never attempt repairs yourself․ Always follow the manufacturer’s electrical guidelines to ensure safe and efficient operation․ Proper electrical safety protects both you and your appliance from potential hazards․

Precautions for Handling Food

Always handle food safely to prevent contamination and ensure optimal sealing․ Wash your hands thoroughly before and after handling food․ Use clean‚ dry utensils and surfaces to avoid introducing bacteria․ Avoid sealing raw meats or fish with sharp bones‚ as they may puncture bags․ Do not vacuum-seal hot foods‚ as steam can compromise the seal․ Allow cooked foods to cool completely before sealing․ For delicate items like bread or pastries‚ place them in a protective layer to prevent crushing․ Never seal perishable foods without proper refrigeration or freezing plans․ Follow these guidelines to maintain food quality and safety during the sealing process․

Understanding the Controls and Components

Familiarize yourself with the FoodSaver’s intuitive controls and components‚ including the vacuum button‚ seal button‚ and indicator lights․ These features ensure efficient and precise food sealing operations․

Indicator Lights and Their Meanings

The FoodSaver system features indicator lights that provide essential feedback during operation․ The green light indicates the device is ready for use‚ while the red light signals an active sealing process․ A flashing light may appear during vacuuming‚ showing progress․ If an error occurs‚ such as an incomplete seal or blockage‚ the lights will flash rapidly; These indicators help you monitor the sealing process and troubleshoot issues efficiently․ Always refer to the manual for detailed explanations of specific light patterns and their meanings to ensure optimal performance and maintain your appliance effectively․

Accessory Compatibility

Ensuring accessory compatibility is crucial for optimal FoodSaver performance․ The system works seamlessly with FoodSaver-branded bags‚ rolls‚ and containers‚ designed to maintain vacuum integrity․ Accessories like marinator containers and reusable bags enhance functionality‚ while the handheld sealer offers versatility for various tasks․ Always verify compatibility with your specific FoodSaver model‚ as certain accessories may not work with older or different series․ Using non-compatible items could compromise the seal or damage the appliance․ Refer to your user manual for a detailed list of compatible accessories and guidelines for their proper use to maximize efficiency and maintain the longevity of your FoodSaver device․

Quick Start Guide

Unbox and plug in your FoodSaver‚ ensuring all components are included․ Follow initial setup instructions‚ then press the power button to activate․ For first-time use‚ place a bag‚ press vacuum‚ and seal—effortlessly preserving freshness and flavor in minutes․

Unboxing and Initial Setup

Unbox your FoodSaver carefully‚ ensuring all components are included․ Locate the main unit‚ power cord‚ and accessories like bags or a handheld sealer․ Plug in the device and familiarize yourself with the controls․ Before first use‚ wipe down surfaces with a clean cloth․ Ensure the sealing area is clear and dry for optimal performance․ Refer to the manual for specific setup instructions tailored to your model․ Proper initial setup ensures smooth operation and longevity of your FoodSaver․ Always follow safety guidelines to avoid damage or injury․ Once ready‚ your FoodSaver is prepared to help preserve freshness and flavor effortlessly․

First-Time Usage Instructions

Before your first use‚ ensure the FoodSaver is properly assembled and placed on a flat‚ stable surface․ Plug in the device and allow it to power up․ Insert a FoodSaver bag into the sealing channel‚ ensuring the open end aligns with the guides․ Place your food inside‚ leaving space for sealing․ Close the lid gently and select the appropriate mode using the control panel․ The machine will automatically start the sealing process․ Once complete‚ remove the bag and store your food․ Always refer to the manual for specific settings and guidelines․ Proper first-time usage ensures optimal performance and longevity of your FoodSaver appliance․

Sealing Your First Bag

Sealing your first bag with the FoodSaver is straightforward․ Place the open end of the bag into the sealing channel‚ ensuring it aligns with the guides․ Insert your food‚ leaving enough space for a proper seal․ Close the lid firmly and press the “Seal” button; The machine will begin the vacuum and sealing process automatically․ Once complete‚ remove the bag and inspect the seal․ For delicate items‚ use the “Gentle” mode to prevent damage․ Avoid overfilling bags‚ as this can compromise the seal․ Properly sealed bags will keep food fresh and airtight․ Always follow the manual’s guidelines for optimal results․

Vacuum Sealing Process

The FoodSaver removes air from bags‚ creating an airtight seal to preserve food freshness and flavor․ This process prevents oxidation and spoilage‚ ensuring long-term storage and optimal taste․

How Vacuum Sealing Works

Vacuum sealing uses suction to remove air from containers or bags‚ creating an airtight environment․ This prevents oxidation‚ moisture‚ and bacteria growth‚ preserving food freshness and extending shelf life․ The FoodSaver system employs a vacuum pump to extract air‚ followed by heat sealing to lock in freshness․ This process is ideal for meats‚ vegetables‚ and leftovers‚ ensuring flavors and nutrients remain intact․ Proper sealing also prevents freezer burn‚ making it perfect for long-term storage․ By eliminating air‚ the FoodSaver system effectively halts spoilage‚ keeping your food fresh for months when stored correctly in refrigerators or freezers․

Step-by-Step Sealing Instructions

To seal food effectively‚ start by placing the FoodSaver bag under the sealer․ Position the open end along the sealing edge‚ ensuring it’s aligned properly․ Next‚ add your food‚ leaving space to avoid overfilling․ Close the lid firmly and press the seal button․ The machine will remove air and seal the bag automatically․ Once the process is complete‚ store the sealed food in the refrigerator or freezer․ For optimal results‚ ensure the bag is clean and dry before sealing․ Following these steps ensures airtight protection‚ preserving freshness and flavor․ Proper sealing also prevents freezer burn and extends shelf life significantly․

Using Different Sealing Modes

Your FoodSaver offers various sealing modes tailored to different food types․ For delicate items like fish or vegetables‚ use the Gentle mode to prevent damage․ The Moist mode is ideal for juicy foods‚ ensuring a tight seal without liquid interference․ Activate the Pulse function for manual control over vacuum pressure‚ perfect for fragile textures․ Double sealing is available for extra protection‚ especially for long-term freezer storage․ Always refer to your user guide for specific mode instructions to optimize sealing and maintain food freshness․ Proper mode selection ensures effective sealing and extends shelf life‚ making your FoodSaver a versatile tool for all your preservation needs․

Maintenance and Cleaning

Regularly clean your FoodSaver to prevent food residue buildup․ Wipe the sealing area with a damp cloth and dry thoroughly․ Store the appliance in a cool‚ dry place to maintain its condition․

Regular Cleaning Tips

Regular cleaning is crucial for maintaining your FoodSaver’s performance․ After each use‚ wipe the sealing area with a damp cloth to remove food residue․ Ensure the appliance is unplugged before cleaning to avoid any electrical hazards․ For tougher stains‚ mix a small amount of mild detergent with warm water and gently scrub the affected areas․ Avoid using abrasive cleaners or rough sponges‚ as they may damage the surfaces․ Dry the appliance thoroughly with a soft cloth to prevent moisture buildup․ Additionally‚ clean the vacuum hose regularly to ensure optimal suction power and prevent clogs․ This routine maintenance will extend the lifespan of your FoodSaver and keep it functioning efficiently․

How to Store the FoodSaver

Proper storage of your FoodSaver ensures longevity and optimal performance․ After cleaning‚ store the appliance in a cool‚ dry place‚ away from direct sunlight․ Avoid storing it in humid environments or near heating vents․ Keep the FoodSaver out of reach of children and pets․ If not in use for an extended period‚ disconnect the power cord and store it separately․ Use the original packaging for storage if available‚ as it provides the best protection․ Ensure all accessories‚ such as the vacuum hose and bags‚ are stored in a dry‚ clean area to prevent damage․ Proper storage helps maintain the appliance’s efficiency and readiness for future use․

Troubleshooting Common Issues

If your FoodSaver isn’t sealing properly‚ check for dust or moisture on the sealing surface․ Ensure the bag is aligned correctly and free of wrinkles․ If the machine doesn’t turn on‚ verify the power cord is securely plugged in and the outlet is functioning․ For uneven seals‚ clean the sealing strip with a damp cloth and dry thoroughly․ If the vacuum isn’t activating‚ inspect for blockages in the hose or valve․ Refer to the user manual for specific error codes and solutions․ Regular cleaning and maintenance can prevent many issues‚ ensuring consistent performance and extending the lifespan of your FoodSaver appliance․

Advanced Features and Tips

Explore advanced features like pulse vacuum and marinate modes for enhanced food preparation․ Utilize compatible accessories‚ such as marinator containers‚ to optimize flavor and efficiency․ Experiment with non-food items like jewelry or documents for versatile sealing solutions․ Always refer to the user manual for specific guidance on these advanced functions․

Using the Handheld Sealer

The handheld sealer is a versatile accessory for your FoodSaver system‚ allowing you to vacuum seal containers and bags with ease․ To use it‚ simply attach the hose to the sealer port on your appliance and place the other end into the container or bag․ Press the vacuum button to remove air‚ then seal for airtight storage․ This tool is perfect for marinating‚ sous vide cooking‚ or storing delicate items․ Always ensure the sealer is clean and dry after use to maintain performance and hygiene․ Refer to the user manual for detailed steps and safety precautions․

Optimizing Food Storage

To maximize food freshness‚ use airtight FoodSaver bags or containers‚ ensuring proper sealing to prevent air exposure․ Portion food before sealing to maintain freshness and convenience․ Label and date containers for easy identification․ Store in cool‚ dry places or refrigerate/freezer as needed․ For moisture-sensitive items‚ consider desiccants or nitrogen flushing․ Regularly check stored food for signs of spoilage․ Proper storage enhances flavor‚ texture‚ and shelf life‚ making meal planning efficient․ Always follow FoodSaver guidelines for specific food types to achieve optimal results and safety․ This method ensures your food stays fresh‚ reducing waste and saving time in the kitchen․

Sealing Non-Food Items

Beyond food‚ the FoodSaver system excels at preserving non-food items like documents‚ electronics‚ and clothing․ Use airtight bags or containers to shield items from moisture‚ dust‚ and pests․ For delicate items‚ place them in a FoodSaver bag or compatible container before sealing․ Activate the handheld sealer for precise control․ Ensure items are dry and free of sharp edges to avoid punctures․ Follow specific guidelines in the user manual for non-food sealing to prevent damage․ This feature extends the FoodSaver’s utility beyond the kitchen‚ making it a versatile tool for protecting valuables and extending their lifespan․

Food Safety and Storage

Proper food storage is essential for maintaining freshness and safety․ The FoodSaver system ensures airtight sealing‚ preventing air and moisture exposure․ Always store sealed foods in appropriate conditions‚ following guidelines for refrigeration or freezing․ Regularly inspect seals for integrity and label bags with contents and dates․ This method helps preserve nutrients and prevents spoilage‚ keeping your food fresh for a longer period․ Refer to the user manual for specific storage recommendations tailored to different food types and ensure compliance with food safety standards for optimal results and safety․

Best Practices for Food Storage

Proper food storage is crucial for maintaining freshness and safety․ Always use airtight FoodSaver bags or containers to prevent air and moisture exposure․ Label sealed items with contents and dates for easy identification․ Store food in appropriate conditions—refrigerate perishables at 40°F or below‚ and freeze at 0°F or below․ For non-perishables‚ keep them in cool‚ dry places․ Regularly inspect sealed foods for signs of spoilage or compromised seals․ Follow FoodSaver guidelines for specific food types‚ such as marinating or storing meats‚ to ensure optimal preservation․ These practices help maintain nutrient quality‚ prevent contamination‚ and extend shelf life effectively․ Consistent storage habits enhance food safety and freshness․

Understanding Shelf Life

Shelf life refers to the duration food remains fresh and safe to eat․ Proper storage using FoodSaver systems extends shelf life by preventing spoilage and contamination․ Use airtight containers or vacuum-sealed bags to block air and moisture‚ key factors in food degradation․ Label and date items for easy tracking․ Most foods store well in cool‚ dry environments‚ while perishables require refrigeration or freezing․ Follow FoodSaver guidelines for specific items to maximize preservation․ Regularly inspect stored foods for signs of spoilage or compromised seals․ Proper storage maintains quality‚ safety‚ and flavor‚ ensuring your food stays fresh for a longer period․ Always adhere to storage recommendations for optimal results․

Refrigeration and Freezing Guidelines

Proper refrigeration and freezing are crucial for maintaining food freshness․ Use FoodSaver vacuum-sealed bags or containers to prevent air and moisture exposure․ For refrigeration‚ store items like meats‚ dairy‚ and vegetables in airtight containers․ Label and date items for easy tracking․ Freezing requires similar care to avoid freezer burn․ Vacuum-sealed items can be stored for extended periods without compromising quality․ Always follow FoodSaver recommendations for specific food types․ Ensure containers are leak-proof and durable for freezer storage․ Regularly inspect frozen items for signs of damage or seal failure․ Proper refrigeration and freezing practices enhance food safety and maintain nutritional value‚ ensuring optimal preservation․

Accessory Usage

Explore the versatility of FoodSaver accessories‚ including marinator containers‚ reusable bags‚ and handheld sealers․ Each accessory enhances food preservation and offers convenient solutions for various storage needs‚ ensuring optimal freshness and efficiency․

Marinator Containers

FoodSaver marinator containers are designed to enhance flavor and reduce marinating time․ Simply place your food‚ add seasonings‚ and use the handheld sealer to remove air․ This creates an airtight environment‚ allowing marinades to penetrate deeply and evenly․ For best results‚ prepare containers according to guidelines in the accessory manual․ Ensure the lid is sealed properly before vacuuming․ Cleaning is easy—hand wash with mild detergent․ Regular use can optimize flavor infusion‚ making meal prep efficient and delicious․ Follow the manufacturer’s instructions for optimal performance and food safety․ This accessory is perfect for meats‚ poultry‚ and vegetables‚ ensuring tender and flavorful dishes every time․

Reusable Bags

FoodSaver reusable bags are a practical and eco-friendly solution for food storage․ Made from durable‚ BPA-free materials‚ they can be used multiple times‚ offering significant cost savings․ To use‚ simply place food inside‚ insert the bag into the FoodSaver‚ and seal․ For smaller items‚ the handheld sealer can be used directly on the bag’s valve․ Regular cleaning is essential—hand wash with mild detergent and dry thoroughly․ Store bags in a cool‚ dry place to maintain their quality․ Reusable bags are ideal for freezing‚ refrigerating‚ or storing non-food items‚ reducing waste and extending freshness․ Follow the user guide for optimal sealing techniques and care tips to maximize their lifespan and efficiency․

Other FoodSaver Accessories

FoodSaver offers a variety of accessories to enhance your food preservation experience․ Marinator containers are perfect for infusing flavors quickly‚ while bottle stoppers prevent oxidation in wine and beverages․ Additional accessories like vacuum canisters‚ deli containers‚ and wine preservation kits provide versatile storage solutions․ These tools are designed to work seamlessly with your FoodSaver system‚ ensuring optimal freshness and organization․ For non-food items‚ accessories like vacuum storage bags protect against moisture and dust․ Refer to the user guide for specific instructions on using each accessory‚ as proper techniques ensure longevity and effectiveness․ These accessories expand the capabilities of your FoodSaver‚ making it a comprehensive solution for all your storage needs․

Final Tips for Effective Use

To maximize your FoodSaver experience‚ always follow proper cleaning and maintenance routines․ Regularly inspect and replace worn seals to ensure optimal performance․ Store food in appropriate bags based on its type and intended storage duration․ Experiment with different sealing modes for delicate or bulky items․ For best results‚ refer to the user manual for specific guidelines on vacuum-sealing various foods․ Keep the appliance on a stable‚ dry surface and avoid overloading it․ Lastly‚ explore additional accessories like marinator containers for enhanced functionality․ By adhering to these tips‚ you’ll preserve food efficiently and maintain your FoodSaver’s longevity․

Resources for Further Assistance

For additional support‚ visit the official FoodSaver website at www․foodsaver․com‚ where you’ll find detailed user manuals‚ troubleshooting guides‚ and FAQs․ Download PDF manuals for specific models like the V3825 or VS9000․ Explore the Quick Start Guide for effortless setup and operation․ Watch tutorial videos on the FoodSaver YouTube channel for visual guidance․ Contact customer support via phone or email for personalized assistance; Refer to the FoodSaver blog for tips on optimizing storage and exploring advanced features․ Join online forums or communities to share experiences and learn from other users․ Ensure you register your product for warranty benefits and updates․

playboy magazines price & identification guide

Playboy magazine collecting has gained popularity due to its iconic covers and cultural significance. This guide explores pricing trends and identification tips, helping collectors make informed decisions and build valuable collections.

Overview of Playboy Magazine’s Popularity

Playboy magazine has been a cultural phenomenon since its debut in 1953, captivating audiences with its iconic covers, interviews with influential figures, and mix of entertainment, fashion, and lifestyle content. Its popularity soared in the 1960s and 1970s, becoming a symbol of freedom and modernity. The magazine’s ability to blend provocative imagery with high-quality journalism made it a staple in many households. The first issue, featuring Marilyn Monroe, set the tone for its success and remains one of the most recognizable publications in history. Over the decades, Playboy has evolved, adapting to changing societal norms while maintaining its iconic status. Its influence extends beyond print, shaping media, fashion, and pop culture. Today, vintage issues are highly sought after by collectors, further cementing its legacy as a cultural icon.

Why Collectors Value Playboy Magazines

Playboy magazines are highly valued by collectors due to their historical significance, cultural impact, and aesthetic appeal. Since its debut in 1953, Playboy has been a symbol of freedom and modernity, blending provocative imagery with high-quality journalism. Collectors often seek rare and early issues, such as the first edition featuring Marilyn Monroe, which has become an iconic piece of pop culture. The magazine’s ability to capture the essence of its era, combined with its interviews with influential figures, adds to its appeal. Additionally, Playboy’s iconic cover models and exclusive content make certain issues highly desirable. The condition and rarity of a magazine greatly influence its value, with mint-condition copies being particularly sought after. For many collectors, Playboy magazines represent a tangible connection to a bygone era, making them both a nostalgic treasure and a valuable investment. This unique blend of history, art, and culture continues to drive the passion for collecting Playboy magazines.

Understanding the Pricing of Playboy Magazines

Pricing depends on factors like condition, rarity, and historical significance. Using specific search techniques helps collectors find accurate value estimates and market trends efficiently online.

Factors Influencing the Value of Playboy Magazines

The value of Playboy magazines is influenced by several key factors. Condition plays a crucial role, with mint copies commanding higher prices. Rarity, such as first-edition issues or those featuring iconic cover models, significantly increases worth. Historical significance, like magazines with interviews of famous figures, also boosts value. Demand from collectors and trends in the market can fluctuate, impacting prices. Additionally, the presence of original inserts, such as centerfolds or posters, can enhance value. Grading by professional companies further validates condition, making such issues more desirable. Understanding these factors helps collectors and sellers accurately assess and negotiate prices in the competitive market for vintage Playboy magazines.

Rare and Highly Sought-After Issues

Certain Playboy issues are highly sought after due to their rarity and historical significance. The debut issue featuring Marilyn Monroe is extremely rare, especially with its original price of 50 cents. Early issues with playmates like Betty Page and Jayne Mansfield are also highly prized; Limited editions, such as those with special covers or signed centerfolds, command premium prices. Issues featuring interviews with notable figures, like John F. Kennedy Jr. or Martin Luther King Jr., are highly valuable. Additionally, magazines with unique artwork or collector’s editions, such as the 50th-anniversary issue, are in high demand. Collectors often search for these rare copies, making them a cornerstone of any serious Playboy collection.

The Role of Condition in Determining Price

The condition of a Playboy magazine plays a crucial role in determining its value. Mint-condition copies, with intact spines, clean pages, and vibrant covers, command the highest prices. Even minor flaws, such as creases, torn pages, or faded colors, can significantly lower the magazine’s worth. Grading companies, like Certified Guaranty Company (CGC) and Professional Sports Authenticator (PSA), evaluate condition on a scale, with higher grades fetching premium prices. For instance, a magazine graded near-mint (9.2 or higher) can sell for thousands of dollars, while a worn copy might only be worth a fraction of that. Collectors and sellers must carefully assess condition, as it directly impacts the magazine’s desirability and market value. Preserving condition through proper storage and handling is essential for maintaining or increasing a magazine’s value over time.

Current Market Trends in Playboy Collectibles

The market for Playboy collectibles is experiencing a surge, driven by nostalgia and increasing interest from younger generations. Rare issues, particularly those featuring iconic Playmates like Marilyn Monroe, are in high demand. Limited editions and special editions, such as anniversary issues or interviews with notable figures, are fetching premium prices. Online auction platforms like eBay and specialized auction houses report consistent growth in sales. Additionally, the trend towards grading and certification has become more prominent, with collectors seeking authenticated and graded magazines to ensure authenticity and value. This trend highlights the evolving nature of the market, where both condition and rarity significantly influence pricing and desirability. As a result, collectors are advised to stay informed about market fluctuations and emerging trends to make strategic investments in their collections.

Identification Guide for Playboy Magazines

Identifying Playboy magazines involves examining key details like cover art, dates, and model names. Authentic issues often feature distinct logos and printing quality, aiding collectors in verification and valuation.

Key Features to Identify Authentic Issues

Authentic Playboy magazines can be identified through several distinct features. The most notable is the iconic Playboy logo, often referred to as the “Bunny logo,” which has remained consistent since its debut. Additionally, each issue typically includes a cover date, either printed on the cover or inside the magazine. Original copies also feature high-quality paper and vibrant color reproduction, which set them apart from reproductions. The presence of a centerfold model, often with a “Playmate of the Month” designation, is another hallmark. Collectors should also look for the magazine’s address and subscription information, usually found near the masthead. Finally, genuine issues often bear a barcode on the cover, introduced in later years, and may include special edition markings for anniversary or commemorative releases. These elements combined help verify authenticity and distinguish genuine Playboy magazines from replicas or fakes, ensuring collectors acquire legitimate pieces for their collections.

Spotting Rare Editions and Limited Prints

Identifying rare editions and limited prints of Playboy magazines requires a keen eye for detail. Rare issues often feature unique cover art, special editions, or commemorative content, such as anniversary issues or interviews with notable figures. Look for low print runs, as these are typically marked with “Limited Edition” or “Special Issue” text. Serial numbers or exclusive inserts, like signed centerfolds or bonus posters, can also indicate rarity. Collectors should pay attention to the magazine’s condition and any special markings that differentiate it from standard issues. For example, the first issue, featuring Marilyn Monroe, is highly sought after and often reprinted, so verifying its authenticity is crucial. Rare editions may also include exclusive interviews or photo spreads that were only available in specific printings. Understanding these nuances helps collectors pinpoint rare and valuable issues, making their collection stand out.

Understanding the Importance of Cover Models

Cover models play a pivotal role in the value and appeal of Playboy magazines. Iconic models like Marilyn Monroe, Pamela Anderson, and Cindy Crawford have graced the covers, making certain issues highly collectible. The popularity and fame of the cover model directly influence the magazine’s demand and price. Rare editions featuring exclusive interviews or photo spreads with these models are particularly sought after. Collectors often prioritize issues with autographed covers or limited editions, as these significantly boost the magazine’s value. Additionally, the cultural impact of the model can elevate the issue’s historical significance. Understanding which models are associated with rare or high-demand issues helps collectors identify valuable additions to their collections. This knowledge is essential for making informed decisions when buying or selling Playboy magazines.

How to Date Playboy Magazines Accurately

Dating Playboy magazines accurately is crucial for collectors, as the publication date significantly impacts value and authenticity. The most reliable method is to check the magazine’s masthead, typically found in the table of contents or near the editor’s note, which lists the month and year of publication. Additionally, the cover date is a primary indicator, though it’s important to verify it against internal content, as some issues may have been printed later. Collectors should also look for publisher information, such as address changes or logo updates, which can help pinpoint the era. Mistaking the date can lead to incorrect valuation, so cross-referencing with a trusted guide or online database is essential. Accurate dating ensures collectors understand the historical context and rarity of their issues, making it a fundamental skill for building a valuable collection.

Identifying Mint Condition vs. Worn Copies

To determine if a Playboy magazine is in mint condition, examine the cover for shininess and lack of creases or bends. Check the edges for sharpness and ensure there are no signs of wear. Inspect the pages for tears, missing pages, or yellowing. A tight, unloosened spine and intact staples are crucial indicators of mint condition. Worn copies often show creases, torn pages, a loose spine, and faded covers. For accuracy, consider grading by professionals who use specific criteria to evaluate condition. Mint condition requires meticulous examination, as even minor flaws can significantly impact value. Comparing the magazine to known mint copies or using a grading guide can aid in accurate assessment. Attention to detail and patience are essential for distinguishing between mint and worn issues, ensuring the magazine meets recognized standards for condition and value.

Advanced Tips for Collectors

Advanced collectors should utilize online resources, condition checklists, and grading services to authenticate and value Playboy magazines. Investing wisely and staying informed about market trends is key to building a valuable collection.

Where to Buy and Sell Playboy Magazines

To buy or sell Playboy magazines, consider online marketplaces like eBay, Etsy, and specialized collector forums. Rare issues often appear on auction sites such as Heritage Auctions or ComicConnect.

Local comic book stores and vintage shops may also carry select editions. Additionally, estate sales or thrift stores can occasionally yield rare finds.

When selling, research current market prices using guides or recent sales data. High-grade, rare, or first-edition issues typically command higher prices.

Joining collector communities or social media groups can connect you with potential buyers or sellers. Always ensure authenticity and condition are verified before transactions.

For convenience, platforms like Facebook Marketplace or local classifieds can also facilitate sales, though caution is advised to avoid scams.

Lastly, grading services like CGC or PSA can enhance the value of your magazines by providing professional authentication and condition assessment.

The Role of Grading Companies in Valuation

Grading companies play a pivotal role in determining the value of Playboy magazines by providing professional authentication and condition assessment.

These companies, such as Certified Guaranty Company (CGC) or Professional Sports Authenticator (PSA), evaluate the magazine’s condition, rarity, and originality, assigning a grade that significantly impacts its market value.

A high grade from a reputable service can enhance credibility and attract higher prices, as collectors and buyers trust the impartial evaluation.

Magazines graded by these companies are encapsulated in protective holders, preserving their condition and further boosting their appeal.

Investors and serious collectors often rely on graded issues to ensure their purchases are genuine and in optimal condition, making grading services indispensable in the collectibles market.

This process not only standardizes valuation but also builds trust within the collector community, fostering a more transparent and competitive marketplace.

Investing in Playboy Magazines: Pros and Cons

Investing in Playboy magazines can be a rewarding yet risky endeavor. One of the primary advantages is the potential appreciation in value, particularly for rare or first-edition issues featuring iconic cover models or significant cultural milestones.

These magazines often serve as tangible assets with historical and nostalgic appeal, attracting both collectors and investors. Additionally, they diversify a portfolio by offering a unique alternative to traditional investments like stocks or real estate.

However, the market for Playboy magazines can be volatile, with values fluctuating based on demand and condition.

Moreover, the cost of maintaining and storing these magazines in pristine condition can be substantial.

Liquidity may also be a concern, as selling rare issues quickly for their full value can be challenging.

While some issues may increase in value, others may not, making it essential to research and carefully select which magazines to invest in.

Ultimately, Playboy magazines can be a lucrative investment for those with a keen eye for rare issues and a deep understanding of the collectibles market.

Resources for Further Learning

Explore books, online forums, and auction sites for deeper insights into Playboy magazine collecting, pricing, and identification to enhance your knowledge and collection strategies effectively.

Recommended Books on Playboy Collectibles

For collectors seeking in-depth knowledge, several books provide comprehensive insights into Playboy magazine collectibles. Titles like The Playboy Collector’s Guide and Playboy: The Complete Guide offer detailed pricing, identification tips, and historical context. These resources are invaluable for understanding rare issues, cover models, and market trends. Books often include high-quality images and expert commentary, helping collectors authenticate and value their items. Whether you’re a novice or an experienced collector, these publications are essential for making informed decisions. They also highlight the cultural significance of Playboy magazines, making them a must-have for enthusiasts. By referencing these guides, collectors can build and maintain a valuable and authentic collection with confidence and expertise.

Online Communities for Playboy Enthusiasts

Online communities play a vital role for Playboy magazine collectors, offering platforms to connect, share knowledge, and trade. Forums like Playboy Collectors Forum and Facebook groups dedicated to Playboy memorabilia provide spaces for enthusiasts to discuss rare issues, pricing trends, and identification tips. These communities often feature expert insights, helping collectors authenticate and value their items. Social media groups also showcase collections and announce sales, fostering a sense of camaraderie among members. By engaging with these online networks, collectors can gain access to exclusive listings, auctions, and market updates. Additionally, online forums allow collectors to learn from experienced enthusiasts, ensuring they make informed decisions when buying or selling Playboy magazines. These platforms are indispensable for anyone looking to expand or refine their collection.

Top Auction Sites for Rare Issues

For collectors seeking rare Playboy magazines, top auction sites like eBay, Heritage Auctions, and ComicConnect are essential resources. These platforms frequently feature rare and limited-edition issues, often with detailed descriptions and high-quality images. eBay is particularly popular for its vast marketplace, while Heritage Auctions specializes in high-value collectibles, offering authenticated items. ComicConnect is renowned for its focus on vintage publications, including rare Playboy editions. Auction sites provide competitive bidding environments, allowing collectors to acquire sought-after issues. Additionally, these platforms often include price guides and past sales data, helping collectors gauge market value. By leveraging these auction sites, enthusiasts can discover rare issues, track pricing trends, and complete their collections with confidence.