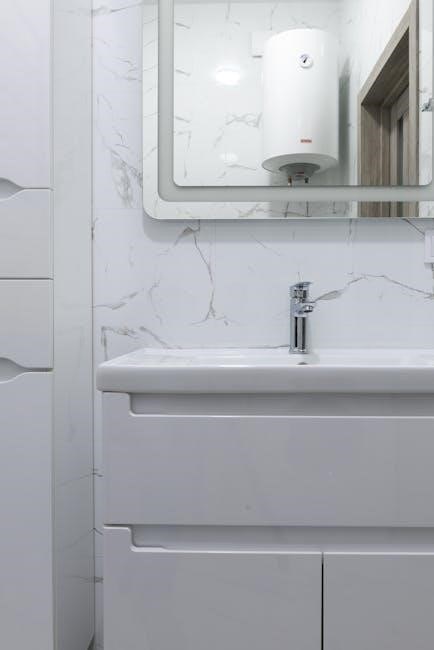
a.o. smith water heater error codes pdf

A.O. Smith Water Heater Error Codes: A Comprehensive Guide (PDF Focus)

Navigating A.O. Smith water heater issues? This guide, leveraging official PDFs like 305-505outdoor.pdf, details error codes and troubleshooting steps for optimal performance.

A.O. Smith water heaters utilize a sophisticated error code system to diagnose internal malfunctions, streamlining the troubleshooting process for both homeowners and qualified technicians. These codes, meticulously documented in official PDF manuals – such as the 305-505outdoor.pdf – provide specific insights into the nature of the problem, ranging from gas supply issues to electrical faults.

Understanding these codes is crucial for efficient repair and maintenance. Ignoring error signals can lead to escalating issues, reduced efficiency, and potentially unsafe operating conditions. This guide aims to demystify these codes, offering a clear pathway to identifying and resolving common problems, ultimately extending the lifespan of your A.O. Smith water heater. Referencing the official documentation is paramount for accurate diagnosis.

Understanding the Importance of Error Codes

A.O. Smith water heater error codes aren’t merely diagnostic tools; they represent a proactive safety and efficiency mechanism. As detailed in resources like the 305-505outdoor.pdf, these codes signal deviations from optimal operating parameters, preventing potential damage or hazardous situations. Early detection, facilitated by these codes, can avert costly repairs and ensure consistent hot water supply.

Ignoring error codes risks exacerbating minor issues into major failures. For example, a ‘02’ code (no burner operation during freeze protection) demands immediate attention to prevent freezing and tank damage. Utilizing the PDF documentation allows for precise identification of the root cause, enabling targeted repairs. Promptly addressing these signals safeguards your investment and maintains a safe, reliable hot water system.

Where to Find A.O. Smith Water Heater Error Code Information (PDF Sources)

Locating reliable A.O. Smith error code information is crucial for effective troubleshooting. The official A.O. Smith website (see Resources section) is the primary source, offering a comprehensive library of downloadable PDF manuals. Specifically, model-specific documents like the 305-505outdoor.pdf provide detailed code lists and diagnostic procedures.

These PDFs outline potential causes for each error, ranging from gas supply issues to electrical faults. Direct links to these resources are often available through online searches. Always prioritize official documentation to ensure accuracy and avoid misinformation. Utilizing these PDFs empowers homeowners and technicians to accurately diagnose and resolve water heater problems, maximizing system lifespan and safety.

Common A.O. Smith Water Heater Error Codes & Troubleshooting

Decoding common errors like 01, 02, and 03, found in PDFs such as 305-505outdoor.pdf, enables quick diagnosis and effective repair solutions.

Error Code 01: Overview & Potential Causes

Error Code 01, while not explicitly detailed in the provided 305-505outdoor.pdf excerpt, generally indicates a system-level fault requiring professional attention. A.O; Smith water heaters utilize error codes to pinpoint malfunctions, streamlining the diagnostic process. This code suggests a broader issue than specific component failures, potentially involving the control board or internal communication systems.

Potential causes, based on general A.O. Smith troubleshooting principles, include a faulty control module, a wiring issue disrupting signal flow, or a sensor malfunction providing incorrect data. Further investigation, utilizing comprehensive service manuals (available as PDFs on the A.O. Smith website), is crucial for accurate diagnosis. A service call is often recommended when encountering Error Code 01, as it often requires specialized tools and expertise.

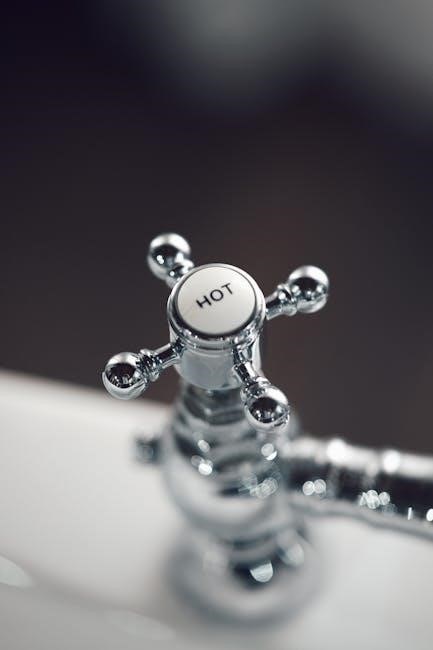
Error Code 02: No Burner Operation During Freeze Protection Mode

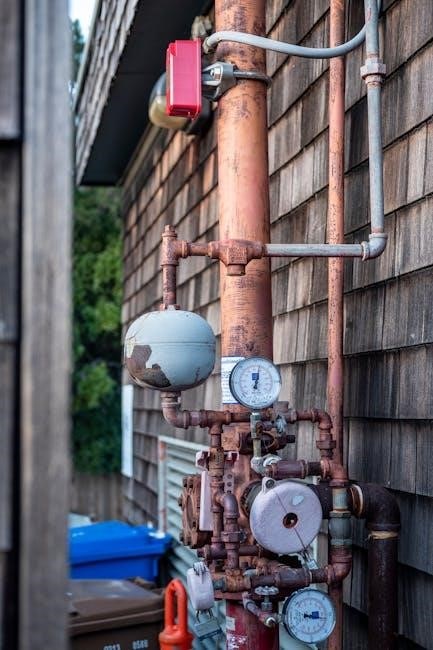
Error Code 02, as detailed in the 305-505outdoor.pdf, signifies “No burner operation during freeze protection mode.” This critical error indicates the heater fails to ignite during freezing temperatures, risking pipe damage. The PDF outlines several troubleshooting steps. First, verify the gas supply is active at both the heater and meter. Check for obstructions within the flue outlet and ensure proper vent connections.

Crucially, confirm vent length adheres to specified limits and the condensation collar is correctly installed. Dip switch settings must also be verified. The document also suggests checking the fan for blockages. Addressing these points, alongside ensuring correct gas type and pressure, can resolve the issue. If problems persist, a service call is advised for professional assessment and repair.

Gas Supply Issues (Code 02)

When encountering Error Code 02 – No Burner Operation during Freeze Protection – the 305-505outdoor.pdf immediately points to potential gas supply problems. The document stresses verifying the gas is turned on at both the water heater itself and the main gas meter or cylinder. It’s vital to ensure the gas line, meter, and regulator are appropriately sized for the unit’s BTU requirements.

Furthermore, the PDF instructs to confirm the correct gas type is being supplied and that the gas pressure meets specifications. A crucial step involves bleeding any air trapped within the gas lines, as air can impede gas flow. If these checks don’t resolve the issue, professional assessment of the gas supply infrastructure is recommended to rule out more complex problems.

Dip Switch Verification (Code 02)

The A.O. Smith 305-505outdoor.pdf highlights dip switch settings as a critical component when troubleshooting Error Code 02 (No Burner Operation during Freeze Protection). Incorrect dip switch configurations can prevent the burner from initiating, even with adequate gas supply. The document emphasizes the need to meticulously verify that the dip switches are set according to the specific model and installation requirements.

These switches control various parameters, including gas type and operational modes. Referencing the unit’s specific manual (available as a PDF download from A.O. Smith’s website) is crucial for accurate settings. Improperly set dip switches can override safety features or misconfigure the unit’s response to freeze conditions, leading to the error code. Double-checking these settings is a simple yet often effective troubleshooting step.

Error Code 03: Power Interruption During Bath Fill

According to the A.O. Smith 305-505outdoor.pdf, Error Code 03 signals a power interruption occurring during a bath fill cycle. The document notes that if water flow ceases after a power return, a simple reset procedure is recommended: turn off all hot water taps, then press the ON/OFF button twice. This attempts to re-establish normal operation. However, persistent issues necessitate further investigation.

The PDF stresses checking for obstructions in the flue inlet and exhaust, ensuring proper vent connections, and verifying vent length compliance. Correct condensation collar installation is also vital. Beyond these physical checks, the document advises verifying dip switch settings and inspecting the fan for blockages, as these can contribute to the error.

Resetting After Power Loss (Code 03)

The A.O; Smith documentation (specifically 305-505outdoor.pdf) clearly outlines the initial steps for resolving Error Code 03 following a power interruption during bath fill. The primary recommendation is a straightforward reset procedure. Users should immediately turn off all hot water taps within the building. Following this, the ON/OFF button on the water heater unit must be pressed twice in quick succession.

This double-press initiates a restart sequence, attempting to resume normal operation and restore hot water flow. If the issue persists after this reset, the PDF indicates that more comprehensive troubleshooting is required, moving beyond the simple power cycle. This suggests a deeper underlying problem beyond a temporary power glitch.

Flue and Vent Inspection (Code 03)

According to the A.O. Smith 305-505outdoor.pdf documentation, Error Code 03 – triggered by power interruption during bath fill – often points to ventilation issues. A thorough inspection of the flue inlet and exhaust is crucial. Obstructions within these pathways can prevent proper combustion and trigger the error. Furthermore, all vent components must be verified for secure and correct connections, ensuring no leaks or disconnections exist.

The PDF emphasizes the importance of adhering to specified vent length limitations. Exceeding these limits can compromise venting efficiency. Correct installation of the condensation collar is also vital. Finally, a check for proper venting material usage is necessary to guarantee safe and efficient operation, preventing recurrence of the error code.

Advanced Troubleshooting & Error Codes

Delving deeper into complex issues, this section utilizes A.O. Smith PDFs to address air supply, exhaust blockages, and flame failure error diagnostics.

Air Supply or Exhaust Blockage Error Codes

Addressing airflow issues is crucial for safe operation. According to the 305-505outdoor.pdf document, several steps can resolve these errors. First, verify the gas supply is active at both the heater and the meter, checking for any obstructions within the flue outlet. Ensure proper gas line sizing, correct gas type and pressure, and bleed any trapped air from the lines;

Venting is equally important. Confirm the correct venting material was used, the condensation collar is properly installed, and vent length adheres to specified limits. Dip switch settings must be verified. Additionally, inspect for proper grounding and consider disconnecting the keypad or EZConnect/MSA controls to isolate the problem. A thorough check of power connections and voltage is also recommended.

Checking Gas Line and Regulator

Ensuring adequate gas supply is paramount when troubleshooting. The 305-505outdoor.pdf highlights several key checks. Begin by confirming the gas is fully turned on at both the water heater itself and the main gas meter. Thoroughly inspect the entire gas line for any potential obstructions that could restrict flow, impacting burner operation and triggering error codes.

Regulator functionality is also vital. Verify the gas line, meter, and regulator are appropriately sized for the heater’s BTU requirements. Confirm the gas type being supplied matches the heater’s specifications and that the gas pressure is within the acceptable range. Bleeding air from the gas lines is essential to prevent inconsistent fuel delivery and ensure optimal combustion.

Vent Length and Material Verification

Proper venting is crucial for safe and efficient operation, as detailed in the 305-505outdoor.pdf. Incorrect vent configurations can lead to combustion issues and error codes. First, meticulously measure the vent length to ensure it falls within the manufacturer’s specified limits – exceeding these limits can cause inadequate draft.

Material compatibility is equally important. Confirm that the venting material used is approved for use with A.O. Smith water heaters and is resistant to corrosion; Inspect all vent components for secure connections, ensuring no gaps or leaks exist. The proper installation of a condensation collar is also vital to manage moisture and prevent corrosion, directly impacting vent performance and error code occurrences.

Flame Failure Error Codes

A flame failure indicates the burner isn’t staying lit, a critical safety concern addressed in A.O. Smith documentation like 305-505outdoor.pdf. Initial troubleshooting involves verifying the flame rod wire connection; a loose connection prevents proper flame sensing. Inspect the flame rod itself for carbon buildup, which can insulate it and hinder its ability to detect the flame.

Further investigation requires checking the gas solenoid valves for electrical shorts or open circuits. If these components fail, gas supply is interrupted, extinguishing the flame. A visual inspection of the burner surface, after removing the burner plate, can reveal condensation or debris obstructing ignition. If issues persist, a service call is recommended, as indicated in the PDF.

Flame Rod Inspection and Cleaning

Addressing flame failure often begins with the flame rod, as detailed in resources like the 305-505outdoor.pdf. A crucial first step is ensuring the flame rod wire is securely connected; a loose connection prevents the system from recognizing the flame. Next, carefully inspect the flame rod itself for any carbon buildup. This accumulation acts as an insulator, hindering the rod’s ability to effectively sense the flame and signal the control board.

Gentle cleaning with fine steel wool or sandpaper can remove this carbon, restoring its conductivity. However, avoid excessive force that could damage the rod. Re-establish a firm wire connection after cleaning, and test the heater to confirm resolution. If the issue persists, further diagnostics are needed.

Gas Solenoid Valve Checks

When troubleshooting flame failure, referencing documentation like the 305-505outdoor.pdf, inspecting the gas solenoid valves is essential. These valves control the gas flow to the burner, and malfunctions can prevent ignition. Begin by carefully checking each valve for open or short circuits using a multimeter. An open circuit indicates a broken valve, while a short circuit suggests internal damage.

Ensure the power supply is disconnected before performing any electrical tests. If a faulty valve is identified, replacement is typically necessary. Proper gas line safety procedures must be followed during any valve work. A malfunctioning solenoid valve can disrupt the gas supply, leading to a no-burn situation and triggering error codes.

Electrical System Error Codes

Addressing electrical faults? PDFs highlight checks for power supply, wiring harnesses, and shorts. Proper voltage and secure connections are crucial for operation.

Power Supply Issues & Voltage Checks

Diagnosing power-related errors requires careful examination. According to A.O. Smith documentation (like the 305-505outdoor.pdf), a primary step involves verifying the power supply for loose connections. Ensure all wiring is securely fastened at both the unit and the circuit breaker.

Crucially, check the power supply for proper voltage and any significant voltage drops. Insufficient voltage can trigger error codes and impede heater function. Use a multimeter to confirm the voltage matches the heater’s specifications.

The PDF also suggests inspecting the appliance’s grounding to ensure it’s properly connected. A faulty ground can cause electrical instability. Addressing these electrical fundamentals is often the first step in resolving many error code occurrences.

Wiring Harness Inspection & Reconnection

A.O. Smith’s troubleshooting guides, such as the 305-505outdoor.pdf, emphasize the importance of a thorough wiring harness inspection. Begin by disconnecting and then carefully reconnecting all wiring harnesses located on the unit and the primary control board (PC board). This simple step can often resolve intermittent connection issues causing error codes.

Visually inspect each harness for any signs of damage – frayed wires, burnt connectors, or corrosion. Pay close attention to connectors; ensure they are fully seated and locked into place. A loose connection can disrupt signals and trigger false error readings.

Systematically checking and reseating each harness is a foundational step before investigating more complex component failures, as outlined in the official documentation.

Electrical Short Detection

According to A.O. Smith’s PDF resources, like the 305-505outdoor.pdf, identifying electrical shorts is crucial for resolving certain error codes. Begin by carefully checking all components within the water heater’s electrical system for potential short circuits. This requires a systematic approach and a multimeter for accurate testing.

Inspect wiring, the PC board, and the gas solenoid valves specifically. Look for any signs of burnt or damaged components, which could indicate a short. Disconnect power before conducting any physical inspection or testing.

The documentation stresses the importance of isolating the short to prevent further damage and ensure safe operation. A thorough check can pinpoint the source of the electrical fault.

Specific Model Error Codes (Referencing PDF Documentation)

A.O. Smith’s PDFs, such as 305-505outdoor.pdf, provide unique error code lists for outdoor, indoor, and tankless models, aiding precise diagnosis.

Error Codes for Outdoor Models (e.g;, 305-505outdoor.pdf)

Outdoor A.O. Smith models, detailed in documentation like the 305-505outdoor.pdf, present specific error codes requiring unique troubleshooting. Code 02 indicates no burner operation during freeze protection, potentially due to gas supply issues, incorrect dip switch settings, or improper gas pressure. Code 03 signals a power interruption during a bath fill, necessitating a double press of the ON/OFF button and inspection of the flue and vent connections.

Furthermore, outdoor units can display codes related to air supply or exhaust blockages, demanding checks of the gas line, regulator, and venting material. Flame failure errors also appear, requiring flame rod inspection and solenoid valve checks. Always consult the specific PDF for your model to ensure accurate diagnosis and repair, as variations exist.

Error Codes for Indoor Models

A.O. Smith indoor water heater error codes, while sharing similarities with outdoor models, often necessitate focused troubleshooting due to differing venting configurations. Common issues include code 03 – power interruption during bath fill – requiring a system reset and thorough vent inspection for obstructions. Air supply or exhaust blockages (identified via specific codes) demand verification of proper gas line sizing, regulator function, and venting material compatibility.

Flame failure errors are also prevalent, prompting checks of the flame rod for carbon buildup and gas solenoid valve functionality. Referencing the appropriate PDF manual is crucial, as indoor models may have unique error code definitions and recommended solutions. Electrical checks, including voltage and wiring harness integrity, are also vital for accurate diagnosis.

Error Codes for Tankless Models

A.O. Smith tankless water heater error codes require specialized attention due to their on-demand heating systems. PDFs detail unique codes related to flow sensors, combustion air, and overheating protection. Code 02, indicating no burner operation during freeze protection, demands verification of gas supply and proper dip switch settings. Air supply or exhaust blockages are critical concerns, necessitating inspection of vent length, material, and connections.

Flame failure codes prompt checks of the flame rod and gas solenoid valves. Tankless models often feature advanced diagnostics, accessible through the unit’s control panel, detailed in the corresponding PDF manual. Electrical system checks, including voltage and wiring, are essential for resolving power-related errors. Always consult the specific model’s documentation.

Preventative Maintenance & Error Code Reduction

Regular inspections – vents, gas lines, and flushing sediment – significantly reduce error occurrences, as outlined in A.O. Smith’s PDF guides, ensuring longevity.

Regular Vent Inspection and Cleaning

Consistent vent maintenance is crucial for preventing error codes, particularly those related to air supply or exhaust blockage (as detailed in documents like 305-505outdoor.pdf). A.O. Smith emphasizes checking for proper connections and ensuring vent length adheres to specified limits.

Inspect all vent components routinely for obstructions, corrosion, or damage. Proper installation of the condensation collar is also vital. Blockages can trigger error code 03, indicating a power interruption during bath fill due to insufficient airflow. Cleaning removes debris that restricts exhaust, maintaining efficient combustion and preventing potentially dangerous carbon monoxide buildup. Prioritize this preventative step to minimize service calls and ensure safe operation.

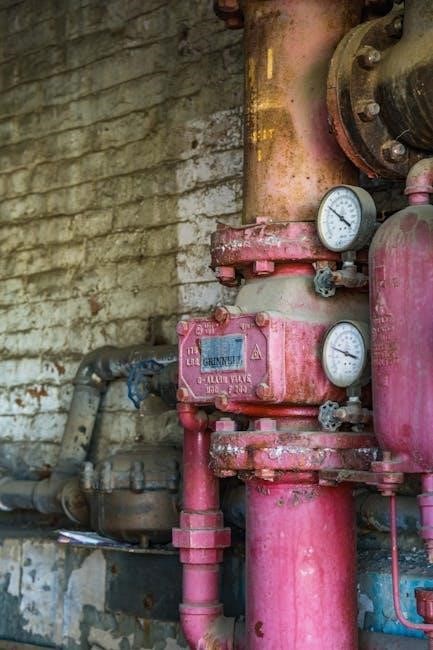
Gas Line Maintenance

Maintaining a healthy gas supply is paramount for A.O. Smith water heater functionality, directly impacting error codes like 02 (No Burner Operation) and those related to flame failure. The 305-505outdoor.pdf document stresses verifying the gas is turned on at both the heater and meter, alongside checking for proper gas type and pressure.

Regularly inspect the gas line, meter, and regulator for appropriate sizing. Bleeding air from gas lines is essential, as trapped air can disrupt combustion. Ensure all connections are secure and free from leaks. Addressing gas supply issues proactively prevents burner malfunctions and ensures consistent heating performance, reducing the likelihood of error code occurrences and costly repairs.

Water Heater Flushing & Sediment Removal

Sediment buildup within the tank can significantly reduce heating efficiency and potentially trigger error codes, though not directly listed in the 305-505outdoor.pdf, it impacts overall performance. Regular flushing removes accumulated minerals and debris, ensuring optimal heat transfer and preventing strain on heating elements or the burner system.

This preventative maintenance extends the lifespan of the water heater and minimizes the risk of unexpected failures. While the PDF focuses on gas-related issues, a clean tank supports consistent operation. Flushing should be performed annually, or more frequently in areas with hard water. Ignoring sediment buildup can lead to reduced hot water capacity and increased energy consumption.

Resources & Further Information

Need more help? Access A.O. Smith’s official website for support, downloadable manuals (like the 305-505outdoor.pdf), and direct customer service contact details.

A.O. Smith Official Website & Support

A.O. Smith’s official website is a central hub for comprehensive support regarding your water heater, including detailed information on error codes. You can find frequently asked questions, troubleshooting guides, and warranty information directly on their site. The website provides access to a vast library of documentation, often mirroring the content found within downloadable PDFs like the 305-505outdoor.pdf, offering solutions for issues like power interruptions (Error 03) or burner operation failures (Error 02).

Beyond self-service resources, A.O. Smith offers direct support channels. These include online contact forms, and a dedicated customer service phone line. When contacting support, having your water heater’s model number and the specific error code readily available will expedite the assistance process. Their knowledgeable representatives can guide you through advanced troubleshooting steps or connect you with a qualified service technician in your area.

Downloading A.O. Smith Water Heater Manuals (PDFs)

Accessing A.O. Smith water heater manuals in PDF format is crucial for understanding error codes and performing effective troubleshooting. The A.O. Smith website hosts a comprehensive archive of these documents, categorized by model number. Documents like the 305-505outdoor.pdf provide detailed explanations of error codes – such as 02 for no burner operation during freeze protection – and corresponding diagnostic steps.

These PDFs aren’t just code lists; they contain vital information on installation, maintenance, and safety precautions. Downloading and saving relevant manuals ensures you have offline access to critical information, even without an internet connection. Searching by model number guarantees you obtain the correct documentation for your specific unit, enabling accurate interpretation of error messages and facilitating efficient repairs.

Contacting A.O. Smith Customer Service

When PDF troubleshooting proves insufficient, direct assistance from A.O. Smith customer service is invaluable. While manuals like 305-505outdoor.pdf offer extensive guidance on error codes (e.g., code 03 for power interruption), complex issues may require expert support. A.O. Smith provides multiple contact avenues, including a dedicated phone line and online support forms accessible through their official website.

Before contacting support, gather your water heater’s model number and a detailed description of the error code and associated symptoms. Having the relevant PDF manual open during the call can streamline the process. Be prepared to discuss troubleshooting steps already attempted. Professional technicians can offer tailored advice, potentially preventing unnecessary service calls and ensuring safe, effective repairs.

crystals guide chart

Crystals Guide Chart: A Comprehensive Overview (Updated April 21, 2026)

Delve into the captivating world of crystals, formed over centuries, blending spiritual significance with modern style; each gemstone possesses unique, inherent properties․

Crystal healing is an ancient practice rooted in the belief that crystals possess inherent energetic vibrations capable of positively influencing our well-being․ For millennia, cultures worldwide have utilized these beautiful stones for physical, emotional, and spiritual support․ This practice isn’t about quick fixes, but rather about facilitating a harmonious connection between your energy field and the Earth’s natural energies․

Crystals aren’t merely aesthetically pleasing; they’re thought to act as conduits for energy, amplifying intentions, clearing blockages, and promoting balance․ Each crystal boasts a unique vibrational frequency, corresponding to different healing properties․ Whether you’re seeking to alleviate stress, enhance creativity, or deepen your spiritual practice, there’s a crystal to support your journey․ This guide will explore the fascinating world of crystals, offering insights into their formation, properties, and practical applications for a more balanced and fulfilling life․

What are Crystals and How are They Formed?

Crystals are naturally occurring, solid materials whose atoms, molecules, or ions are arranged in a highly ordered, repeating pattern – extending in all three spatial dimensions․ This unique atomic structure is what gives crystals their distinct shapes and properties․ Their formation is a remarkably slow process, often taking centuries, occurring deep within the Earth’s crust under specific conditions of heat, pressure, and time․

Most crystals form from molten rock (magma or lava) as it cools and solidifies, or from solutions as minerals precipitate out․ The rate of cooling and the chemical composition of the environment significantly influence the size and quality of the crystals․ Different elements and minerals combine to create the vast array of crystal types we see today, each with its own unique chemical formula and crystalline structure․ These geological processes result in the beautiful gemstones we admire and utilize․

The Science Behind Crystal Properties

The remarkable properties of crystals aren’t solely based on metaphysical beliefs; they are deeply rooted in scientific principles․ The ordered atomic structure dictates how crystals interact with energy, including light and vibrations․ Phenomena like piezoelectricity – the ability to generate an electrical charge under mechanical stress – and pyroelectricity – generating charge with temperature changes – demonstrate these interactions․

Furthermore, the chemical composition and trace elements within a crystal influence its color, hardness, and other physical characteristics․ Crystals can also exhibit unique optical properties, such as birefringence (double refraction) and dichroism (varying color depending on viewing angle)․ While the exact mechanisms behind perceived energetic effects are still under scientific investigation, the consistent and predictable physical properties of crystals are well-established and measurable, contributing to their diverse applications․

Understanding Crystal Structures & Systems

Crystals aren’t randomly assembled; they exhibit highly ordered, repeating arrangements of atoms, ions, or molecules․ This internal order defines a crystal’s structure and belongs to one of seven crystal systems: cubic, tetragonal, orthorhombic, hexagonal, trigonal, monoclinic, and triclinic․ Each system dictates the symmetry and angles of the crystal’s axes․

These systems influence a crystal’s physical properties, like cleavage planes (how it breaks) and hardness․ Understanding these structures helps identify crystals and predict their behavior․ For example, cubic crystals, like pyrite, exhibit high symmetry and isotropic properties (same properties in all directions), while monoclinic crystals, like orthoclase, have lower symmetry and anisotropic properties․ The arrangement directly impacts how energy flows through the crystal, influencing its perceived effects․

Common Crystals and Their Meanings

Explore a diverse array of popular crystals, each celebrated for its distinct energetic properties and symbolic associations, offering unique benefits to users․

Clear Quartz: The Master Healer

Clear Quartz, often dubbed the “Master Healer,” stands as a remarkably versatile and powerful crystal within the healing realm․ Its exceptional ability to amplify energy and thought makes it a cornerstone for various spiritual practices and metaphysical applications․ This transparent stone is believed to clear negativity, enhance clarity, and promote overall well-being․

Beyond its healing properties, Clear Quartz is prized for its capacity to enhance psychic abilities and connect individuals to higher realms of consciousness․ It serves as an excellent tool for meditation, manifestation, and energy work, effectively amplifying the intentions set within its crystalline structure․ Many practitioners utilize Clear Quartz to cleanse other crystals, restoring their energetic vibrancy․

Its pure and brilliant appearance symbolizes purity and light, making it a popular choice for jewelry and decorative purposes․ Whether used for healing, spiritual growth, or aesthetic appeal, Clear Quartz remains a timeless and invaluable crystal for all seeking positive transformation․

Amethyst: Spirituality and Intuition

Amethyst, with its captivating violet hues, is deeply revered for its potent spiritual properties and ability to enhance intuition․ This majestic crystal is believed to open the third eye chakra, fostering deeper self-awareness and connection to the divine․ Throughout history, Amethyst has been associated with royalty and spiritual enlightenment, symbolizing peace, tranquility, and protection․

Beyond its aesthetic beauty, Amethyst is renowned for its calming effects on the mind and emotions․ It’s often used to alleviate stress, anxiety, and insomnia, promoting restful sleep and emotional balance․ Practitioners utilize Amethyst during meditation to deepen their practice and access higher states of consciousness․

Amethyst is also thought to transmute lower vibrations into higher frequencies, creating a protective shield against negative energies․ Whether worn as jewelry or placed within a sacred space, Amethyst serves as a powerful ally on the path to spiritual growth and inner peace․

Rose Quartz: Love and Emotional Healing

Rose Quartz, radiating gentle pink energy, is universally recognized as the stone of unconditional love․ It opens the heart chakra, fostering self-love, compassion, and harmonious relationships․ This beautiful crystal encourages forgiveness, emotional healing, and a deeper connection with oneself and others․

Rose Quartz isn’t limited to romantic love; it extends to familial bonds, friendships, and self-acceptance․ It gently dissolves emotional wounds, traumas, and blockages, replacing them with feelings of peace and tranquility․ Many find comfort in holding Rose Quartz during times of grief or heartbreak, allowing its soothing energy to ease the pain․

Utilizing Rose Quartz can manifest loving energy into all aspects of life․ Placing it in your bedroom promotes peaceful sleep and loving dreams, while carrying it throughout the day attracts positive relationships and enhances emotional well-being․

Citrine: Abundance and Manifestation

Citrine, often called the “Merchant’s Stone,” is a vibrant yellow crystal renowned for attracting wealth, prosperity, and success․ It doesn’t just draw abundance; it helps you maintain it, fostering a positive mindset focused on growth and opportunity․ This joyful stone is believed to energize and uplift, dispelling negativity and promoting optimism․

Beyond financial gain, Citrine enhances creativity, confidence, and personal power․ It’s a fantastic crystal for entrepreneurs, artists, and anyone pursuing ambitious goals․ Citrine encourages taking action and stepping outside of one’s comfort zone, empowering you to manifest your desires․

Unlike many crystals, Citrine doesn’t require cleansing as often, as it doesn’t hold negative energy․ Placing it in your workspace or carrying it as a talisman can amplify your intentions and attract positive outcomes;

Black Tourmaline: Protection and Grounding

Black Tourmaline is a powerful grounding stone, highly valued for its protective qualities․ It acts like a shield, absorbing and transmuting negative energy, making it an excellent crystal to keep in your home or carry with you․ This stone is particularly beneficial for empaths or those sensitive to energetic influences․

Beyond protection, Black Tourmaline promotes a sense of security and stability․ It helps to dispel fear, anxiety, and self-doubt, fostering a feeling of inner strength and resilience․ This crystal is deeply connected to the Earth, grounding you and connecting you to its vital energy․

Regular cleansing of Black Tourmaline is essential, as it absorbs negativity․ Smudging with sage or placing it under running water can restore its protective properties․

Selenite: Cleansing and Purification

Selenite is renowned for its incredibly high vibrational energy and powerful cleansing properties․ Often called “liquid light,” this crystal doesn’t need cleansing itself, but actively cleanses other crystals and spaces․ Placing other stones on or near Selenite will clear their energy, removing blockages and restoring their natural vibrations․

Beyond crystal cleansing, Selenite promotes clarity of mind and spiritual connection․ It facilitates access to higher realms, aiding in meditation and angelic communication․ This gentle yet potent stone dissolves negative energy, creating a peaceful and harmonious environment․

Selenite is fragile and should be handled with care, avoiding prolonged exposure to water as it can dissolve․

Using Crystals: A Practical Guide

Unlock the potential of your crystals through mindful practices like cleansing, charging, and programming, enhancing their energy for personal well-being and intention setting․

Crystal Cleansing Methods

Maintaining the purity of your crystals is crucial for optimal energy flow and effectiveness․ Over time, crystals can absorb ambient energies, diminishing their inherent vibrations․ Several methods exist for cleansing, each suited to different crystal types and personal preferences․

Smudging with sage or palo santo is a popular technique, allowing the smoke to gently cleanse the crystal’s aura․ Alternatively, immerse your crystals in saltwater (ensure the crystal is water-safe!) for a few hours, visualizing negative energies dissolving․ Moonlight cleansing, particularly during a full moon, offers a gentle yet powerful purification․

Sound healing, using singing bowls or tuning forks, can also break up stagnant energy․ Finally, simply visualizing a bright white light surrounding and cleansing the crystal is a potent method․ Remember to research specific crystal sensitivities before employing any cleansing technique, and always handle your crystals with respect and intention․

Charging Your Crystals

After cleansing, it’s vital to recharge your crystals, replenishing their energy and amplifying their natural properties․ Think of it as revitalizing their inherent power, preparing them for focused intention work or everyday use․ Several methods effectively restore a crystal’s vibrancy․

Sunlight charging, while potent, should be approached cautiously, as prolonged exposure can fade certain crystals․ Moonlight, especially during a full moon, provides a gentler, yet equally effective charge․ Placing crystals on a selenite charging plate is another excellent option, as selenite naturally cleanses and charges other stones․

Earth burial – briefly burying crystals in soil – reconnects them with grounding energies․ Visualizing a bright, golden light infusing the crystal with energy is a powerful technique, regardless of other methods used․ Regular charging, ideally after each cleansing, ensures your crystals remain potent tools for healing and manifestation․

Programming Crystals for Intentions

Programming crystals involves imbuing them with a specific intention, directing their energy towards a desired outcome․ This process transforms a crystal from a beautiful object into a powerful tool for manifestation and personal growth․ Begin by holding the cleansed and charged crystal, closing your eyes, and focusing intently on your desired outcome․

Visualize this outcome vividly, feeling the emotions associated with its realization․ Clearly articulate your intention, speaking it aloud or silently directing it towards the crystal․ For example, “I program this rose quartz to attract loving and harmonious relationships․”

Maintain this focused energy for several minutes, allowing the crystal to absorb your intention․ Some practitioners visualize a beam of light connecting their heart to the crystal․ Trust that the crystal has received your programming, and continue to work with it regularly to reinforce the intention․

Wearing Crystals: Jewelry and Placement

Integrating crystals into your daily life is beautifully achieved through jewelry or strategic placement on the body․ Wearing crystals allows their energy to resonate with your aura throughout the day, offering continuous support for your intentions․ Pendants position crystals close to the heart chakra, promoting emotional healing and love;

Bracelets and rings maintain contact with the skin, facilitating energy flow․ Consider the crystal’s properties when choosing jewelry; amethyst for calming, citrine for abundance, or black tourmaline for protection․ Beyond jewelry, placing crystals on specific body points can amplify their effects․

For example, placing amethyst on the third eye can enhance intuition, while rose quartz on the chest opens the heart chakra․ Experiment with different placements to discover what feels most beneficial for you, trusting your intuition to guide you․

Crystals for Specific Needs

Discover targeted crystal support for various life challenges, from easing anxiety and promoting restful sleep to enhancing focus and aiding physical well-being․

Crystals for Anxiety and Stress Relief

Navigating modern life often brings feelings of anxiety and overwhelming stress; crystals can offer gentle, supportive energy during these challenging times․ Several gemstones are particularly renowned for their calming and grounding properties, assisting in restoring inner peace and emotional balance․

Amethyst, with its soothing violet hue, is a powerful stone for alleviating anxiety, promoting tranquility, and enhancing spiritual awareness․ Rose Quartz fosters self-love and compassion, dissolving emotional blockages and encouraging a sense of calm․ Lepidolite, rich in lithium, is known for its mood-stabilizing effects, reducing stress and promoting restful sleep․

Blue Lace Agate gently eases tension and encourages clear communication, while Howlite calms an overactive mind and promotes patience․ Holding these crystals during meditation, carrying them throughout the day, or placing them in your living space can create a sanctuary of serenity and support․

Crystals for Sleep and Insomnia

Restful sleep is fundamental to overall well-being, yet many struggle with insomnia or disturbed sleep patterns; crystals can be valuable allies in promoting relaxation and a peaceful night’s rest․ Certain gemstones possess energies that soothe the mind, release tension, and prepare the body for deep, restorative sleep․

Amethyst is highly regarded for its calming properties, easing anxiety and promoting tranquility, making it ideal for placing under your pillow or on your nightstand․ Lepidolite, containing lithium, gently soothes the nervous system and reduces stress, facilitating a more peaceful state․ Howlite calms an overactive mind, quieting racing thoughts that often interfere with sleep․

Selenite’s gentle energy cleanses the aura and creates a protective shield, promoting a sense of safety and serenity․ Moonstone, connected to the lunar cycle, encourages restful sleep and enhances dream recall․ Incorporating these crystals into your bedtime routine can cultivate a tranquil atmosphere conducive to deep, rejuvenating sleep․

Crystals for Focus and Concentration

In today’s fast-paced world, maintaining focus and concentration can be challenging; crystals can offer support by enhancing mental clarity, improving memory, and promoting a sense of groundedness․ Specific gemstones possess energies that stimulate cognitive function and help overcome mental distractions, allowing for increased productivity and improved learning․

Clear Quartz is known as the “master healer” and amplifies energy, enhancing focus and clarity of thought․ Carnelian boosts motivation and creativity, igniting passion and drive․ Citrine promotes optimism and self-confidence, fostering a positive mindset conducive to concentration․

Lapis Lazuli stimulates intellectual ability and enhances memory, making it a valuable tool for students and professionals․ Fluorite improves mental clarity and helps to filter out distractions․ Placing these crystals on your desk or carrying them with you can create a supportive environment for focused work and enhanced cognitive performance․

Crystals for Physical Healing (Disclaimer)

While many believe crystals possess healing properties that can support physical well-being, it’s crucial to understand that crystal healing is a complementary therapy and should never be used as a substitute for conventional medical treatment․ Crystals are not intended to diagnose, treat, cure, or prevent any disease․

The information provided regarding crystals and physical health is based on traditional beliefs and anecdotal evidence, not scientific proof․ Always consult with a qualified healthcare professional for any health concerns or before making any decisions related to your health or treatment․

Crystals can be used alongside conventional medicine to promote relaxation, reduce stress, and enhance overall well-being, but they should not replace professional medical advice or care․ Responsible use involves acknowledging their limitations and prioritizing your health above all else․

Advanced Crystal Practices

Explore deeper connections with crystal grids, elixirs, and synergistic combinations, unlocking amplified energy and refined intentions for experienced practitioners․

Crystal Grids: Amplifying Energy

Crystal grids are powerful arrangements of crystals created with specific geometric patterns to amplify energy and manifest intentions․ These sacred layouts harness the combined power of individual stones, focusing and directing their energies towards a desired outcome․ The geometry used – often based on sacred geometry like the Flower of Life – acts as a blueprint, enhancing the vibrational frequency․

Creating a grid involves selecting crystals that align with your intention, arranging them around a central focus stone, and connecting them with intention․ Consider the crystal shapes; points direct energy outward, while tumbled stones offer a more grounded influence․ Activating the grid with a wand or your finger, visualizing your intention flowing through the network, completes the process․ Grids can be used for healing, abundance, protection, or any other focused goal, offering a potent tool for energetic work․

Crystal Elixirs: Infused Water (Safety Precautions)

Crystal elixirs are water infused with the energetic properties of crystals, consumed to promote healing and well-being․ While a potent practice, safety is paramount․ Not all crystals are suitable for direct water infusion; some contain toxic elements that can leach into the water, posing a health risk․

The indirect method is highly recommended: place the crystal around the water container, rather than directly in it․ Alternatively, use a crystal wand to stir the water, imbuing it with the stone’s energy without physical contact․ Always research a crystal’s safety before use, avoiding those containing arsenic, lead, or asbestos․

Use only pure, filtered water and consume elixirs in moderation․ If you experience any adverse effects, discontinue use immediately․ Proper preparation and mindful selection are crucial for a safe and beneficial experience․

Combining Crystals for Synergistic Effects

Harnessing the power of crystal combinations can amplify their individual properties, creating synergistic effects for enhanced healing and manifestation․ This practice involves thoughtfully pairing crystals based on their complementary energies and intended purpose․

For example, combining Clear Quartz (the amplifier) with Rose Quartz (love and emotional healing) intensifies the loving energy․ Amethyst (spirituality) and Citrine (abundance) can balance spiritual growth with practical manifestation․ Black Tourmaline (protection) paired with Selenite (cleansing) provides a powerful shield against negativity while maintaining energetic purity․

Consider the crystals’ colors, associated chakras, and metaphysical properties when choosing combinations․ Intuition plays a vital role; experiment to discover pairings that resonate with your specific needs and intentions․

Resources for Further Crystal Study

Expanding your knowledge of crystals is a continuous journey, and numerous resources are available to deepen your understanding․ Several reputable books offer comprehensive guides to crystal properties, healing techniques, and historical lore․ Authors like Judy Hall and Hibiscus Moon are highly regarded in the crystal community․

Online platforms, such as websites dedicated to crystal healing and metaphysical studies, provide articles, forums, and expert insights․ Consider enrolling in workshops or courses led by certified crystal practitioners for hands-on experience and personalized guidance․

Remember to critically evaluate information and prioritize sources with established credibility․ Local metaphysical shops often host events and offer curated selections of crystals and related literature, fostering a supportive learning environment․

the guide to being fabulous

The Ultimate Guide to Being Fabulous

Embark on a journey of self-discovery, manifesting your ideal lifestyle through style, and unlocking a fabulous aesthetic that truly resonates with your soul!

Dive into a world where confidence blossoms, fashion fears dissolve, and everyday life becomes a runway, embracing experimentation and sustainable choices along the way.

This guide empowers you to ditch restrictive rules, revamp your wardrobe, and express your unique self, culminating in a radiant, authentically fabulous you.

What does “fabulous” even mean? It’s a deeply personal concept, far beyond fleeting trends or mainstream fashion dictates. It’s about uncovering and embodying your most authentic self, radiating confidence and joy through your style choices. This isn’t about imitation; it’s about creation.

To begin, consider a “style manifesto” – a set of keywords defining your ideal lifestyle and aesthetic. Dig deep, beyond surface-level preferences, to pinpoint your core values and how you want to present yourself to the world. Are you drawn to boldness, simplicity, vintage charm, or something entirely unique?

Take a moment for introspection. Pour yourself a comforting beverage, perhaps with a touch of fizz, and grab your favorite notebook. Breathe deeply and allow yourself to envision your most fabulous self. This is a journey of self-discovery, and the first step is defining what fabulous truly means to you.

Remember, fabulous isn’t a destination; it’s a state of being.

Discovering Your Authentic Style Manifesto

Now that you’ve begun to contemplate your personal definition of fabulous, let’s solidify it with a style manifesto. Think of this as your guiding document, a declaration of your aesthetic principles. Inspired by the concept of an “authentic code,” this manifesto will help you curate a wardrobe and style that genuinely reflect who you are.

Start by brainstorming keywords. What adjectives describe how you want to feel when you get dressed? Consider words like “empowered,” “playful,” “sophisticated,” “comfortable,” or “rebellious.” Don’t limit yourself – write down everything that resonates. Then, refine your list to 5-7 core keywords.

Next, translate these keywords into tangible style elements. If “bold” is a keyword, perhaps that means embracing vibrant colors and statement accessories. If “comfortable” is key, prioritize relaxed silhouettes and soft fabrics. Your manifesto is a living document, so feel free to revisit and revise it as your style evolves!

This is your style blueprint!

The Power of Self-Manifestation in Fashion

Fashion isn’t merely about clothing; it’s a powerful tool for self-expression and manifestation. By consciously choosing what you wear, you’re sending a message to the universe – and to yourself – about the person you aspire to be. This concept, akin to manifestation techniques, allows you to embody your ideal self through style.

Consider your style manifesto. Each outfit becomes an affirmation of your core values and desired qualities. If you want to feel more confident, choose pieces that make you feel strong and empowered. If you’re seeking creativity, experiment with bold colors and unconventional combinations.

The act of intentionally selecting your attire, perhaps with a cup of tea or a glass of fizz, and even adding a touch of lipstick, elevates the experience. It’s about creating a ritual, a moment of self-care and intentionality. Dress as the fabulous person you already are – or are becoming!

Wardrobe Revamp: Unleashing Your Potential

Transform your closet into a curated collection of confidence, discovering exciting new outfit combinations through dedicated exploration and mindful space-clearing for fabulousness!

Making Space for Fabulousness

Before diving into style exploration, a crucial first step is decluttering your wardrobe. This isn’t merely about tidying; it’s about creating physical and mental space for the fabulousness you’re cultivating. Truly assess each item – does it spark joy, fit well, and align with the aesthetic you’re developing?

Be honest with yourself. If something hasn’t been worn in a year (excluding truly seasonal items), it’s likely time to let it go. Consider donating, selling, or responsibly recycling unwanted clothes. A streamlined wardrobe makes outfit creation significantly easier, preventing overwhelm and encouraging experimentation.

Visualize the space as a canvas for your style. Empty hangers represent opportunities, and a clear view of your existing pieces allows you to truly see their potential. This process isn’t just about removing clothes; it’s about making room for a more confident, stylish you!

Creating New Outfit Combinations

Now for the fun part! Once you’ve decluttered, dedicate time – an afternoon or evening works well – to rediscover your wardrobe. Lay out your current collection on a bed or sofa, creating a visual playground of possibilities. Play some upbeat music and perhaps enjoy a drink to enhance the creative atmosphere.

Start piecing items together that you wouldn’t normally combine. Challenge your preconceived notions about what “works.” Experiment with different textures, colors, and silhouettes. Don’t be afraid to try unexpected pairings – that’s where the magic happens!

Document your successful combinations. Take photos of outfits you love to create a personal style lookbook for future inspiration. This dedicated exploration will unlock a wealth of new looks you never knew you had, maximizing your wardrobe’s potential.

Dedicated Time for Style Exploration

Truly unlocking fabulousness requires carving out dedicated time for style exploration. It’s not about endless shopping, but intentional play with what you already own. Schedule an afternoon or evening solely for this purpose – treat it like a self-care ritual!

Create an inspiring atmosphere. Put on music that makes you feel confident and energized. A little fizz (optional, of course!) can also loosen inhibitions and encourage experimentation. The goal is to create a relaxed and joyful environment.

This isn’t about finding “perfect” outfits, but about rediscovering your clothes and yourself. Try on everything, mix and match, and don’t be afraid to step outside your comfort zone. Document your experiments – you might be surprised by what you discover!

Breaking Fashion Rules & Embracing Experimentation

Dare to defy expectations, mixing high and low pieces, playing with patterns and colors, and wearing sequins anytime – because fabulousness knows no boundaries!

Embrace bold combinations and dress up for everyday moments, letting go of “special occasion” limitations to unlock your unique style potential.

Ditching the “Special Occasion” Mentality

We often fall into the trap of saving our most cherished pieces for elusive “special occasions.” That stunning dress? “Too good for the grocery store.” Those fabulous shoes? “Only for parties!” But why limit joy and self-expression to infrequent events?

This mentality stifles your style and prevents you from fully experiencing the confidence and happiness that comes with wearing what you love, when you love it.

Challenge yourself to break free from this restrictive mindset. Wear the sequins during the day! Don those fancy shoes simply because they make you feel amazing.

Life is too short to wait for a perfect moment to feel fabulous. Every day is an opportunity to celebrate yourself and your unique style. Embrace the joy of wearing what brings you happiness, regardless of the occasion.

Transform ordinary moments into extraordinary ones simply by choosing to dress up and feel good!

Sequins for Daytime: Why Not?

The idea of wearing sequins during the day might seem audacious, even rebellious, but why should such sparkle be reserved for evenings? Fashion is about self-expression, and there are absolutely no rules dictating when you can – or cannot – embrace a little shimmer.

Consider pairing a sequined top with relaxed denim and sneakers for an effortlessly cool, high-low look. Or, throw a sequined jacket over a simple dress for a touch of unexpected glamour.

The key is to balance the sparkle with more casual elements, creating an outfit that feels both playful and polished. Don’t be afraid to experiment and challenge conventional style norms!

Sequins aren’t just for parties; they’re a fantastic way to inject joy and personality into your everyday wardrobe.

Embrace the unexpected, and let your sequins shine – anytime, anywhere!

Mixing High & Low: Elevated Casual

The art of truly fabulous style lies in the ability to seamlessly blend investment pieces with more accessible finds. This “high-low” mix creates a look that feels both sophisticated and relatable, avoiding the pitfalls of appearing overly precious or contrived.

Imagine pairing a designer handbag with a classic white t-shirt and well-worn jeans. Or, combining a luxurious cashmere sweater with a trendy, affordable skirt.

The contrast is key – it’s about elevating everyday staples with a touch of luxury, or grounding statement pieces with casual comfort.

Don’t be afraid to experiment with different price points and brands.

This approach not only looks chic but also allows you to build a versatile wardrobe that reflects your personal style without breaking the bank.

Pattern & Color Play: Bold Combinations

Fabulousness often demands a departure from the predictable. Embrace the exhilarating freedom of mixing patterns and colors – a powerful way to showcase your personality and create truly memorable outfits!

Forget the outdated “rules” dictating what clashes. Instead, focus on finding combinations that you love. Think floral prints paired with stripes, or bold color blocking with unexpected hues.

Start small if you’re hesitant, perhaps with accessories. A brightly colored scarf can instantly elevate a neutral outfit, or patterned socks can add a playful touch.

Don’t be afraid to experiment with different scales of patterns – a large floral print alongside a smaller geometric design can create visual interest.

Ultimately, the goal is to have fun and express yourself through a vibrant and confident use of color and pattern!

Dressing Up for Everyday Life

Why reserve your most fabulous outfits for “special occasions”? Injecting a dose of glamour into your daily routine is a transformative act of self-love and a cornerstone of truly being fabulous!

Consider this: life is full of small moments worthy of celebration. Elevate a simple grocery run with a statement accessory, or wear those “fancy” shoes just because they make you feel amazing.

Ditching the mentality of saving the best for later allows you to experience joy and confidence now. It’s about embracing the power of dressing for yourself, not for others.

A touch of sparkle, a bold color, or a beautifully tailored piece can instantly lift your mood and radiate positivity. It’s a subtle yet powerful shift in perspective.

Remember, fabulousness isn’t about extravagance; it’s about intentionality and embracing joy in the everyday!

Sustainable & Savvy Style Choices

Discover the allure of second-hand fashion, hunting for vintage treasures, and embracing sustainable style without breaking the bank – a fabulous and conscious approach!

The Allure of Second-Hand Fashion

Step into a world where style meets sustainability! Second-hand fashion isn’t just about saving money; it’s a conscious choice that breathes new life into pre-loved garments. It’s a treasure hunt, a delightful exploration of unique pieces with stories to tell, offering a refreshing alternative to mainstream consumption.

Embrace the thrill of the chase, discovering hidden gems in vintage stores, charity shops, and online platforms. You’ll find items that stand out, reflecting your individuality and setting you apart from the crowd.

Beyond the unique finds, choosing second-hand significantly reduces your environmental impact, lessening the demand for new production and minimizing textile waste. It’s a fabulous way to curate a wardrobe that’s both stylish and responsible, proving that looking good and doing good can absolutely go hand-in-hand. Learn all the insider tips and tricks!

Hunting Down True Vintage Treasures

The pursuit of true vintage is an adventure! It requires patience, a keen eye, and a willingness to dig. Forget fleeting trends; vintage offers timeless elegance and unparalleled quality, pieces crafted with attention to detail rarely found today.

Seek out local vintage shops, estate sales, and online marketplaces specializing in authentic vintage clothing. Learn to identify different eras by their silhouettes, fabrics, and construction techniques. Don’t be afraid to ask questions about the garment’s history and origin.

Inspect items carefully for any damage or alterations, but don’t dismiss a piece with minor flaws – they often add character! Remember, finding that perfect vintage treasure is about more than just the item itself; it’s about connecting with the past and adding a unique story to your fabulous style.

Sustainable Style on a Shoestring

Fabulous style doesn’t require a fortune! Sustainable fashion is accessible to everyone, even on a budget. Embrace the allure of second-hand shopping – thrift stores, consignment shops, and online platforms offer incredible finds at a fraction of the retail price.

Get creative with what you already own! Re-purpose, re-style, and mend existing pieces instead of constantly buying new ones. Learn basic sewing skills to repair minor damages and customize your clothing. Swap clothes with friends and family to refresh your wardrobe without spending a dime.

Focus on quality over quantity, investing in timeless pieces that will last for years. Remember, conscious consumption is key to a truly fabulous and sustainable wardrobe – style with a clear conscience!

Confidence & Self-Expression

Unleash your inner radiance by conquering fashion anxieties, embracing your unique aesthetic, and prioritizing feeling fantastic in every outfit you choose to wear!

Overcoming Fashion Fears

Many of us harbor hidden anxieties when it comes to style. We often save beloved pieces for “special occasions,” fearing they’re too good for everyday wear. This creates a wardrobe full of items rarely enjoyed! It’s time to dismantle that mindset.

Are you stuck in a rut, repeatedly wearing outfits the same way? Do you shy away from experimenting with bold colors or unfamiliar styles, believing it’s safer to play it safe? Recognize these patterns as opportunities for growth.

The truth is, there are no hard and fast rules. Dare to wear those sequins during the day, simply because they make you feel amazing! Don’t hesitate to pair high-end items with casual staples – elevated casual is effortlessly chic. Embrace the freedom to mix patterns, colors, and dress up even for mundane tasks. Remember, fabulousness isn’t reserved for special events; it’s a state of mind!

Embracing Your Unique Aesthetic

Finding your fabulousness isn’t about blindly following trends; it’s about uncovering and celebrating your authentic style. Dig deep to pinpoint your “true manifesto” – the core values and lifestyle aspirations that define you. Think of it as creating a personal style code, using keywords to represent your ideal aesthetic.

Take the time for introspection. Pour yourself a comforting drink, put on some inspiring music, and perhaps even a touch of lipstick to boost your mood. Breathe, and allow yourself to explore what genuinely makes you feel good.

Your aesthetic is a reflection of your inner self. Don’t be afraid to experiment and break away from expectations. Embrace individuality, and remember that true style is about confidence and self-expression, not conformity. Let your personality shine through your clothing choices!

The Importance of Feeling Good

Ultimately, being fabulous isn’t about adhering to external standards of beauty or fashion; it’s about cultivating a deep sense of self-love and confidence. The clothes you wear should be a source of joy and empowerment, enhancing how you feel about yourself, not dictating it.

Ditch the notion of saving “special” pieces for “special” occasions. Wear the sequins during the day, sport those fabulous shoes simply because they make you happy! Elevate your everyday life by dressing up, even for mundane tasks like grocery shopping.

When you feel good in what you’re wearing, it radiates outwards, impacting your mood and interactions. Prioritize comfort and self-expression over rigid rules. Remember, fabulousness is a state of mind, and feeling good is the most stylish accessory you can wear.

Finishing Touches: Elevating Your Look

Add a pop of color with lipstick, set the mood with music, and perhaps enjoy a little fizz – these details amplify your fabulous style!

The Power of Lipstick

Lipstick isn’t merely makeup; it’s a transformative tool, a quick injection of confidence, and a surprisingly potent style statement. Often mentioned as a simple yet effective finishing touch, a carefully chosen shade can instantly elevate your entire look, shifting your mood and projecting an aura of fabulousness.

Consider it a secret weapon. Feeling a little lackluster? A bold red can provide an immediate boost. Opting for a more understated ensemble? A subtle nude or berry tone adds polish and sophistication. Don’t be afraid to experiment with textures – matte, gloss, or satin – to find what best complements your aesthetic.

The act of applying lipstick itself can be a ritual, a moment of self-care and preparation. It signals to yourself that you’re ready to face the world with style and grace. It’s a small detail with a significant impact, proving that sometimes, the most fabulous looks are completed with a single swipe.

Adding a Touch of Fizz (Optional!)

The pursuit of fabulousness should be joyful, and sometimes, that joy is best amplified with a little sparkle – literally or figuratively! A glass of bubbly, a celebratory cocktail, or even a sparkling beverage can enhance the experience of style exploration and self-expression.

Think of it as setting the mood. As you revamp your wardrobe or experiment with new outfit combinations, a touch of fizz can loosen inhibitions and encourage bolder choices. It’s about creating an atmosphere of playful experimentation, where you feel comfortable taking risks and embracing your unique aesthetic.

However, remember the “optional” part! Fabulousness isn’t dependent on alcohol. It’s about feeling good in your own skin and expressing yourself authentically. If a sparkling drink adds to your enjoyment, wonderful! If not, a cup of tea or simply your favorite music will do just as well.

Music & Mood Setting for Style

Creating the right atmosphere is paramount when embarking on a style journey. Music, in particular, possesses a remarkable ability to influence our mood and unlock our creativity. As you dedicate time to style exploration, curate a playlist that makes you feel confident, empowered, and fabulous!

Consider the vibe you’re aiming for. Energetic pop for a bold, playful mood? Sultry jazz for a sophisticated look? Or perhaps indie tunes for a more relaxed, authentic aesthetic? Let the music guide your outfit choices and inspire you to experiment.

Beyond music, consider other mood-setting elements. Dim the lights, light a candle, or simply tidy up your space. A clean and inviting environment fosters a sense of calm and allows you to focus on the joy of self-expression. Remember, fabulousness is a feeling, and the right ambiance can help you cultivate it.

heat pump wiring diagram pdf

Heat Pump Wiring Diagram PDF: A Comprehensive Guide

This guide expertly navigates heat pump wiring diagrams in PDF format, offering installation, troubleshooting, and maintenance insights for optimal system performance and longevity․

Understanding Heat Pump Systems

Heat pumps offer efficient heating and cooling by transferring heat, unlike traditional systems generating it․ Wiring diagrams are crucial for understanding their operation, especially with increasing complexity in modern units․ Technicians often encounter confusion, particularly with dual-fuel configurations, highlighting the need for clear, accessible documentation․

These systems integrate indoor and outdoor units, controlled by a network of electrical components․ A PDF wiring diagram visually represents this network, detailing connections between thermostats, contactors, reversing valves, and the compressor․ Proper interpretation is vital for installation, diagnostics, and repairs․ Familiarity with these diagrams empowers technicians to confidently address electrical issues, ensuring optimal performance and preventing costly downtime․ Understanding the core principles of heat pump operation is foundational for effectively utilizing these diagrams․

Types of Heat Pumps & Corresponding Diagrams

Heat pump wiring diagrams vary significantly based on system type․ Single-stage systems have simpler diagrams, showing basic connections for heating and cooling․ Two-stage models introduce complexity with wiring for low and high-capacity operation․ Dual-fuel systems, combining heat pumps with gas furnaces, require even more intricate diagrams illustrating the interaction between both systems․

Variable speed heat pumps, offering the highest efficiency, possess the most complex wiring schematics, detailing communication between the indoor unit, outdoor unit, and the thermostat․ Accessing PDF versions of manufacturer-specific diagrams (like York) is crucial․ These diagrams often include detailed labels and component lists․ Understanding these distinctions is key to correctly interpreting the wiring diagram and performing accurate troubleshooting․

Essential Components in a Heat Pump Wiring Diagram

A comprehensive heat pump wiring diagram PDF will clearly illustrate key components․ These include the compressor, reversing valve, indoor fan motor, outdoor fan motor, and various relays and capacitors․ The thermostat is central, controlling system operation via wiring to the control board․ Wiring diagrams also depict the transformer, providing necessary voltage, and safety devices like disconnect switches and fuses․

Understanding the function of each component and its representation in the diagram is vital․ PDF formats often allow zooming for detailed inspection of connections․ Correctly identifying these elements is the first step towards effective troubleshooting and maintenance, ensuring safe and efficient system operation․

Decoding Heat Pump Wiring Symbols

Heat pump wiring diagram PDFs utilize standardized symbols for easy interpretation․ Common symbols represent components like capacitors (often two curved lines), relays (a coil and switch), and fuses (a broken line within a shape)․ Wiring lines indicate connections, with solid lines representing standard conductors․ Thermostats are shown with temperature control symbols, and motors with coil representations․

Understanding these symbols is crucial for reading a PDF diagram effectively․ Manufacturers often include a legend within the diagram itself, clarifying symbol meanings․ Familiarity with these conventions allows technicians to quickly trace circuits, identify potential issues, and perform accurate repairs, ensuring safe and efficient system operation․

Wiring Diagrams for Different Heat Pump Configurations

PDF diagrams illustrate wiring for single-stage, two-stage, dual-fuel, and variable speed heat pumps, detailing unique electrical setups for each system type․

Single-Stage Heat Pump Wiring Diagrams

Single-stage heat pump wiring diagrams, often found in PDF format, present the simplest configuration․ These diagrams typically illustrate connections for the compressor, reversing valve, indoor fan motor, and associated control circuits․ PDF versions clearly show the power supply wiring, thermostat connections, and safety devices like disconnect switches and fuses․

Understanding these diagrams is crucial for technicians, as they represent the foundational wiring principles for all heat pump systems․ The PDF format allows for detailed zoom capabilities, highlighting individual components and wire colors․ Common elements include the ‘Y’ wire for cooling, ‘O’ wire for reversing valve control, and ‘G’ wire for fan operation․

These diagrams often include voltage specifications and wire gauge recommendations, ensuring safe and efficient operation․ Proper interpretation of these PDF diagrams is essential for correct installation and troubleshooting of single-stage heat pump systems, preventing potential electrical hazards and ensuring optimal performance․

Two-Stage Heat Pump Wiring Diagrams

Two-stage heat pump wiring diagrams, readily available in PDF format, introduce increased complexity compared to single-stage systems․ These PDFs illustrate wiring for both high and low heating/cooling stages, requiring additional control wiring and components․ Technicians rely on these diagrams to understand the operation of the two-speed compressor and indoor fan motor․

Key elements within the PDF include wiring for the second-stage thermostat control, often designated with additional terminals or wires․ These diagrams detail how the system switches between stages based on heating or cooling demand․ Understanding the interaction between the thermostat, control board, and compressor is vital․

PDF versions often include detailed schematics of the control board, showing the logic for stage selection․ Correctly interpreting these diagrams ensures efficient operation and prevents premature component failure․ Proper wiring, as depicted in the PDF, maximizes comfort and energy savings․

Dual-Fuel Heat Pump Wiring Diagrams

Dual-fuel heat pump wiring diagrams, commonly found in PDF format, showcase systems integrating a heat pump with a supplemental fossil fuel furnace – typically gas or oil․ These PDFs are crucial for technicians due to the increased wiring complexity, managing seamless transitions between heating sources․

The PDF diagrams illustrate wiring for the outdoor heat pump unit, the indoor air handler, and the auxiliary furnace․ A key component is the transfer switch, controlled by the thermostat, dictating which heating source operates․ Understanding the logic behind this switch is paramount․

PDF versions often detail the wiring for the fossil fuel system’s safety controls, ensuring safe operation․ Technicians use these diagrams to troubleshoot issues related to fuel switching or component failures․ Correct interpretation, as shown in the PDF, optimizes efficiency and comfort․

Variable Speed Heat Pump Wiring Diagrams

Variable speed heat pump wiring diagrams, often available as detailed PDFs, represent the most advanced configurations․ These PDFs illustrate complex wiring schemes controlling the compressor and fan motors for precise temperature regulation and enhanced energy efficiency․

These PDFs showcase communication wiring between the indoor and outdoor units, utilizing protocols like modulating communication․ Technicians rely on these diagrams to understand the control signals governing the variable speed operation․ Proper wiring ensures seamless modulation and optimal performance․

PDF versions frequently include wiring for auxiliary components like economizers and dehumidification features․ Troubleshooting requires a thorough understanding of the control logic depicted in the PDF․ Accurate interpretation is vital for diagnosing issues and maintaining system efficiency․

Troubleshooting Common Heat Pump Wiring Issues

PDF wiring diagrams are crucial for pinpointing errors, diagnosing faults, and ensuring safe repairs within complex heat pump systems, enhancing reliability․

Identifying Wiring Errors in Diagrams

Utilizing a heat pump wiring diagram PDF is the first step in accurately identifying potential wiring errors․ Technicians often encounter situations, like the one described where a previous installer left a job unfinished due to electrical confusion․ Carefully compare the physical wiring of the heat pump to the diagram, looking for discrepancies in color coding, terminal connections, and component placement․

Common errors include miswired fan motors, incorrect thermostat connections, and reversed polarity on compressors or reversing valves․ Pay close attention to relay pack configurations, especially in dual-fuel systems, as these can be particularly complex․ PDF diagrams allow for zooming and detailed inspection of each connection point․ Look for broken wires, loose connections, or signs of corrosion that might not be immediately visible․ Remember to always verify the diagram matches the specific model number (like the 50BYN example) of the heat pump being serviced․

Using Wiring Diagrams for Fault Diagnosis

A heat pump wiring diagram PDF is invaluable when diagnosing system malfunctions․ Begin by tracing the circuit related to the reported issue, systematically checking each component․ For instance, if the unit isn’t heating, focus on the reversing valve, compressor, and associated wiring․ Utilize the diagram to confirm proper voltage levels at each connection point, using a multimeter․

PDF diagrams facilitate understanding complex configurations, like those found in dual-fuel systems, where Bill Porter’s experience highlights the need for clarity․ Compare the diagram’s expected readings with actual measurements; deviations indicate a fault․ Software like GeoTSOL can aid in simulating system behavior and pinpointing potential issues․ Remember to always prioritize safety and disconnect power before probing wires․ Refer to manufacturer-specific diagrams (like York’s) for accurate component locations and wiring schemes․

Safety Precautions When Working with Heat Pump Wiring

Working with heat pump wiring demands strict adherence to safety protocols․ Always disconnect power at the breaker box before commencing any work, verifying with a voltage tester․ Never assume wires are de-energized; treat all connections as live until proven otherwise․ Utilize insulated tools and wear appropriate personal protective equipment (PPE), including safety glasses and gloves․

Refer to the heat pump wiring diagram PDF to understand the system’s layout and potential hazards․ Be cautious of capacitors, which can store a dangerous electrical charge even after power is removed․ Avoid working in wet conditions, and ensure adequate ventilation․ If unsure about any aspect of the wiring, consult a qualified HVACR technician, like those who benefit from clarified diagrams as noted by Bill Porter․ Proper labeling of wires, as seen in the 50BYN example, aids in safe reconnection․

Resources for Heat Pump Wiring Diagrams

Explore manufacturer sites like York, online databases, and tools such as GeoTSOL for comprehensive heat pump wiring diagram PDFs and system design assistance․

Manufacturer-Specific Wiring Diagrams (York, etc․)

Accessing precise heat pump wiring diagram PDFs directly from manufacturers like York is crucial for accurate installations and repairs․ These diagrams, often detailed and model-specific, supersede generic schematics, ensuring compatibility and safety․ York, for instance, provides manuals guiding setup and operation with confidence, including advanced operating instructions․

Manufacturer resources typically offer the most up-to-date information, reflecting design changes and component updates․ Searching the York website, or contacting their support, yields specific PDF documents tailored to your unit․ Other manufacturers, like Carrier and Trane, also maintain extensive online libraries․ Utilizing these official sources minimizes errors and guarantees adherence to the manufacturer’s specifications, ultimately extending the lifespan and efficiency of your heat pump system․ Always prioritize manufacturer-provided documentation․

Online Databases and Diagram Repositories

Numerous online databases and repositories offer a wealth of heat pump wiring diagram PDFs, supplementing manufacturer resources․ These platforms often compile diagrams from various brands and models, providing a centralized location for searching․ However, verifying the accuracy and currency of diagrams from these sources is paramount;

Royalty-free image sites also host schematic illustrations, useful for understanding general wiring principles․ While convenient, these may not be specific enough for detailed repairs․ Be cautious when relying solely on these resources; cross-reference with manufacturer documentation whenever possible․ Diagram repositories can save time, but responsible usage demands diligent verification to ensure the information aligns with your specific heat pump model and configuration, preventing potential errors and safety hazards․

Software Tools for Heat Pump System Design (GeoTSOL)

GeoTSOL emerges as a professional-grade software solution for meticulously planning and designing comprehensive heat pump systems․ This user-friendly tool empowers technicians and engineers to visualize and optimize system layouts, including detailed wiring schematics․ It offers flexibility in selecting diverse heat sources and operating modes, facilitating customized designs tailored to specific project requirements․

While not solely a PDF diagram repository, GeoTSOL generates detailed system designs that can be exported and saved in formats compatible with PDF viewers․ This allows for easy sharing and documentation of wiring configurations․ The software’s simulation capabilities aid in identifying potential wiring issues before installation, enhancing system reliability and efficiency․ It’s a powerful asset for complex installations․

Accessing and Utilizing PDF Wiring Diagrams

PDF formats deliver easily shareable heat pump wiring diagrams, requiring compatible viewers for interpretation and enabling efficient system setup and maintenance procedures․

Reading and Interpreting PDF Diagram Formats

PDF wiring diagrams for heat pumps present information in a standardized, universally accessible format, ensuring consistent visualization across different devices and operating systems․ Understanding the layout is crucial; typically, diagrams utilize standardized symbols representing components like compressors, contactors, capacitors, and fan motors․

Key elements include power supply lines (often denoted by solid lines), control wiring (dashed or dotted lines), and grounding connections․ Pay close attention to wire numbers and color codes, as these directly correlate to physical wiring within the heat pump system․ Diagrams often include multiple views or zoomed-in sections for complex areas․

Effective interpretation requires familiarity with electrical schematics and heat pump operation․ Look for legends explaining symbols and abbreviations․ Utilize features within PDF readers, such as zoom and search, to navigate and locate specific components or wiring paths․ Remember that accurate reading is paramount for safe and effective troubleshooting or installation․

Compatible Accessories and Diagram Updates

Heat pump systems often integrate with various accessories – thermostats, air handlers, zoning dampers – each requiring specific wiring configurations․ PDF wiring diagrams should clearly illustrate these integrations, detailing the necessary connections and compatibility requirements․ Always verify accessory compatibility with the heat pump model before installation, referencing the manufacturer’s specifications․

Diagrams aren’t static; manufacturers frequently release updates to reflect design changes, component revisions, or bug fixes․ Regularly check the manufacturer’s website for the latest PDF versions of wiring diagrams․ Outdated diagrams can lead to incorrect wiring, potentially causing system malfunctions or safety hazards․

Ensure you’re using the diagram specifically for your heat pump’s serial number or model year․ Properly maintained diagrams, alongside compatible accessories, guarantee optimal system performance and longevity, minimizing troubleshooting efforts and maximizing efficiency․

Index and Label Diagrams within PDF Documents (50BYN Example)

Effective PDF wiring diagrams incorporate a detailed index and clear labeling for easy navigation․ The 50BYN example demonstrates this, with labeled figures like “Wiring Diagram; 50BYN With VVTT and Relay Pack” identified by specific figure numbers (e․g․, Fig․ 7)․ A well-structured index allows technicians to quickly locate diagrams for specific components or configurations․

Diagram labels should be concise and informative, clearly identifying wires, terminals, and components․ Color-coding, where used, must be consistently applied and explained in a legend․ Proper labeling minimizes ambiguity and reduces the risk of wiring errors during installation or troubleshooting․

Searchable PDFs are invaluable; technicians can quickly find relevant diagrams by searching for keywords like “relay,” “thermostat,” or the model number․ Utilizing these features streamlines the diagnostic process and improves efficiency․