kenmore washer model 110 repair manual
Kenmore Washer Model 110 Repair Manual: A Comprehensive Guide
This detailed repair manual offers a foundational understanding of your Kenmore automatic washer’s operation, encompassing 179 pages and providing essential guidance for DIY repairs.
The Kenmore Model 110 washer represents a cornerstone in the brand’s commitment to reliable home appliances. As part of the broader Kenmore lineup – encompassing standard Kenmore, Elite, and PRO models – the 110 is designed for ease of use and effective cleaning. This particular model, often identified as 110.22842100, is a popular choice for households seeking a durable and efficient washing machine.
Understanding the features of the Model 110 is crucial for successful maintenance and repair. It often incorporates innovative cleaning technologies, such as the Quad Action Impeller system, offering up to four wash motions – spraying, impeller action, wash basket movement, and flex fins – to optimize cleaning performance. Furthermore, select models boast a Steam Treat feature, simplifying stain removal without pre-treatment.
This repair manual aims to empower owners with the knowledge to address common issues and perform necessary repairs, extending the lifespan of their Kenmore Model 110 washer.
Understanding the Kenmore Model Lineup (Kenmore, Elite, PRO)
Kenmore appliances are categorized into three distinct lines: Kenmore, Kenmore Elite, and Kenmore PRO, each catering to different needs and budgets. The standard Kenmore line, where the Model 110 typically resides, focuses on providing reliable performance and essential features at an accessible price point. These models prioritize durability and straightforward operation.
Kenmore Elite washers represent a step up, incorporating advanced technologies and enhanced features like improved wash cycles and more sophisticated controls. Finally, the Kenmore PRO line offers the highest level of performance and innovation, often including features like smart connectivity and specialized wash programs.
While the Model 110 is part of the core Kenmore line, understanding the broader lineup helps contextualize its features and capabilities. All three lines share Kenmore’s commitment to quality, but differ in their feature sets and price ranges, offering consumers a choice to suit their individual requirements.
Common Problems & Troubleshooting
Addressing issues like failure to start, fill, drain, or leaks, alongside excessive vibration, is crucial for maintaining your Kenmore Model 110 washer’s functionality.
Washer Won’t Start: Initial Checks
Before diving into complex repairs, several initial checks can pinpoint why your Kenmore Model 110 washer refuses to start. First, verify the power supply. Ensure the washer is properly plugged into a functioning outlet and that the circuit breaker hasn’t tripped. A simple reset of the breaker can often resolve the issue.
Next, examine the lid switch. This safety feature prevents operation when the lid is open. Confirm it’s engaging correctly; a faulty lid switch is a common culprit. Also, check the control panel for any error codes displayed on the electronic LCD panel, as these provide valuable diagnostic clues.
Inspect the start/pause button for responsiveness. If the button feels loose or doesn’t click firmly, it might require replacement. Finally, listen for any humming sounds when attempting to start the washer. A hum suggests the motor is receiving power but may be jammed or have another internal issue.
Washer Won’t Fill with Water: Causes & Solutions
A Kenmore Model 110 washer failing to fill typically stems from issues with the water inlet valve, water supply, or control board. Begin by verifying both hot and cold water supply are fully turned on. Check the inlet hoses for kinks or obstructions restricting water flow.
The water inlet valve itself is a frequent cause. This component controls water entry; a faulty valve may need replacement. To test, disconnect power and check the valve’s screen for sediment buildup. Clear any debris found within the screens.
Inspect the water level switch, which signals the control board when to stop filling. A malfunctioning switch can prevent filling. Finally, examine the control board for potential issues, though this often requires professional diagnosis. Remember safety first – always disconnect power before any inspection or repair.
Washer Won’t Drain: Identifying the Issue
If your Kenmore Model 110 isn’t draining, the most common culprit is a clogged drain pump. Begin by disconnecting power and locating the pump – often accessible from the front or rear of the machine. Inspect the pump’s filter for lint, coins, or other obstructions.
A blocked drain hose is another frequent cause. Detach the hose from both the washer and the drainpipe, and clear any blockages. Ensure the drain hose isn’t kinked or excessively bent, restricting flow.
The drain pump itself may be faulty and require replacement. Listen for humming during the drain cycle; silence suggests a pump failure. Less commonly, a control board issue can prevent the pump from activating. Always prioritize safety by disconnecting power before any inspection or repair attempts;
Washer is Leaking Water: Common Leak Points
Water leaks in the Kenmore Model 110 often stem from several key areas. First, inspect the water inlet hoses connecting to the back of the washer; tighten connections or replace damaged hoses. Check the drain hose for cracks or loose clamps, ensuring a secure fit at both ends.
The door boot (if a front-load model) is a common leak source. Examine it for tears or debris, and replace if damaged. Internal leaks can originate from the water pump or tub seal, requiring more extensive disassembly to address.
Overfilling, due to a faulty water level sensor, can also cause leaks. Carefully observe where the water is escaping from to pinpoint the source and determine the appropriate repair. Always disconnect power before investigating any leak.
Excessive Vibration During Spin Cycle
Severe shaking during the spin cycle of your Kenmore Model 110 usually indicates an imbalance; Ensure the washer is level on the floor; adjust the feet as needed. Verify the load is balanced – avoid washing single, heavy items alone. An unbalanced load is the most frequent cause.
Worn shock absorbers or suspension rods can contribute to excessive vibration. These components dampen the washer’s movement and should be inspected for damage or weakness. A failing drive belt can also cause instability.
The wash basket action, including the Quad Action Impeller, should be checked for obstructions. Finally, confirm the shipping bolts (if recently installed) have been removed, as they are designed to stabilize the drum during transport.
Disassembly & Repair Procedures
Detailed step-by-step instructions are crucial for accessing internal components, enabling effective replacement of parts like the water inlet valve and drain pump.
Accessing Internal Components
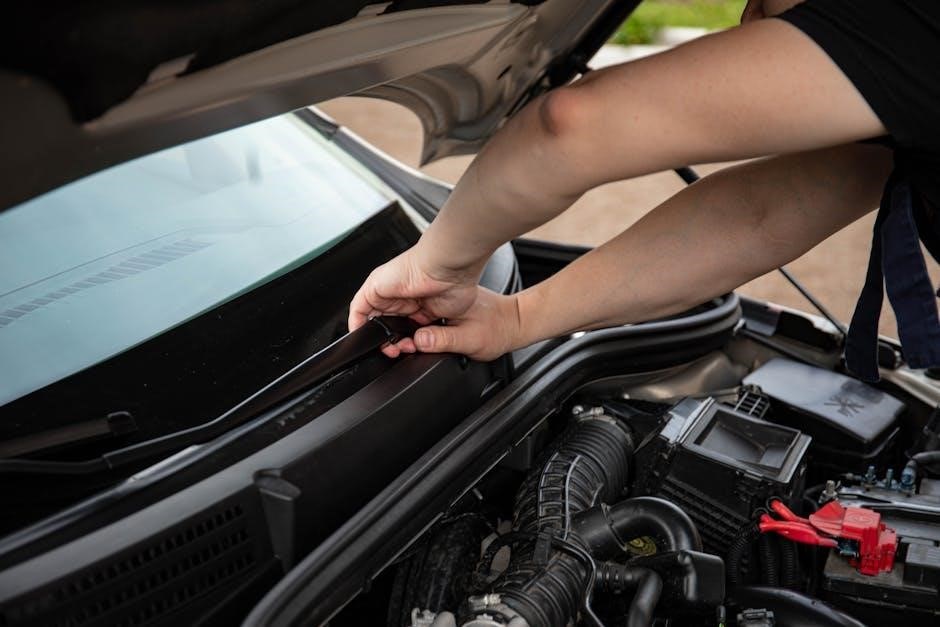
Before initiating any disassembly, ensure the Kenmore Model 110 washer is completely disconnected from both the power supply and the water lines. This is a paramount safety precaution. Begin by removing the top panel, typically secured with clips or screws located at the rear of the appliance.
Once the top panel is removed, you’ll gain access to the control panel and various internal components. Carefully disconnect any wiring harnesses connected to the control panel, noting their positions for reassembly. The front panel can then be detached, revealing the wash basket and associated mechanisms.
To access the lower components, such as the drain pump and motor coupling, you may need to tilt the washer backward (with appropriate support) or remove the front access panel. Always exercise caution when handling the washer to avoid personal injury or damage to the appliance. Remember to document each step with photos for easier reassembly.
Replacing the Water Inlet Valve
A faulty water inlet valve prevents the washer from filling correctly. Begin by disconnecting the water supply hoses from the existing valve, noting which hose connects to the hot and cold water inlets. Disconnect the electrical connectors attached to the valve.
Locate the retaining clip or screws securing the valve to the washer chassis and remove them. Gently pull the old valve out, being mindful of any remaining water that may spill. Before installing the new valve, inspect the inlet screens for debris and clean them thoroughly.
Connect the new valve, securing it with the retaining clip or screws. Reconnect the electrical connectors and water supply hoses, ensuring a tight seal to prevent leaks. Test the new valve by briefly turning on the water supply and checking for any leaks around the connections.
Replacing the Drain Pump
A malfunctioning drain pump causes the washer to retain water. First, disconnect the power supply to the washing machine. Locate the drain pump, typically at the lower front or rear of the appliance. Disconnect the drain hose connected to the pump, preparing for potential residual water spillage.
Remove any access panels or screws securing the pump to the washer’s frame. Carefully disconnect the electrical connector attached to the pump. Gently remove the old pump, noting its orientation for correct re-installation;
Install the new drain pump, ensuring it’s properly aligned and secured with screws or clips. Reconnect the electrical connector and drain hose, verifying a secure fit. Test the new pump by running a drain cycle, checking for leaks and proper water expulsion.
Replacing the Drive Belt
A worn or broken drive belt prevents the washer drum from spinning correctly. Begin by disconnecting the power supply. Access the drive belt, usually by removing the back panel of the washing machine. Note the belt’s routing around the motor pulley and the drum pulley – a diagram can be helpful.
Loosen the motor mounting bolts to create slack in the belt. Carefully remove the old belt, and inspect the pulleys for wear or damage. Install the new drive belt, ensuring it’s correctly seated in the grooves of both pulleys.
Tighten the motor mounting bolts to apply tension to the belt. Test the washer by running a spin cycle, listening for unusual noises and verifying proper drum rotation.
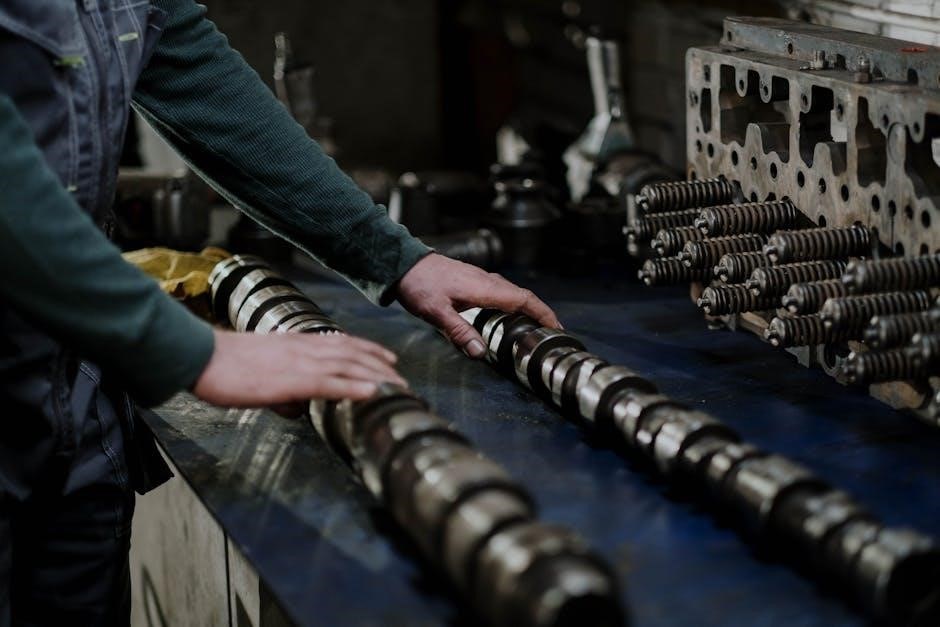
Replacing the Motor Coupling
The motor coupling connects the motor to the transmission, and often fails due to wear and tear, resulting in a clicking or grinding noise during operation. Disconnect the power before starting. Access the coupling, typically located beneath the washer cabinet, requiring removal of panels.
Detach the old coupling halves from both the motor shaft and the transmission. Inspect both components for damage; replace if necessary. Align the new coupling halves and firmly press them onto the motor shaft and transmission, ensuring a secure fit.
Reassemble the washer cabinet and test the repair by running a wash cycle. Listen for any unusual noises, confirming the coupling is functioning correctly and the noise has been eliminated.
Component Specifics
Kenmore washers utilize innovative cleaning technologies, including Quad Action Impeller systems and, in some models, traditional agitators for optimal wash basket action.
Understanding the Quad Action Impeller System
The Quad Action Impeller represents a significant advancement in Kenmore washing machine technology, offering a more dynamic and effective cleaning process compared to traditional agitator systems. This system employs up to four distinct wash motions – spraying, impeller rotation, wash basket action, and flexible fins – working in concert to thoroughly clean laundry.
Unlike agitators that rely on a central post to move clothes, the impeller utilizes a low-profile disc with strategically designed fins. This allows for a larger wash basket capacity and gentler treatment of fabrics. The spraying action pre-mixes water and detergent, while the impeller’s rotation creates powerful currents. The wash basket action further enhances cleaning, and the flex fins adapt to different load sizes and fabric types.
Understanding how each component of the Quad Action Impeller system functions is crucial for effective troubleshooting and repair. Issues with the impeller itself, its motor, or the associated spray nozzles can all impact washing performance. Regular inspection and maintenance of these components will ensure optimal cleaning results and prolong the lifespan of your Kenmore washer.
The Role of the Agitator (if applicable)
While the Kenmore Model 110 frequently features the advanced Quad Action Impeller system, some variations may incorporate a traditional agitator. The agitator’s primary function is to create water movement within the wash basket, driving clothes through the detergent solution for effective cleaning. It achieves this through a central oscillating motion, mimicking hand-washing action.
Agitators typically consist of a central post with vanes or fins designed to lift, drop, and roll clothes. This process helps to dislodge dirt and stains. However, agitators can be harsher on fabrics compared to impeller systems, potentially causing wear and tear over time.
If your Model 110 does utilize an agitator, understanding its components – including the agitator dogs, drive block, and transmission linkage – is vital for repair. Common issues include a broken agitator, worn agitator dogs, or a malfunctioning transmission. Proper diagnosis and replacement of these parts are essential to restore effective washing performance.
Examining the Wash Basket Action
The Kenmore Model 110’s wash basket action is central to its cleaning performance, utilizing up to three distinct motions – spraying, agitator action (if equipped), and direct wash basket rotation. Newer models leverage the Quad Action Impeller, adding flex fins for optimal cleaning through four motions: spraying, impeller, wash basket action, and fin flexibility.
Observing the basket during operation reveals how these motions work in concert. Spraying pre-treats clothes, while the impeller or agitator creates turbulence. The basket’s rotation ensures thorough saturation and removal of loosened dirt. A smooth, consistent rotation is crucial; any wobbling or excessive noise indicates a potential issue.
Inspect the basket for damage, such as cracks or holes. Check the suspension rods and springs supporting the basket, as these can wear out, causing instability. A properly functioning wash basket action is fundamental for effective and gentle cleaning.
Advanced Troubleshooting & Maintenance
Utilize the electronic LCD panel for diagnostic insights, and ensure proper care of the Steam Treat feature for optimal performance and longevity of your Kenmore washer.
Using the Electronic LCD Panel for Diagnostics
The Kenmore Model 110 washer’s electronic LCD panel serves as a crucial diagnostic tool, offering insights into potential issues and guiding repair efforts. This panel allows for easy temperature adjustments, customization of wash cycles, and scheduling of operations, enhancing user control and convenience.
When encountering problems, carefully observe the LCD panel for error codes or unusual displays. These codes often pinpoint the source of the malfunction, streamlining the troubleshooting process. Refer to the official Kenmore Model 110 repair manual (available in PDF and booklet formats) to decipher these codes accurately.
Beyond error codes, the panel displays cycle status, remaining time, and selected options, providing real-time feedback on the washer’s operation. Regularly checking these displays can help identify anomalies before they escalate into major repairs. Understanding the panel’s functionality is paramount for effective maintenance and troubleshooting of your Kenmore washer.
Steam Treat Feature: Troubleshooting & Care
The Steam Treat feature on the Kenmore Model 110 washer is designed to eliminate tough, set-in stains without pre-treating, utilizing the power of steam for a deep clean. However, issues can arise, requiring troubleshooting and proper care. If Steam Treat isn’t functioning, first ensure the water supply is adequate and the water inlet valve is operating correctly.
Check for error codes displayed on the LCD panel, referencing the repair manual for specific interpretations. A common issue is mineral buildup within the steam generator; regular cleaning with a descaling solution (as recommended in the manual) can prevent this.
Proper usage is key – avoid overloading the washer when using Steam Treat, as this can reduce its effectiveness. Always follow the garment care label instructions. Consistent maintenance, including cleaning the dispenser and steam generator, will prolong the feature’s lifespan and ensure optimal performance.
Kenmore Smart Washer Connectivity Issues
Kenmore Smart Washers, like the Model 110, offer remote control and monitoring via a smartphone app. Connectivity problems can disrupt this functionality. Initial troubleshooting involves verifying your home Wi-Fi network is active and stable, and the washer is within range. Ensure the Kenmore AC App is updated to the latest version, as updates often include bug fixes and improved compatibility.
Check the washer’s LCD panel for connectivity status indicators. If the washer isn’t connecting, try resetting both the washer and your home router. Refer to the repair manual for specific reset procedures.
Firewall settings on your router might be blocking communication; consult your router’s documentation for instructions on allowing access. If problems persist, contact Kenmore support for assistance, providing details about your network setup and any error messages displayed.
Resources & Manuals
Access official Kenmore Model 110 repair manuals in PDF and booklet formats, alongside schematics, wiring diagrams, and thriving online repair communities for support.
Locating the Official Kenmore Model 110 Repair Manual (PDF & Booklet)
Finding the correct repair manual for your Kenmore Model 110 washer is crucial for successful troubleshooting and repairs. Transform SR Brands LLC, the owner of the Kenmore trademark, offers both PDF and booklet versions of service and repair manuals. These resources provide detailed instructions, diagrams, and parts lists specific to your model – 110.22842100 is a frequently cited model number.
Online searches utilizing keywords like “Kenmore Model 110 repair manual PDF” or “Kenmore washer owner’s manual” will yield various results. Be sure to verify the source’s reliability before downloading any files. Many websites offer free downloads, while others may require a purchase. A 179-page manual is available, offering comprehensive guidance. Remember to always prioritize official Kenmore documentation when available to ensure accuracy and safety during your repair process. Accessing these manuals empowers you to confidently address issues with your appliance.
Finding Schematics and Wiring Diagrams
Accurate schematics and wiring diagrams are indispensable when tackling electrical repairs on your Kenmore Model 110 washer. These diagrams illustrate the intricate connections within the machine, enabling you to safely diagnose and resolve issues related to the control panel, motor, or other electrical components.
Locating these diagrams often involves searching online repair communities and forums dedicated to Kenmore appliances. Websites specializing in appliance parts frequently provide schematics as part of their product listings or as downloadable resources. The official Kenmore service manuals (available in PDF and booklet formats) are also excellent sources for detailed wiring information. When working with electrical systems, always disconnect the power supply before beginning any repairs. Prioritize safety and consult multiple sources to confirm the accuracy of the diagrams before proceeding with any electrical work.
Utilizing Online Repair Communities & Forums
Online repair communities and forums represent a valuable resource for Kenmore Model 110 washer owners facing repair challenges. These platforms connect you with a network of experienced DIYers and appliance repair professionals willing to share their knowledge and expertise. Posting detailed descriptions of your washer’s issue, including model number and any error codes, can elicit targeted advice and potential solutions.
Many forums host dedicated threads specifically for Kenmore appliances, making it easier to find relevant information. You can search existing discussions for similar problems or start a new thread to seek assistance. Remember to be respectful and provide clear, concise information when interacting with other members. Sharing photos or videos of the issue can also be incredibly helpful in obtaining accurate diagnoses and repair guidance.
Understanding Kenmore Service Manuals for All Models
Kenmore service manuals, available in both PDF and booklet formats, are indispensable tools for anyone undertaking appliance repair. These manuals provide detailed schematics, wiring diagrams, and step-by-step instructions for diagnosing and resolving a wide range of issues across all Kenmore models, including the Model 110 washer. They offer a deeper level of technical information than standard owner’s manuals.
Accessing these manuals often requires searching online repair resource websites. While specific manuals for the Model 110 are crucial, understanding the broader Kenmore service manual structure can aid in troubleshooting. These resources detail component locations, disassembly procedures, and safety precautions. Utilizing a service manual ensures repairs are conducted safely and effectively, maximizing the lifespan of your Kenmore appliance and avoiding potential hazards.